K64:100% Manip Route: Difference between revisions
DarkRiolu27 (talk | contribs) (→5-4) |
DarkRiolu27 (talk | contribs) m (→Pix) |
||
| (29 intermediate revisions by the same user not shown) | |||
| Line 1: | Line 1: | ||
This article is a guide on how to perform the RNG manipulation for the 100% speedrun of Kirby 64: The Crystal Shards. For a general explanation on how RNG works in this game, click [[K64:RNG|here] | This article is a guide on how to perform the RNG manipulation for the 100% speedrun of Kirby 64: The Crystal Shards. For a general explanation on how RNG works in this game, click [[K64:RNG|here.]] For a video explanation of the manip route, click [https://www.speedrun.com/k64/guide/y0t49 here.] It is recommended that players learn the normal speedrun route before attempting any RNG manipulation. | ||
=How to use this guide= | =How to use this guide= | ||
In order to use RNG manipulation in a run, the instructions in the [[#Before the run starts|next section]] must be followed first, and then the manip must be carried throughout each level, with instructions on how to do so presented below. Kirby 64 takes so long to reset that it would typically not be worth it to try and recover the manip once it is lost, so the run must either be carried forward without the manip or restarted from the beginning. Because of this, it is recommended that runners who wish to learn manip do so sequentially, starting at [[#1-1|1-1] | In order to use RNG manipulation in a run, the instructions in the [[#Before the run starts|next section]] must be followed first, and then the manip must be carried throughout each level, with instructions on how to do so presented below. Kirby 64 takes so long to reset that it would typically not be worth it to try and recover the manip once it is lost, so the run must either be carried forward without the manip or restarted from the beginning. Because of this, it is recommended that runners who wish to learn manip do so sequentially, starting at [[#1-1|1-1,]] as trying to reset in the middle of a run to achieve a specific RNG value will most likely be slower than dealing with bosses' random actions. Unfortunately, since most of the timeloss due to randomness typically comes from bosses in the later worlds, runners have to learn and perform the majority of the manip before the largest timesaves can be taken advantage of. | ||
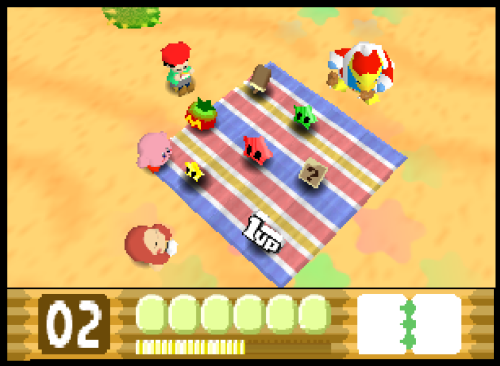
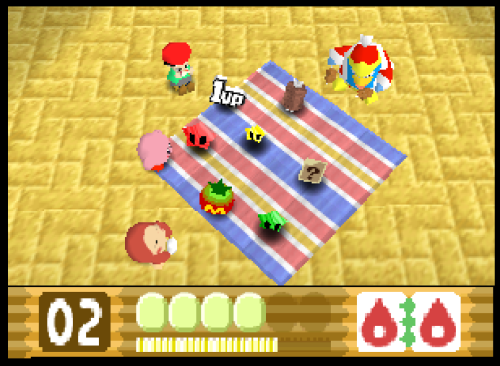
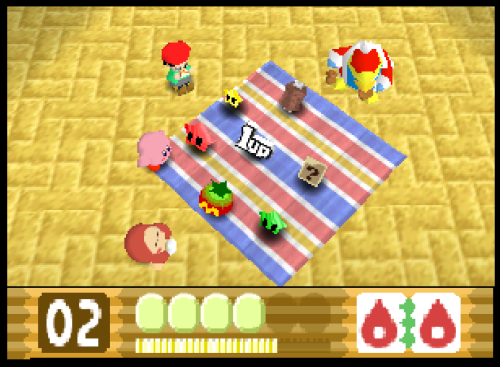
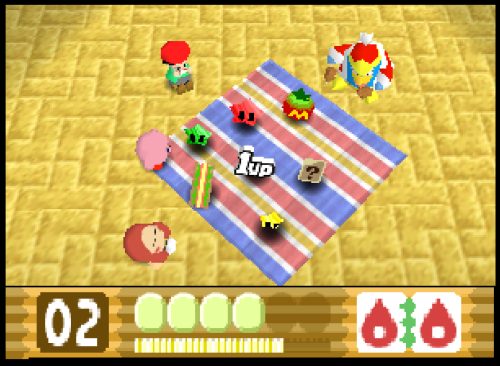
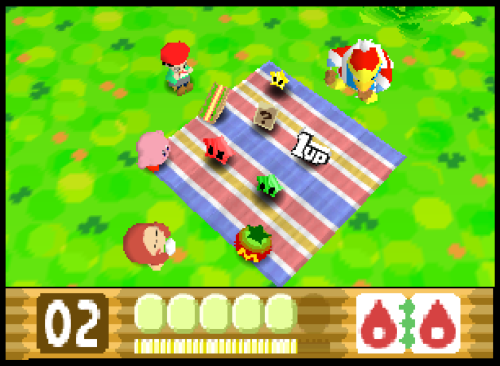
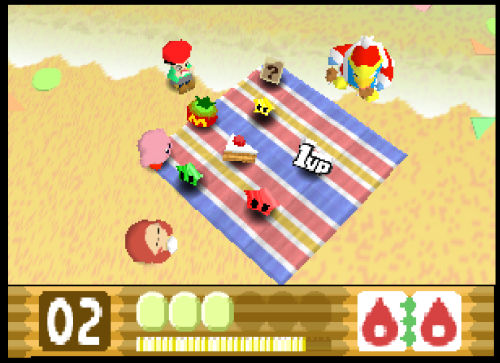
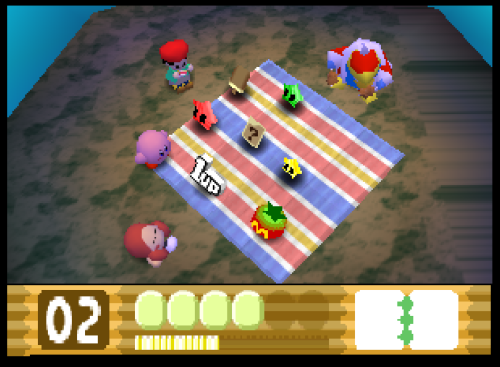
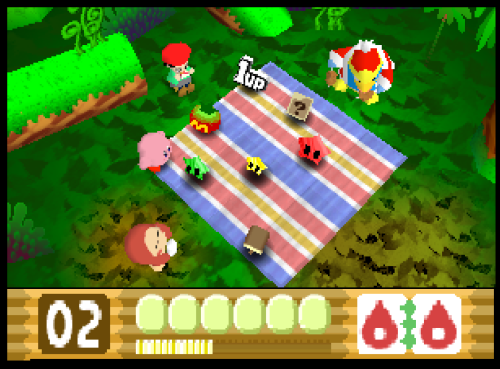
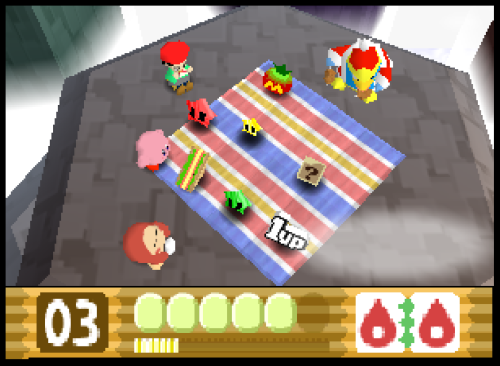
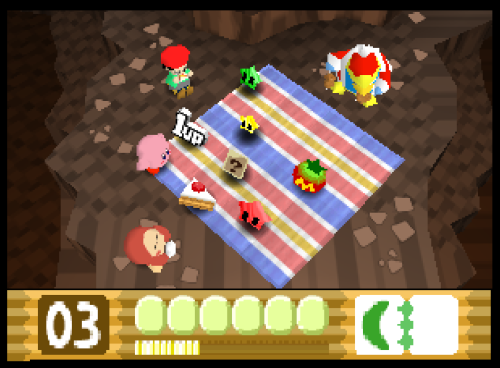
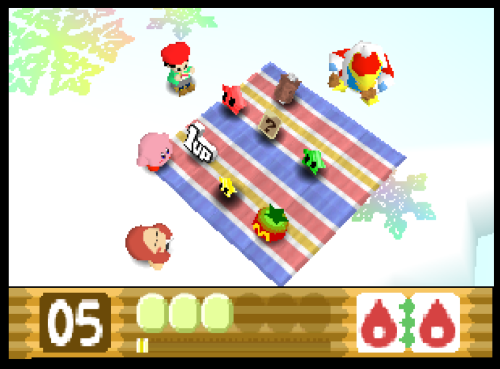
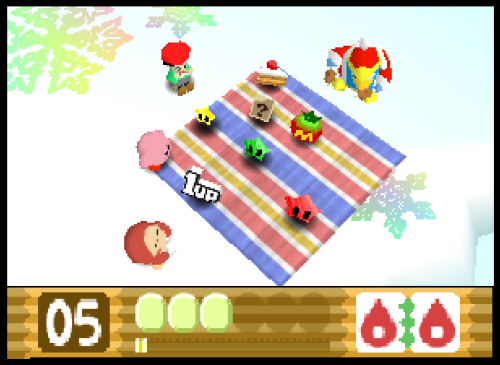
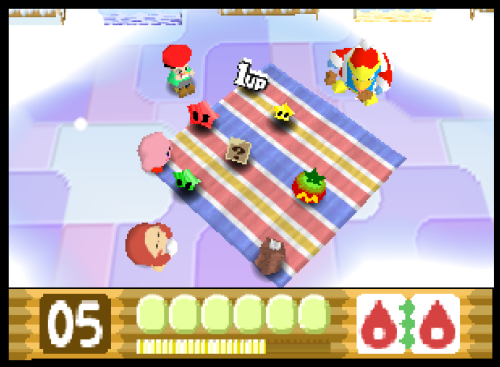
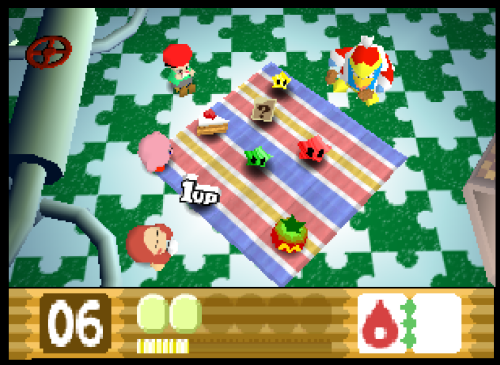
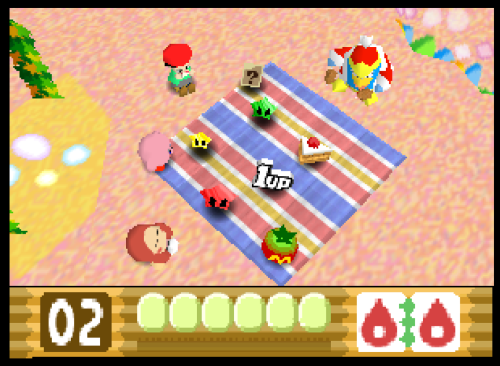
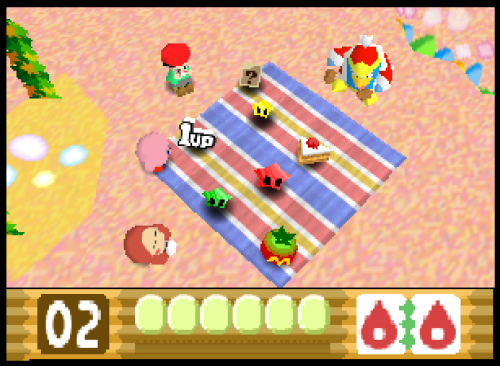
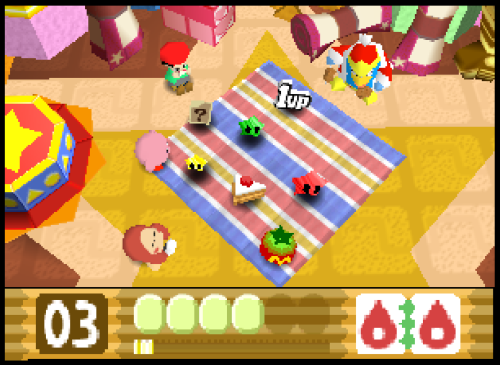
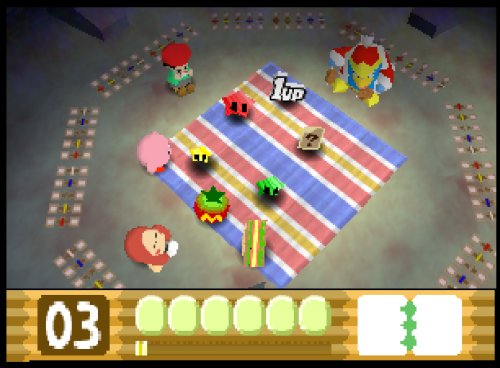
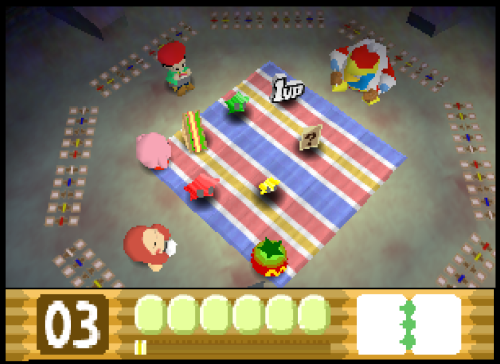
The instructions for each level will start with a relatively consistent method to obtain the correct RNG value and copy ability starting from a reset; that way, runners can practice each level on console with the same RNG as during a run. Any time Kirby should advance RNG will be noted, as well as any noteworthy interactions with random enemies. For any sections of a level that do not have explicit instructions, the runner should use normal speedrun strategies and not go out of their way to interact with or avoid enemies. Each section will end with a picture of the picnic or picnics that will indicate that the RNG value is correct, starting with the picnic that will appear if the manip was performed correctly (in some cases multiple RNG values will result in the same value after the picnic is spawned, even though the picnics themselves will be different). Any picnics that give an RNG value nearby the target value will also be shown. If there is more than one level-end RNG value that will result in the correct or a usable value after the picnic spawns, the distance between those RNG values and the target value will be noted. The enemy info card from the picnic should not be collected unless specifically instructed to do so. | The instructions for each level will start with a relatively consistent method to obtain the correct RNG value and copy ability starting from a reset; that way, runners can practice each level on console with the same RNG as during a run. Any time Kirby should advance RNG will be noted, as well as any noteworthy interactions with random enemies. For any sections of a level that do not have explicit instructions, the runner should use normal speedrun strategies and not go out of their way to interact with or avoid enemies. Each section will end with a picture of the picnic or picnics that will indicate that the RNG value is correct, starting with the picnic that will appear if the manip was performed correctly (in some cases multiple RNG values will result in the same value after the picnic is spawned, even though the picnics themselves will be different). Any picnics that give an RNG value nearby the target value will also be shown. If there is more than one level-end RNG value that will result in the correct or a usable value after the picnic spawns, the distance between those RNG values and the target value will be noted. The enemy info card from the picnic should not be collected unless specifically instructed to do so. | ||
| Line 12: | Line 12: | ||
# Kirby, Kirby, Waddle Dee: Either connect a second and third controller and choose three characters at once so that there is one COM, or enter and immediately exit [https://wikirby.com/wiki/Boss_Endurance Boss Battles] once, then start the run. | # Kirby, Kirby, Waddle Dee: Either connect a second and third controller and choose three characters at once so that there is one COM, or enter and immediately exit [https://wikirby.com/wiki/Boss_Endurance Boss Battles] once, then start the run. | ||
# Kirby, Waddle Dee, Kirby: Start the run. | # Kirby, Waddle Dee, Kirby: Start the run. | ||
If none of the above combinations appear, press B to exit out and choose another character. If no above combination appears after 3 iterations, the opening screens were not skipped quickly enough and the process must be restarted from the beginning. Once the run is set up, be sure not to play the wrong file or exit back to the title screen; otherwise, the game will have to be reset and the run will need to be set up again. | If none of the above combinations appear, press B to exit out and choose another character. If no above combination appears after 3 iterations, the opening screens were not skipped quickly enough and the process must be restarted from the beginning. Once the run is set up, be sure not to choose more characters, play a mini-game, play the wrong file, or exit back to the title screen; otherwise, the game will have to be reset and the run will need to be set up again. | ||
=World 1= | =World 1= | ||
| Line 43: | Line 43: | ||
==1-3== | ==1-3== | ||
<p class="h3-no-toc">Practice Setup</p> | <p class="h3-no-toc">Practice Setup</p> | ||
To practice the manip starting at this stage, reset the game and don't press anything until the opening cutscene plays. Skip the cutscene and mash A to skip the title screen, then play single-player 100-Yard Hop. Immediately pause and choose 'Play Again' 17 times, then 'Play Another Game.' Select 100-Yard Hop again and keep choosing a character, then pressing B to exit and choosing another character until the COMs are Kirby, King Dedede, Waddle Dee, in that order. If that combination doesn't appear within a few iterations, reset and start from the beginning. Once that combination appears, choose a file with 1-3 unlocked, go to 1-1, obtain single fire, and advance RNG twice, then exit the level. At this point the RNG value will be correct and 1-3 can be practiced. | To practice the manip starting at this stage, reset the game and don't press anything until the opening cutscene plays. Skip the cutscene and mash A to skip the title screen, then play single-player 100-Yard Hop. Immediately pause and choose 'Play Again' 17 times, then 'Play Another Game.' Select 100-Yard Hop again and keep choosing a character, then pressing B to exit and choosing another character until the COMs are Kirby, King Dedede, Waddle Dee, in that order. If that combination doesn't appear within a few iterations, reset and start from the beginning. Once that combination appears, choose a file with 1-3 unlocked, go to 1-1, obtain single fire, and advance RNG twice after entering the stage, then exit the level. At this point the RNG value will be correct and 1-3 can be practiced. | ||
| Line 55: | Line 55: | ||
==Whispy Woods== | ==Whispy Woods== | ||
<p class="h3-no-toc">Practice Setup</p> | <p class="h3-no-toc">Practice Setup</p> | ||
To practice the manip starting at this boss, reset the game and go to the title screen, then wait until the first demo starts playing. Immediately press A to skip it and mash A through the title screen to get to file select. Play single-player 100-Yard Hop, but if the COMs are Waddle Dee, Adeleine, and Waddle Dee, in that order, press B and choose a character again, then enter the game. Immediately pause and choose 'Play Again' 4 times, then 'Play Another Game.' Select 100-Yard Hop again and keep choosing a character, then pressing B to exit and choosing another character until the COMs are Kirby, King Dedede, Adeleine, in that order. If the combination doesn't appear within a couple iterations, reset and start from the beginning. Once that combination appears, choose a file with Whispy unlocked, go to 1-1, obtain double fire without advancing RNG, then exit the level. At this point the RNG value will be correct and Whispy can be practiced. | To practice the manip starting at this boss, reset the game and go to the title screen, then wait until the first demo starts playing. Immediately press A to skip it and mash A through the title screen to get to file select. Play single-player 100-Yard Hop, but if the COMs are Waddle Dee, Adeleine, and Waddle Dee, in that order, press B and choose a character again, then enter the game. Immediately pause and choose 'Play Again' 4 times, then 'Play Another Game.' Select 100-Yard Hop again and keep choosing a character, then pressing B to exit and choosing another character until the COMs are Kirby, King Dedede, Adeleine, in that order. If the combination doesn't appear within a couple iterations, reset and start from the beginning. Once that combination appears, choose a file with [https://kirby.fandom.com/wiki/Whispy_Woods Whispy] unlocked, go to 1-1, obtain double fire without advancing RNG after entering the stage, then exit the level. At this point the RNG value will be correct and [https://kirby.fandom.com/wiki/Whispy_Woods Whispy] can be practiced. | ||
| Line 64: | Line 64: | ||
==2-1== | ==2-1== | ||
<p class="h3-no-toc">Practice Setup</p> | <p class="h3-no-toc">Practice Setup</p> | ||
To practice the manip starting at this stage, reset the game and go to the title screen, then wait until the first demo starts playing. Immediately press A to skip it and mash A through the title screen to get to file select. Play single-player 100-Yard Hop, but if the COMs are Waddle Dee, Adeleine, and Waddle Dee, in that order, press B and choose a character again, then enter the game. Immediately pause and choose 'Play Again' 6 times, then 'Play Another Game.' Select 100-Yard Hop again and keep choosing a character, then pressing B to exit and choosing another character until the COMs are Waddle Dee, Kirby, Kirby, in that order. If the combination doesn't appear within a couple iterations, reset and start from the beginning. Once that combination appears, choose a file with 2-1 unlocked, go to 1-1 or 2-1, obtain double fire | To practice the manip starting at this stage, reset the game and go to the title screen, then wait until the first demo starts playing. Immediately press A to skip it and mash A through the title screen to get to file select. Play single-player 100-Yard Hop, but if the COMs are Waddle Dee, Adeleine, and Waddle Dee, in that order, press B and choose a character again, then enter the game. Immediately pause and choose 'Play Again' 6 times, then 'Play Another Game.' Select 100-Yard Hop again and keep choosing a character, then pressing B to exit and choosing another character until the COMs are Waddle Dee, Kirby, Kirby, in that order. If the combination doesn't appear within a couple iterations, reset and start from the beginning. Once that combination appears, choose a file with 2-1 unlocked, go to 1-1 or 2-1, obtain double fire and advance RNG twice after entering the stage, then exit the level. At this point the RNG value will be correct and 2-1 can be practiced. | ||
| Line 124: | Line 124: | ||
==Pix== | ==Pix== | ||
<p class="h3-no-toc">Practice Setup</p> | <p class="h3-no-toc">Practice Setup</p> | ||
To practice the manip starting at this boss, reset the game and don't press anything until the opening cutscene plays. Skip the cutscene and mash A to skip the title screen, then play single-player 100-Yard Hop. Immediately pause and choose 'Play Again' 12 times, then 'Play Another Game.' Select 100-Yard Hop again and keep choosing a character, then pressing B to exit and choosing another character until the COMs are all Adeleine. If the combination doesn't appear within a few iterations, reset and start from the beginning. Once that combination appears, choose a file with Pix unlocked, go to 2-1, and combine 2 enemies that give abilities to get a double star, which will act as a substitute for curling stone. Be sure not to throw the first enemy at the second, or RNG will advance too far. Swallow the ability star and exit the level. At this point the RNG value will be correct and Pix can be practiced. | To practice the manip starting at this boss, reset the game and don't press anything until the opening cutscene plays. Skip the cutscene and mash A to skip the title screen, then play single-player 100-Yard Hop. Immediately pause and choose 'Play Again' 12 times, then 'Play Another Game.' Select 100-Yard Hop again and keep choosing a character, then pressing B to exit and choosing another character until the COMs are all Adeleine. If the combination doesn't appear within a few iterations, reset and start from the beginning. Once that combination appears, choose a file with [https://wikirby.com/wiki/Pix Pix] unlocked, go to 2-1, and combine 2 enemies that give abilities to get a double star, which will act as a substitute for curling stone. Be sure not to throw the first enemy at the second, or RNG will advance too far. Swallow the ability star and exit the level. At this point the RNG value will be correct and [https://wikirby.com/wiki/Pix Pix] can be practiced. | ||
<p class="h3-no-toc">Route</p> | <p class="h3-no-toc">Route</p> | ||
Advance RNG twice right at the start of the fight, then put curling stone in Kirby's mouth. Jump over [https://wikirby.com/wiki/Pix Pix's] first attack but don't move for the rest of phase 1 until the very end. Move 4 platforms to the right and [https://wikirby.com/wiki/Pix Pix] should give the | Advance RNG twice right at the start of the fight, then put curling stone in Kirby's mouth. Jump over [https://wikirby.com/wiki/Pix Pix's] first attack but don't move for the rest of phase 1 until the very end. Move 4 platforms to the right and [https://wikirby.com/wiki/Pix Pix] should give the droplet pattern. Spit curling stone to the right and one-cycle the boss. Don't advance RNG after [https://wikirby.com/wiki/Pix Pix] is defeated. | ||
=World 3= | =World 3= | ||
| Line 149: | Line 149: | ||
<p class="h3-no-toc">Route</p> | <p class="h3-no-toc">Route</p> | ||
Destroy every dandelion in the first room and run, don't slide, off the semisolid platform above the [https://wikirby.com/wiki/Sparky Sparky.] Inhale the [https://wikirby.com/wiki/cairn Cairn] and carry it into the next room, then spit it at the [https://wikirby.com/wiki/Bobo Bobo] to get the volcano ability. Fire exactly 8 shots to destroy the block under the crystal shard and damage the large [https://wikirby.com/wiki/kany Kany] twice, then grab the crystal shard and throw the ability star at the miniboss to finish it off. In the Waddle Dee section, follow the pattern of jumping shown | Destroy every dandelion in the first room and run, don't slide, off the semisolid platform above the [https://wikirby.com/wiki/Sparky Sparky.] Inhale the [https://wikirby.com/wiki/cairn Cairn] and carry it into the next room, then spit it at the [https://wikirby.com/wiki/Bobo Bobo] to get the volcano ability. Fire exactly 8 shots to destroy the block under the crystal shard and damage the large [https://wikirby.com/wiki/kany Kany] twice, then grab the crystal shard and throw the ability star at the miniboss to finish it off. In the Waddle Dee section, follow the pattern of jumping shown below, making sure that consecutive jumps happen as soon as the crate touches the river so that RNG doesn't have a chance to advance. Get single fire in the last room and don't advance RNG any more. | ||
<youtube>uGT3F6zpyhc</youtube> | |||
<p class="h3-no-toc">Picnics that give the correct RNG value</p> | <p class="h3-no-toc">Picnics that give the correct RNG value</p> | ||
| Line 190: | Line 191: | ||
==Acro== | ==Acro== | ||
<p class="h3-no-toc">Practice Setup</p> | <p class="h3-no-toc">Practice Setup</p> | ||
To practice the manip starting at this boss, reset the game and mash A to skip the opening screens and go straight to file select. Play single-player 100-Yard Hop and immediately pause and choose 'Play Again' once, then 'Play Another Game.' Select 100-Yard Hop again and keep choosing a character, then pressing B to exit and choosing another character until the COMs are King Dedede, Adeleine, Waddle Dee, in that order. If the combination doesn't appear within a couple iterations, reset and start from the beginning. Once that combination appears, choose a file with Acro unlocked, get bomb from 2-4 and exit the level. At this point the RNG value will be correct and Acro can be practiced. | To practice the manip starting at this boss, reset the game and mash A to skip the opening screens and go straight to file select. Play single-player 100-Yard Hop and immediately pause and choose 'Play Again' once, then 'Play Another Game.' Select 100-Yard Hop again and keep choosing a character, then pressing B to exit and choosing another character until the COMs are King Dedede, Adeleine, Waddle Dee, in that order. If the combination doesn't appear within a couple iterations, reset and start from the beginning. Once that combination appears, choose a file with [https://wikirby.com/wiki/acro Acro] unlocked, get bomb from 2-4 and exit the level. At this point the RNG value will be correct and [https://wikirby.com/wiki/acro Acro] can be practiced. | ||
<p class="h3-no-toc">Route</p> | <p class="h3-no-toc">Route</p> | ||
Finish [https://wikirby.com/wiki/acro Acro's] first phase as quickly as possible, then the second phase should be the dive attack. Hit with 5 bombs before/during the dive, then get the sixth hit in as soon as possible after the dive, before Acro becomes visible. Discard bomb without advancing RNG. | Finish [https://wikirby.com/wiki/acro Acro's] first phase as quickly as possible, then the second phase should be the dive attack. Hit with 5 bombs before/during the dive, then get the sixth hit in as soon as possible after the dive, before [https://wikirby.com/wiki/acro Acro] becomes visible. Discard bomb without advancing RNG. | ||
=World 4= | =World 4= | ||
| Line 203: | Line 204: | ||
<p class="h3-no-toc">Route</p> | <p class="h3-no-toc">Route</p> | ||
Obtain single fire and advance RNG once by standing still on the first swinging log. Destroy all of the [https://wikirby.com/wiki/Flora Floras] in the last room except the last 2, and throw away fire when grabbing stone. | |||
| Line 262: | Line 263: | ||
==Magman== | ==Magman== | ||
<p class="h3-no-toc">Practice Setup</p> | <p class="h3-no-toc">Practice Setup</p> | ||
To practice the manip starting at this boss, reset the game and don't press anything until the opening cutscene plays. Skip the cutscene and mash A to skip the title screen, then play single-player 100-Yard Hop. Immediately pause and choose 'Play Again' 15 times, then 'Play Another Game.' Select 100-Yard Hop again and keep choosing a character, then pressing B to exit and choosing another character until the COMs are Kirby, Waddle Dee, King Dedede, in that order. If the combination doesn't appear within a few iterations, reset and start from the beginning. Once that combination appears, choose a file with Magman unlocked, get cutter from 1-1, and exit the level. At this point the RNG value will be correct and Magman can be practiced. | To practice the manip starting at this boss, reset the game and don't press anything until the opening cutscene plays. Skip the cutscene and mash A to skip the title screen, then play single-player 100-Yard Hop. Immediately pause and choose 'Play Again' 15 times, then 'Play Another Game.' Select 100-Yard Hop again and keep choosing a character, then pressing B to exit and choosing another character until the COMs are Kirby, Waddle Dee, King Dedede, in that order. If the combination doesn't appear within a few iterations, reset and start from the beginning. Once that combination appears, choose a file with [https://wikirby.com/wiki/magman Magman] unlocked, get cutter from 1-1, and exit the level. At this point the RNG value will be correct and [https://wikirby.com/wiki/magman Magman] can be practiced. | ||
| Line 304: | Line 305: | ||
==5-3== | ==5-3== | ||
<p class="h3-no-toc">Practice Setup</p> | <p class="h3-no-toc">Practice Setup</p> | ||
To practice the manip starting at this stage, reset the game and mash A to skip the opening screens and go straight to file select. Play single-player 100-Yard Hop and immediately pause and choose 'Play Again' 15 times, then 'Play Another Game.' Select 100-Yard Hop again and keep choosing a character, then pressing B to exit and choosing another character until the COMs are all Adeleine. If the combination doesn't appear within a few iterations, reset and start from the beginning. Choose a file with 5-3 unlocked, go to 4-3, and combine 2 enemies to get a double star, also advancing RNG once in the process. Swallow the ability star and exit the level. At this point the RNG value will be correct and 5-3 can be practiced. | To practice the manip starting at this stage, reset the game and mash A to skip the opening screens and go straight to file select. Play single-player 100-Yard Hop and immediately pause and choose 'Play Again' 15 times, then 'Play Another Game.' Select 100-Yard Hop again and keep choosing a character, then pressing B to exit and choosing another character until the COMs are all Adeleine. If the combination doesn't appear within a few iterations, reset and start from the beginning. Choose a file with 5-3 unlocked, go to 4-3, and combine the first 2 enemies to get a double star, also advancing RNG once in the process. Swallow the ability star and exit the level. At this point the RNG value will be correct and 5-3 can be practiced. | ||
| Line 329: | Line 330: | ||
<p class="h3-no-toc">Route</p> | <p class="h3-no-toc">Route</p> | ||
Take out the ability star in the first room and put it into Kirby's mouth in the second room, then swallow it as Kirby runs off the ledge and go through the semisolid platforms as quickly as possible, shooting drill downwards after clearing the last one. Quickly run left and throw drill away, inhaling the [https://wikirby.com/wiki/burnis Burnis] before it drops a second projectile and swallowing it. After the Dedede room, pay attention to which way the first [https://wikirby.com/wiki/flora Flora] is moving when it spawns. If it moved to the right first, RNG will need to be advanced 13 total times before the final room. If it moved to the left first, RNG will need to be advanced 12 total times before the final room. It is recommended to throw fire away and throw cutter when combining with spark to account for 2 advancements, leaving 11 or 10 left, respectively. Additionally, 4 health is required to beat the miniboss optimally, so carefully grab some cake and/or a sandwich if low. In the miniboss room, listen to how many rocks the large [https://wikirby.com/wiki/burnis Burnis] drops, since it won't be visible immediately. Break the cage and jump into the large [https://wikirby.com/wiki/burnis Burnis] 4 times, using the lightsaber each time to damage it. Take out the ability star and throw it at the miniboss for the final 2 damage, then swallow the [https://wikirby.com/wiki/Magoo Magoo] to get single fire. Be sure to have at least 2 HP after the fight, or Kirby won't be able to advance RNG. Each attack from the large [https://wikirby.com/wiki/burnis Burnis] will advance RNG by 1, as will throwing the ability star and the [https://wikirby.com/wiki/Magoo Magoo] jumping. Add all of those advancements to the 2 from the previous room, then in the next room advance RNG however many times is necessary to get to the required 13 or 12 advancements total. In the final room, the [https://wikirby.com/wiki/zoos Zooses] should throw 4 lightningbolts total, and fire should be thrown away for a total of 5 RNG advancements. Get spark from the second [https://wikirby.com/wiki/zoos Zoos.] If either [https://wikirby.com/wiki/zoos Zoos] drops a raindrop instead, RNG will have to be advanced to make up for that. Make sure to have at least 2 HP after the picnic. | Take out the ability star in the first room and put it into Kirby's mouth in the second room, then swallow it as Kirby runs off the ledge and go through the semisolid platforms as quickly as possible, shooting drill downwards after clearing the last one. Quickly run left and throw drill away, inhaling the [https://wikirby.com/wiki/burnis Burnis] before it drops a second projectile and swallowing it. After the Dedede room, pay attention to which way the first [https://wikirby.com/wiki/flora Flora] is moving when it spawns. If it moved to the right first, RNG will need to be advanced 13 total times before the final room. If it moved to the left first, RNG will need to be advanced 12 total times before the final room. It is recommended to throw fire away and throw cutter when combining with spark to account for 2 advancements, leaving 11 or 10 left, respectively. Additionally, 4 health is required to beat the miniboss optimally, so carefully grab some cake and/or a sandwich if low. In the miniboss room, listen to how many rocks the large [https://wikirby.com/wiki/burnis Burnis] drops, since it won't be visible immediately. Break the cage and jump into the large [https://wikirby.com/wiki/burnis Burnis] 4 times, using the lightsaber each time to damage it. Take out the ability star and throw it at the miniboss for the final 2 damage, then swallow the [https://wikirby.com/wiki/Magoo Magoo] to get single fire. Be sure to have at least 2 HP after the fight, or Kirby won't be able to advance RNG. Each attack from the large [https://wikirby.com/wiki/burnis Burnis] will advance RNG by 1, as will throwing the ability star and the [https://wikirby.com/wiki/Magoo Magoo] jumping. Add all of those advancements to the 2 from the previous room, then in the next room advance RNG however many times is necessary to get to the required 13 or 12 advancements total. In the final room, the [https://wikirby.com/wiki/zoos Zooses] should throw 4 lightningbolts total, and fire should be thrown away for a total of 5 RNG advancements. Get spark from the second [https://wikirby.com/wiki/zoos Zoos.] If either [https://wikirby.com/wiki/zoos Zoos] drops a raindrop instead, RNG will have to be advanced once per raindrop to make up for that. Make sure to have at least 2 HP after the picnic. | ||
| Line 337: | Line 338: | ||
==HR-H== | ==HR-H== | ||
<p class="h3-no-toc">Practice Setup</p> | <p class="h3-no-toc">Practice Setup</p> | ||
To practice the manip starting at this boss, reset the game and go to the title screen, then wait until the first demo starts playing. Immediately press A to skip it and mash A through the title screen to get to file select. Play single-player 100-Yard Hop, but if the COMs are Waddle Dee, Adeleine, and Waddle Dee, in that order, press B and choose a character again, then enter the game. Immediately pause and choose 'Play Again' 10 times, then 'Play Another Game.' Select 100-Yard Hop again and keep choosing a character | To practice the manip starting at this boss, reset the game and go to the title screen, then wait until the first demo starts playing. Immediately press A to skip it and mash A through the title screen to get to file select. Play single-player 100-Yard Hop, but if the COMs are Waddle Dee, Adeleine, and Waddle Dee, in that order, press B and choose a character again, then enter the game. Immediately pause and choose 'Play Again' 10 times, then 'Play Another Game.' Select 100-Yard Hop again and keep choosing a character, then pressing B to exit and choosing another character until the COMs are Adeleine, Kirby, Kirby, in that order. If the combination doesn't appear within a few iterations, reset and start from the beginning. Once that combination appears, choose a file with 6-1 unlocked. Enter 6-1 and obtain spark, advance RNG twice after entering the stage, then exit the level. At this point the RNG value will be correct and [https://wikirby.com/wiki/HR-H HR] can be practiced. | ||
<p class="h3-no-toc">Route</p> | <p class="h3-no-toc">Route</p> | ||
Advance RNG twice before the first attack. After HR slaps, advance RNG one more time. Don't advance RNG during the rest of the fight. Make sure to do the second phase quickly enough that only 7 platforms fall, or RNG will advance too far. After the fight is done, throw away spark and stand still to advance RNG twice total, then grab the crystal shard. | Advance RNG twice before the first attack. After [https://wikirby.com/wiki/HR-H HR] slaps, advance RNG one more time. Don't advance RNG during the rest of the fight. [https://wikirby.com/wiki/HR-H HR] should clap and then slap for a 3-cycle first phase. Make sure to do the second phase quickly enough that only 7 platforms fall, or RNG will advance too far. After the fight is done, throw away spark and stand still to advance RNG twice total, then grab the crystal shard. | ||
=World 6= | =World 6= | ||
==6-1== | ==6-1== | ||
<p class="h3-no-toc">Practice Setup</p> | <p class="h3-no-toc">Practice Setup</p> | ||
To practice the manip starting at this stage, reset the game and go to the title screen, then wait until the first demo starts playing. Immediately press A to skip it and mash A through the title screen to get to file select. Play single-player 100-Yard Hop, but if the COMs are Waddle Dee, Adeleine, and Waddle Dee, in that order, press B and choose a character again, then enter the game. Immediately pause and choose 'Play Again' 12 times, then 'Play Another Game.' Select 100-Yard Hop again and keep choosing a character | To practice the manip starting at this stage, reset the game and go to the title screen, then wait until the first demo starts playing. Immediately press A to skip it and mash A through the title screen to get to file select. Play single-player 100-Yard Hop, but if the COMs are Waddle Dee, Adeleine, and Waddle Dee, in that order, press B and choose a character again, then enter the game. Immediately pause and choose 'Play Again' 12 times, then 'Play Another Game.' Select 100-Yard Hop again and keep choosing a character, then pressing B to exit and choosing another character until the COMs are King Dedede, King Dedede, Waddle Dee, in that order. If the combination doesn't appear within a few iterations, reset and start from the beginning. Once that combination appears, choose a file with 6-1 unlocked. Enter 6-1 and exit immediately. At this point the RNG value will be correct and 6-1 can be practiced. | ||
| Line 361: | Line 362: | ||
==6-2== | ==6-2== | ||
<p class="h3-no-toc">Practice Setup</p> | <p class="h3-no-toc">Practice Setup</p> | ||
To practice the manip starting at this stage, reset the game and don't press anything until the opening cutscene plays. Skip the cutscene and mash A to skip the title screen, then play single-player 100-Yard Hop. Immediately pause and choose 'Play Again' 6 times, then 'Play Another Game.' Select 100-Yard Hop again and keep choosing a character | To practice the manip starting at this stage, reset the game and don't press anything until the opening cutscene plays. Skip the cutscene and mash A to skip the title screen, then play single-player 100-Yard Hop. Immediately pause and choose 'Play Again' 6 times, then 'Play Another Game.' Select 100-Yard Hop again and keep choosing a character, then pressing B to exit and choosing another character until the COMs are King Dedede, Adeleine, Adeleine, in that order. If the combination doesn't appear within a few iterations, reset and start from the beginning. Once that combination appears, choose a file with 6-2 unlocked, go to 6-1 to get spark, and exit the level. At this point the RNG value will be correct and 6-2 can be practiced. | ||
| Line 373: | Line 374: | ||
==6-3== | ==6-3== | ||
<p class="h3-no-toc">Practice Setup</p> | <p class="h3-no-toc">Practice Setup</p> | ||
To practice the manip starting at this stage, reset the game and don't press anything until the opening cutscene plays. Skip the cutscene and mash A to skip the title screen, then play single-player 100-Yard Hop. Immediately pause and choose 'Play Again' 17 times, then 'Play Another Game.' Select 100-Yard Hop again and keep choosing a character | To practice the manip starting at this stage, reset the game and don't press anything until the opening cutscene plays. Skip the cutscene and mash A to skip the title screen, then play single-player 100-Yard Hop. Immediately pause and choose 'Play Again' 17 times, then 'Play Another Game.' Select 100-Yard Hop again and keep choosing a character, then pressing B to exit and choosing another character until the COMs are Waddle Dee, Adeleine, Waddle Dee, in that order. If the combination doesn't appear within a few iterations, reset and start from the beginning. Once that combination appears, choose a file with 6-3 unlocked and go to 1-1 to get cutter. Enter 6-1 to get combine cutter with spark, advancing RNG once in the process. Swallow the ability star and exit the level. At this point the RNG value will be correct and 6-3 can be practiced. | ||
<p class="h3-no-toc">Route</p> | <p class="h3-no-toc">Route</p> | ||
Defeat the one [https://wikirby.com/wiki/Sparky Sparky] in the level before it can move and don't advance RNG while combining for any abilities. Do throw away the ability star to advance RNG after grabbing the second crystal shard. Make sure to immediately eliminate enemies that can advance RNG, but leave the three [https://wikirby.com/wiki/Propeller Propellers] alive for a split second so that they can start moving and advance RNG before being destroyed. | Defeat the one [https://wikirby.com/wiki/Sparky Sparky] in the level before it can move and don't advance RNG while combining for any abilities. Do throw away the ability star to advance RNG before combining fire and needle and also after grabbing the second crystal shard. Make sure to immediately eliminate enemies that can advance RNG, but leave the three [https://wikirby.com/wiki/Propeller Propellers] alive for a split second so that they can start moving and advance RNG before being destroyed. | ||
| Line 392: | Line 393: | ||
<p class="h3-no-toc">Route</p> | <p class="h3-no-toc">Route</p> | ||
Make sure to one-cycle every phase or the manip will be lost. Finish the cutter and spark phases as quickly as possible, then advance RNG twice after stone starts by throwing away lightsaber and standing still. Wait for the bomb phase to start, then quickly advance RNG 7 times by quickly inhaling and standing still briefly between inhales. Finish the bomb phase and move to the right side of the screen, then advance RNG 6 times during the needle phase while waiting to be able to attack. Don't advance RNG during or after the rest of the fight, even when discarding abilities. | Make sure to one-cycle every phase or the manip will be lost. Finish the cutter and spark phases as quickly as possible, then advance RNG twice after stone starts by throwing away lightsaber and standing still. Wait for the bomb phase to start, then quickly advance RNG 7 times by quickly inhaling and standing still briefly between inhales, making sure to finish before the bubbles split. Finish the bomb phase and move to the right side of the screen, then advance RNG 6 times during the needle phase while waiting to be able to attack. Don't advance RNG during or after the rest of the fight, even when discarding abilities. | ||
=Dark Star and 0<sup>2</sup>= | =Dark Star and 0<sup>2</sup>= | ||
<p class="h3-no-toc">Practice Setup</p> | <p class="h3-no-toc">Practice Setup</p> | ||
To practice the manip starting at this boss, reset the game and go to the title screen, then wait until the first demo starts playing. Immediately press A to skip it and mash A through the title screen to get to file select. Play single-player 100-Yard Hop, but if the COMs are Waddle Dee, Adeleine, and Waddle Dee, in that order, press B and choose a character again, then enter the game. Immediately pause and choose 'Play Again' 14 times, then 'Play Another Game.' Select 100-Yard Hop again and keep choosing a character | To practice the manip starting at this boss, reset the game and go to the title screen, then wait until the first demo starts playing. Immediately press A to skip it and mash A through the title screen to get to file select. Play single-player 100-Yard Hop, but if the COMs are Waddle Dee, Adeleine, and Waddle Dee, in that order, press B and choose a character again, then enter the game. Immediately pause and choose 'Play Again' 14 times, then 'Play Another Game.' Select 100-Yard Hop again and keep choosing a character, then pressing B to exit and choosing another character until the COMs are Kirby, Kirby, King Dedede, in that order. If the combination doesn't appear within several iterations, reset and start from the beginning. Once that combination appears, choose a file with Dark Star unlocked, then enter and immediately exit the level, being careful to not advance RNG when inside the level. At this point the RNG value will be correct and [https://wikirby.com/wiki/0%C2%B2 0<sup>2</sup>] can be practiced. | ||
<p class="h3-no-toc">Route</p> | <p class="h3-no-toc">Route</p> | ||
When fighting 0<sup>2</sup>, make sure not to miss shots or 0<sup>2</sup> will get an extra attack off, advancing RNG too far. Once 0<sup>2</sup>'s weak spot is exposed, shoot 9 sets of 4 crystals into it, then prepare for the one-cycle. | When fighting [https://wikirby.com/wiki/0%C2%B2 0<sup>2</sup>,] make sure not to miss shots or [https://wikirby.com/wiki/0%C2%B2 0<sup>2</sup>] will get an extra attack off, advancing RNG too far. Once [https://wikirby.com/wiki/0%C2%B2 0<sup>2</sup>'s] weak spot is exposed, shoot 9 sets of 4 crystals into it, then prepare for the one-cycle. | ||
Latest revision as of 00:42, 22 March 2025
This article is a guide on how to perform the RNG manipulation for the 100% speedrun of Kirby 64: The Crystal Shards. For a general explanation on how RNG works in this game, click here. For a video explanation of the manip route, click here. It is recommended that players learn the normal speedrun route before attempting any RNG manipulation.
How to use this guide
In order to use RNG manipulation in a run, the instructions in the next section must be followed first, and then the manip must be carried throughout each level, with instructions on how to do so presented below. Kirby 64 takes so long to reset that it would typically not be worth it to try and recover the manip once it is lost, so the run must either be carried forward without the manip or restarted from the beginning. Because of this, it is recommended that runners who wish to learn manip do so sequentially, starting at 1-1, as trying to reset in the middle of a run to achieve a specific RNG value will most likely be slower than dealing with bosses' random actions. Unfortunately, since most of the timeloss due to randomness typically comes from bosses in the later worlds, runners have to learn and perform the majority of the manip before the largest timesaves can be taken advantage of.
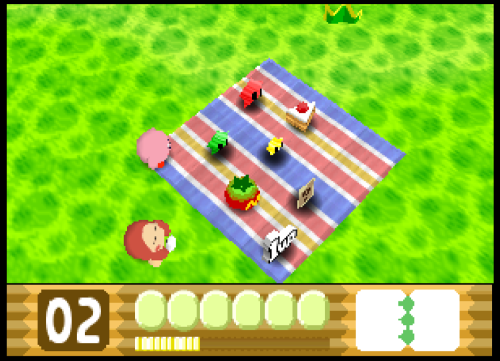
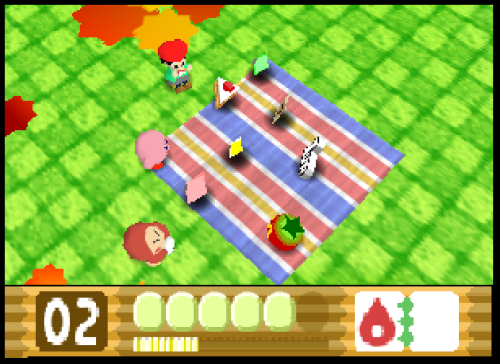
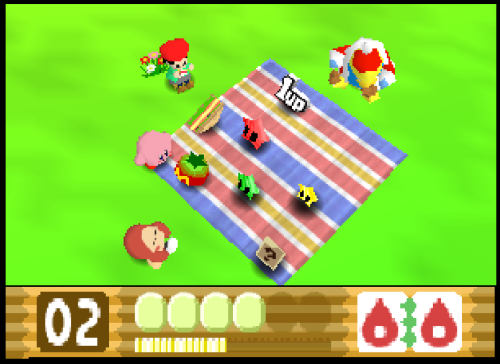
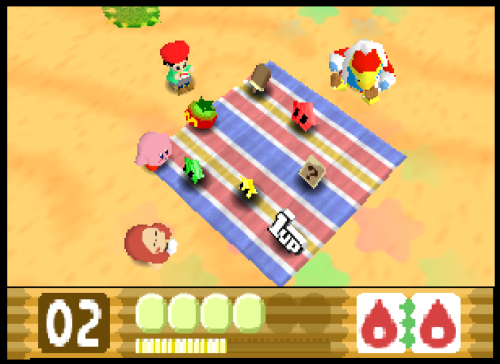
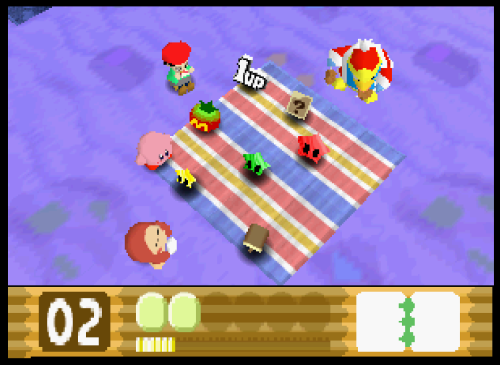
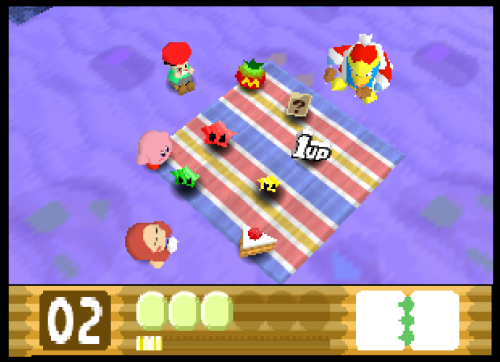
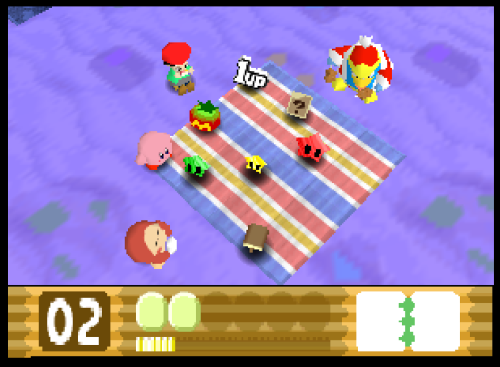
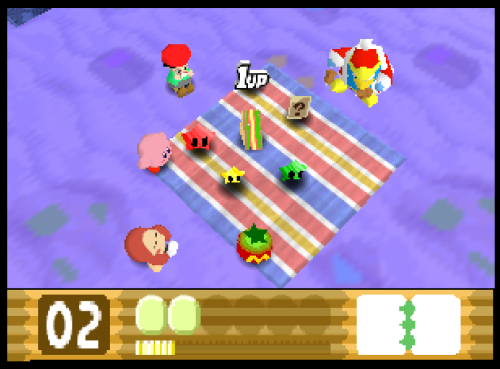
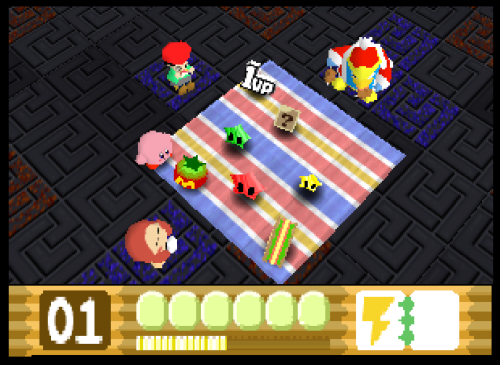
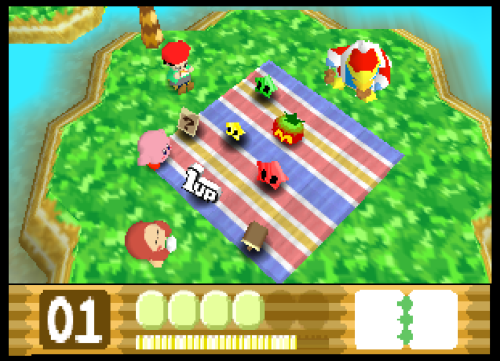
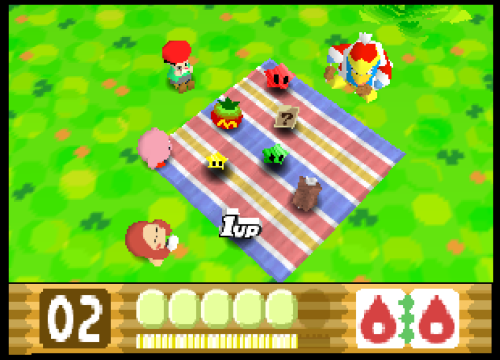
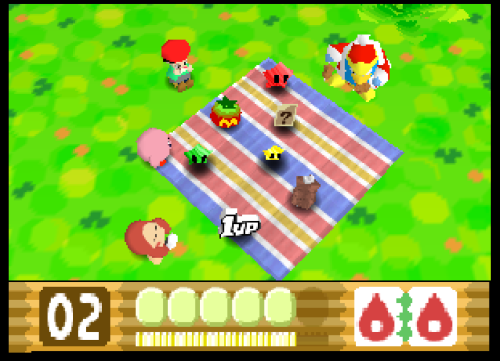
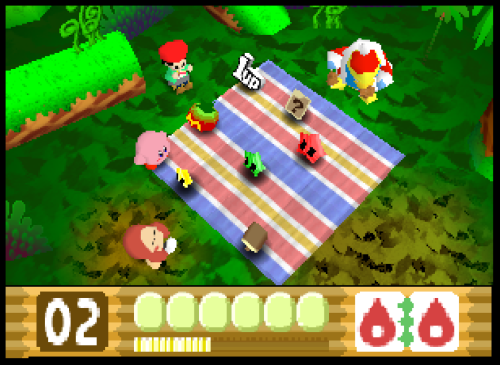
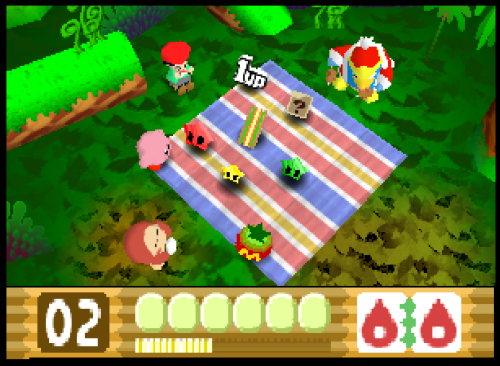
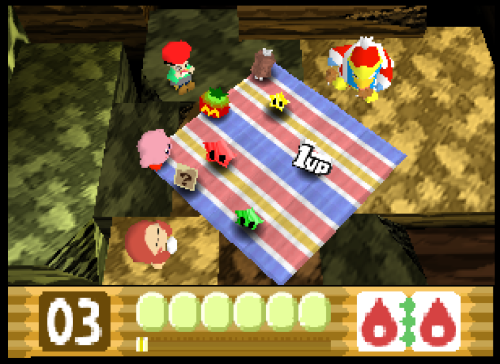
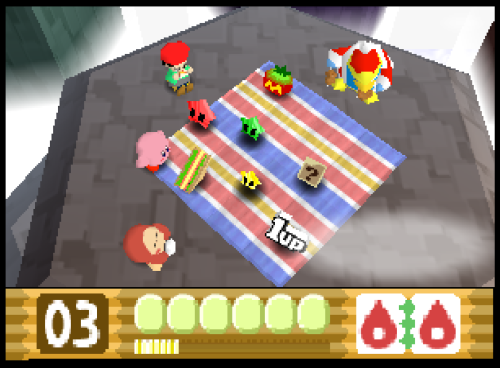
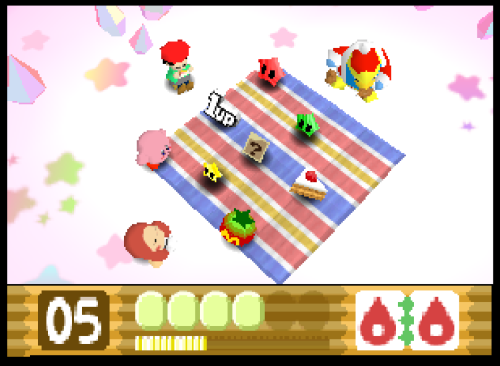
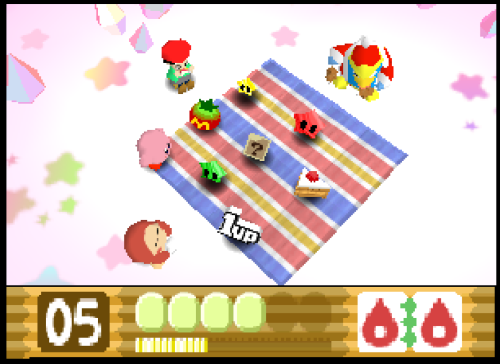
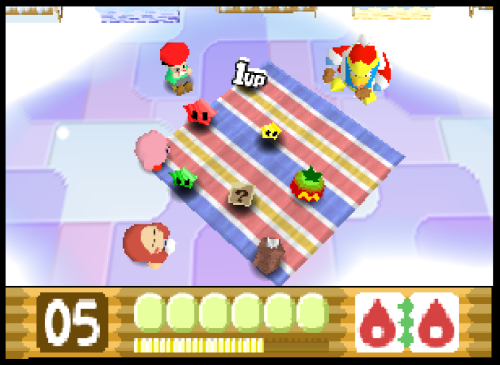
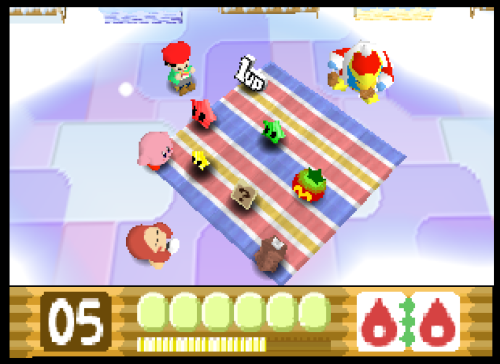
The instructions for each level will start with a relatively consistent method to obtain the correct RNG value and copy ability starting from a reset; that way, runners can practice each level on console with the same RNG as during a run. Any time Kirby should advance RNG will be noted, as well as any noteworthy interactions with random enemies. For any sections of a level that do not have explicit instructions, the runner should use normal speedrun strategies and not go out of their way to interact with or avoid enemies. Each section will end with a picture of the picnic or picnics that will indicate that the RNG value is correct, starting with the picnic that will appear if the manip was performed correctly (in some cases multiple RNG values will result in the same value after the picnic is spawned, even though the picnics themselves will be different). Any picnics that give an RNG value nearby the target value will also be shown. If there is more than one level-end RNG value that will result in the correct or a usable value after the picnic spawns, the distance between those RNG values and the target value will be noted. The enemy info card from the picnic should not be collected unless specifically instructed to do so.
Before the run starts
Reset the game and mash A through the opening screens to get to the file select screen as quickly as possible. It is recommended to keep a completed file in order to set up the manip before each run. Select any file and choose the mini-games option. Choose any mini-game on any difficulty and pick a character, paying attention to the characters the COM chooses. If the COMs are any of the three following combinations (listed from left to right - order matters), follow the given instructions:
- King Dedede, Kirby, Kirby: Either connect a second controller and choose two characters at once so that there are two COMs, then start the run, or enter and immediately exit Boss Battles twice, then start the run.
- Kirby, Kirby, Waddle Dee: Either connect a second and third controller and choose three characters at once so that there is one COM, or enter and immediately exit Boss Battles once, then start the run.
- Kirby, Waddle Dee, Kirby: Start the run.
If none of the above combinations appear, press B to exit out and choose another character. If no above combination appears after 3 iterations, the opening screens were not skipped quickly enough and the process must be restarted from the beginning. Once the run is set up, be sure not to choose more characters, play a mini-game, play the wrong file, or exit back to the title screen; otherwise, the game will have to be reset and the run will need to be set up again.
World 1
1-1
Practice Setup
To practice the manip starting at this stage, follow the instructions in the previous section
Route
Obtain single fire from the Bobo at the start of the level. After the N-Z miniboss, jump high enough to not disturb the first Flutter while using single fire. Throw the ability star to advance RNG once when combining for fireworks, but avoid standing still and advancing RNG a second time. Run along the ground after collecting the final crystal shard in order to disturb the last Flutter as soon as possible, then jump over the Poppy Bros. Jr. and do not slide into the loading zone. Avoid advancing RNG during or after the Waddle Doo fight, putting the ability star into Kirby's mouth and spitting it out rather than throwing it to finish the fight.
Picnic that gives the correct RNG value
1-2
Practice Setup
To practice the manip starting at this stage, reset the game and don't press anything until the opening cutscene plays. Skip the cutscene and mash A to skip the title screen, then go to 'Options,' 'Mini-Games,' and play single-player 100-Yard Hop. Immediately pause and choose 'Play Again' 7 times, then quit as long as the puddle is on the third space. If not, reset and try again. Choose a file with 1-2 unlocked, then enter and immediately exit the stage once. After this the RNG value will be correct and 1-2 can be practiced.
Route
Run through the first two dandelions to destroy them and grab single fire as quickly as possible. If too slow, the next dandelion will advance RNG one extra time. Only drop near the ground when close to the Sparky at the end of the room and destroy it while it's in the air. the Sparky should be jumping straight up when destroyed; if it's jumping towards Kirby, RNG will be one value too far and the player must advance RNG one fewer time during the Adeleine fight. Climb the tree quickly, not advancing RNG and also killing the last Sparky.
Advance RNG 12 times during the first phase of Adeleine (11 if RNG was one too far). It's recommended to duck 8 times before destroying the first enemy, then stand still once after each enemy. Immediately stand to the right of where Ice Dragon will spawn. Kirby should start an idle animation before the painting becomes vulnerable. Stand still after hitting Ice Dragon once to advance RNG, then hold left during the second hit so that Kirby doesn't stand still. Finish it off in midair. Advance RNG 4 times before Dark Matter spawns, then advance RNG one more time after defeating it. Stand still to advance RNG one final time before grabbing the crystal shard.
Picnic that gives the correct RNG value
1-3
Practice Setup
To practice the manip starting at this stage, reset the game and don't press anything until the opening cutscene plays. Skip the cutscene and mash A to skip the title screen, then play single-player 100-Yard Hop. Immediately pause and choose 'Play Again' 17 times, then 'Play Another Game.' Select 100-Yard Hop again and keep choosing a character, then pressing B to exit and choosing another character until the COMs are Kirby, King Dedede, Waddle Dee, in that order. If that combination doesn't appear within a few iterations, reset and start from the beginning. Once that combination appears, choose a file with 1-3 unlocked, go to 1-1, obtain single fire, and advance RNG twice after entering the stage, then exit the level. At this point the RNG value will be correct and 1-3 can be practiced.
Route
During this stage, only advance RNG by throwing away single fire to grab cutter and throwing single fire to combine for double fire. Don't advance RNG during Dedede's first phase and land the third hit as Dedede jumps to do his hammer attack, then advance RNG once. Finish off Dedede as quickly as possible and don't advance RNG any further.
Picnic that gives the correct RNG value
Whispy Woods
Practice Setup
To practice the manip starting at this boss, reset the game and go to the title screen, then wait until the first demo starts playing. Immediately press A to skip it and mash A through the title screen to get to file select. Play single-player 100-Yard Hop, but if the COMs are Waddle Dee, Adeleine, and Waddle Dee, in that order, press B and choose a character again, then enter the game. Immediately pause and choose 'Play Again' 4 times, then 'Play Another Game.' Select 100-Yard Hop again and keep choosing a character, then pressing B to exit and choosing another character until the COMs are Kirby, King Dedede, Adeleine, in that order. If the combination doesn't appear within a couple iterations, reset and start from the beginning. Once that combination appears, choose a file with Whispy unlocked, go to 1-1, obtain double fire without advancing RNG after entering the stage, then exit the level. At this point the RNG value will be correct and Whispy can be practiced.
Route
Jump over the Whispy Jr. to the left, then use double fire to the left, damaging both that Whispy Jr. and the one to the left of it. Turn around and double fire to the right, hitting the same two Whispy Jr.s, then hit the third one twice. RNG should not be advanced by Kirby at any point during the fight. Whispy should give roots first and no puffs and must be 2-cycled to end with the correct RNG value.
World 2
2-1
Practice Setup
To practice the manip starting at this stage, reset the game and go to the title screen, then wait until the first demo starts playing. Immediately press A to skip it and mash A through the title screen to get to file select. Play single-player 100-Yard Hop, but if the COMs are Waddle Dee, Adeleine, and Waddle Dee, in that order, press B and choose a character again, then enter the game. Immediately pause and choose 'Play Again' 6 times, then 'Play Another Game.' Select 100-Yard Hop again and keep choosing a character, then pressing B to exit and choosing another character until the COMs are Waddle Dee, Kirby, Kirby, in that order. If the combination doesn't appear within a couple iterations, reset and start from the beginning. Once that combination appears, choose a file with 2-1 unlocked, go to 1-1 or 2-1, obtain double fire and advance RNG twice after entering the stage, then exit the level. At this point the RNG value will be correct and 2-1 can be practiced.
Route
Throw away double fire when grabbing stone. In the room filling with sand, advance RNG 13 times, then stand still to advance RNG one more time before transforming into stone until Bandana Dee arrives. Put stone into Kirby's mouth and hit the Sparky with it after the Sparky hits the ground. After grabbing the last crystal shard, jump over the Sparky and leave it alive.
Picnics that give the correct RNG value
The RNG values 2 before and 2 after the target value will also work.
2-2
Practice Setup
To practice the manip starting at this stage, reset the game and go to the title screen, then wait until the first demo starts playing. Immediately press A to skip it and mash A through the title screen to get to file select. Play single-player 100-Yard Hop, but if the COMs are Waddle Dee, Adeleine, and Waddle Dee, in that order, press B and choose a character again, then enter the game. Immediately pause and choose 'Play Again' 16 times, then 'Play Another Game.' Select 100-Yard Hop again and keep choosing a character, then pressing B to exit and choosing another character until the COMs are King Dedede, Waddle Dee, Waddle Dee, in that order. If the combination doesn't appear within a couple iterations, reset and start from the beginning. Once that combination appears, choose a file with 2-2 unlocked, go to 2-2, then walk towards the Sparky and inhale it as early as possible without running. Combine it with the Hack by spitting it out - not throwing it - and swallow the ability star, then exit the level. At this point the RNG value will be correct and 2-2 can be practiced.
Route
Jump over the first Sparky and leave it alive, then throw away stone + spark while waiting for the first pillar to fall. The next Sparky should do a big jump towards Kirby; slide off the pillar and puff to destroy it. Obtain single fire. In the last room before Dedede, use fire along the ground and eliminate both Sparkys ASAP. Throw away single fire before the Propeller starts moving towards Kirby, then eat it to get ice and don't advance RNG any more.
Picnics that give the correct RNG value
The RNG values 2 after and 4 after the target value will also work.
2-3
Practice Setup
To practice the manip starting at this stage, reset the game and mash A to skip the opening screens and go straight to file select. Play single-player 100-Yard Hop and immediately pause and choose 'Play Again' 4 times, then 'Play Another Game.' Select 100-Yard Hop again and choose a character, and the COMs should be King Dedede, King Dedede, Waddle Dee, in that order. If not, reset and start from the beginning. Choose a file with 5-1 unlocked, go to 5-1 and swallow the Frigis after it drops 2 projectiles but before it drops a third, being careful not to advance RNG otherwise. Exit the stage and go to either 3-1, 4-1, or 4-3 to combine with stone by putting ice in Kirby's mouth and spitting it out, not throwing it. Swallow the ability star and exit the level. At this point the RNG value will be correct and 2-3 can be practiced.
Route
Reenter 2-2 and jump over the Sparky, leaving it alive. Spit ice at the Hack, don't throw it, then swallow the ability star, exit the level, and enter 2-3. Don't use curling stone when entering the level to make it easier to freeze the first 4 Boneheads. Freeze the fifth Bonehead as well, but let the one after it live. If any mistakes are made during the rest of the room, the Bos might advance RNG more than they're supposed to. After jumping off the star block and curling, continue that curl all the way down the skeleton's spine until the block that requires stone is broken. Briefly curl to defeat the Gabon, then start running and don't use curling stone until Kirby is part-way up the slope at the start of the skeleton's jaw. Continue that curl until back at the opening in the spine so that the Bos are despawned. Leave the Bonehead that already activated once alive, but freeze the other one. Continue through the room quickly, not freezing any Bos. RNG should not be advanced by Kirby for the rest of the level. Be sure to have at least 4 HP when exiting the level; if not, grab the Maxim tomato from the picnic.
Picnics that give the correct RNG value
The RNG values 2 before, 2 after, 4 after, and 8 after the target value will also work.
2-4
Practice Setup
To practice the manip starting at this stage, reset the game and don't press anything until the opening cutscene plays. Skip the cutscene and mash A to skip the title screen, then play single-player 100-Yard Hop. Immediately pause and choose 'Play Again' 2 times, then 'Play Another Game.' Select 100-Yard Hop again and keep choosing a character, then pressing B to exit and choosing another character until the COMs are all King Dedede. If the combination doesn't appear within a few iterations, reset and start from the beginning. Once that combination appears, choose a file with 5-1 unlocked, go to 5-1, and swallow the Frigis after it drops 2 projectiles but before it drops a third, being careful not to advance RNG otherwise. Exit the stage and go to either 3-1, 4-1, or 4-3 to combine with stone by putting ice in Kirby's mouth and spitting it out, not throwing it. Swallow the ability star and exit the level. At this point the RNG value will be correct and 2-4 can be practiced.
Route
Advance RNG 6 times while waiting in the room with the first crystal shard. This should cause the pattern in the next room to be tree, star, cloud. Stand still to advance RNG once on the elevator after the Maxim tomato, then make sure not to let the Spark-i hit the wall after defeating the miniboss, even if that means destroying it.
Picnic that gives the correct RNG value
Pix
Practice Setup
To practice the manip starting at this boss, reset the game and don't press anything until the opening cutscene plays. Skip the cutscene and mash A to skip the title screen, then play single-player 100-Yard Hop. Immediately pause and choose 'Play Again' 12 times, then 'Play Another Game.' Select 100-Yard Hop again and keep choosing a character, then pressing B to exit and choosing another character until the COMs are all Adeleine. If the combination doesn't appear within a few iterations, reset and start from the beginning. Once that combination appears, choose a file with Pix unlocked, go to 2-1, and combine 2 enemies that give abilities to get a double star, which will act as a substitute for curling stone. Be sure not to throw the first enemy at the second, or RNG will advance too far. Swallow the ability star and exit the level. At this point the RNG value will be correct and Pix can be practiced.
Route
Advance RNG twice right at the start of the fight, then put curling stone in Kirby's mouth. Jump over Pix's first attack but don't move for the rest of phase 1 until the very end. Move 4 platforms to the right and Pix should give the droplet pattern. Spit curling stone to the right and one-cycle the boss. Don't advance RNG after Pix is defeated.
World 3
3-1
Practice Setup
To practice the manip starting at this stage, reset the game and don't press anything until the opening cutscene plays. Skip the cutscene and mash A to skip the title screen, then play single-player 100-Yard Hop. Immediately pause and choose 'Play Again' 13 times, then 'Play Another Game.' Select 100-Yard Hop again and keep choosing a character, then pressing B to exit and choosing another character until the COMs are Kirby, Waddle Dee, Kirby, in that order. If the combination doesn't appear within a few iterations, reset and start from the beginning. Once that combination appears, choose a file with 3-1 unlocked. At this point the RNG value will be correct and 3-1 can be practiced.
Route
Obtain single fire from the first Bobo. When in the room with the Zebons, float quickly up the left side of the room, as going too slowly will cause the Zebons to advance RNG too much. In the next room, use fire once and then throw it away. Inhale the Pengy and run through the room, making sure to activate each Glom and paying attention to how many times they blink. Spit out the Pengy to combine it with the Poppy Bros. Jr. If the third Glom blinked a second time before attacking, advance RNG twice before getting to the miniboss. If the second Glom blinked a second time before attacking, advance RNG once. If the first Glom blinked a second time before attacking, don't advance RNG. Don't destroy any of the Ticks before defeating the miniboss or RNG will advance too far. In the last room, slide off the second semisolid platform and jump over the Sparky, running down the slope instead of jumping over it. Go quickly so that the Sparky and Zebon don't advance RNG more than they're supposed to. Use the ability star to destroy the last Zoos by jumping into it, and grab the enemy info card from the picnic to advance RNG to the correct value for the next level.
Picnic that gives the correct RNG value
3-2
Practice Setup
To practice the manip starting at this stage, reset the game and mash A to skip the opening screens and go straight to file select. Play single-player 100-Yard Hop and immediately pause and choose 'Play Another Game.' Select 100-Yard Hop again and keep choosing a character, then pressing B to exit and choosing another character until the COMs are King Dedede, Adeleine, Waddle Dee, in that order. If the combination doesn't appear within a few iterations, reset and start from the beginning. Once that combination appears, choose a file with 3-2 unlocked and enter the stage, then immediately exit. At this point the RNG value will be correct and 3-2 can be practiced.
Route
Destroy every dandelion in the first room and run, don't slide, off the semisolid platform above the Sparky. Inhale the Cairn and carry it into the next room, then spit it at the Bobo to get the volcano ability. Fire exactly 8 shots to destroy the block under the crystal shard and damage the large Kany twice, then grab the crystal shard and throw the ability star at the miniboss to finish it off. In the Waddle Dee section, follow the pattern of jumping shown below, making sure that consecutive jumps happen as soon as the crate touches the river so that RNG doesn't have a chance to advance. Get single fire in the last room and don't advance RNG any more.
Picnics that give the correct RNG value
The RNG value 2 after the target value will also work.
Alternate picnic that gives a workable RNG value
The RNG value 7 after the target value will result in this picnic. If this picnic is created, the RNG value will be one too far; however, 3-3 can be played normally while still getting the same results.
3-3
Practice Setup
To practice the manip starting at this stage, reset the game and don't press anything until the opening cutscene plays. Skip the cutscene and mash A to skip the title screen, then play single-player 100-Yard Hop. Immediately pause and choose 'Play Again' 11 times, then 'Play Another Game.' Select 100-Yard Hop again and keep choosing a character, then pressing B to exit and choosing another character until the COMs are all Adeleine. If the combination doesn't appear within a few iterations, reset and start from the beginning. Once that combination appears, choose a file with 3-3 unlocked, get single fire from 1-1, 2-1, or 3-1, and exit the level. At this point the RNG value will be correct and 3-3 can be practiced.
Route
Throw away fire when inhaling the Kapar, being sure to do it quickly enough that the Kapar's projectile doesn't break the ability star first. Don't advance RNG while combining for the shuriken ability or discarding it. Combine stone and cutter and defeat the miniboss. In the next room, Rick should be the first transformation. Break out of Rick and use the power again to get Pitch and break the wall. Transform again into Rick and climb the left wall. After getting the crystal shard, transform one final time on the next semisolid platform and use Pitch to fly through the last section.
Picnic that gives the correct RNG value
3-4
Practice Setup
To practice the manip starting at this stage, reset the game and go to the title screen, then wait until the first demo starts playing. Immediately press A to skip it and mash A through the title screen to get to file select. Play single-player 100-Yard Hop, but if the COMs are Waddle Dee, Adeleine, and Waddle Dee, in that order, press B and choose a character again, then enter the game. Immediately pause and choose 'Play Again' 5 times, then 'Play Another Game.' Select 100-Yard Hop again and keep choosing a character, then pressing B to exit and choosing another character until the COMs are Kirby, Kirby, Waddle Dee, in that order. If the combination doesn't appear within a couple iterations, reset and start from the beginning. Once that combination appears, choose a file with 3-4 unlocked, get cutter from 1-1 and combine it with stone from 3-1, making sure to spit out cutter to combine it instead of throwing it. Swallow the ability star and exit the level. At this point the RNG value will be correct and 3-4 can be practiced.
Route
Immediately float to the top of the level without moving left or right, then mash B and hold right during the transformation into Rick, only breaking out of the transformation at the bottom of the room, then throwing away the ability. For a faster but more difficult strategy, watch this video. Inhale the Flopper and use it to swim near the top of the next room, then spit it out rather than throwing it away. Obtain bomb to use against the miniboss and Acro. In the last room, go quickly, but then at the end of the room wait for one extra boulder to break on the wall before exiting the level.
Picnic that gives the correct RNG value
Acro
Practice Setup
To practice the manip starting at this boss, reset the game and mash A to skip the opening screens and go straight to file select. Play single-player 100-Yard Hop and immediately pause and choose 'Play Again' once, then 'Play Another Game.' Select 100-Yard Hop again and keep choosing a character, then pressing B to exit and choosing another character until the COMs are King Dedede, Adeleine, Waddle Dee, in that order. If the combination doesn't appear within a couple iterations, reset and start from the beginning. Once that combination appears, choose a file with Acro unlocked, get bomb from 2-4 and exit the level. At this point the RNG value will be correct and Acro can be practiced.
Route
Finish Acro's first phase as quickly as possible, then the second phase should be the dive attack. Hit with 5 bombs before/during the dive, then get the sixth hit in as soon as possible after the dive, before Acro becomes visible. Discard bomb without advancing RNG.
World 4
4-1
Practice Setup
To practice the manip starting at this stage, reset the game and mash A to skip the opening screens and go straight to file select. Play single-player 100-Yard Hop and immediately pause and choose 'Play Again' 3 times, then 'Play Another Game.' Select 100-Yard Hop again and keep choosing a character, then pressing B to exit and choosing another character until the COMs are King Dedede, Kirby, King Dedede, in that order. If the combination doesn't appear within a few iterations, reset and start from the beginning. Once that combination appears, choose a file with 4-1 unlocked, enter and immediately exit the level. At this point the RNG value will be correct and 4-1 can be practiced.
Route
Obtain single fire and advance RNG once by standing still on the first swinging log. Destroy all of the Floras in the last room except the last 2, and throw away fire when grabbing stone.
Picnics that give the correct RNG value
There are 2 expected target values depending on how long the Floras are spawned for that are 2 values apart. The RNG values 4 before and 2 before the first value, as well as 4 after the second target value will also work.
4-2
Practice Setup
To practice the manip starting at this stage, reset the game and don't press anything until the opening cutscene plays. Skip the cutscene and mash A to skip the title screen, then play single-player 100-Yard Hop. Immediately pause and choose 'Play Again' 3 times, then 'Play Another Game.' Select 100-Yard Hop again and choose a character, and the COMs should be Kirby, Waddle Dee, Adeleine, in that order. If not, reset and start from the beginning. Choose a file with 4-2 unlocked, get stone from 3-1 or 4-1 and combine it with bomb from 2-4, being sure to throw the power when combining it. Swallow the ability star and exit the level. At this point the RNG value will be correct and 4-2 can be practiced.
Route
Go back to 2-4 and throw bomb at the Skud to get dynamite, then swallow the ability star, exit the level, and enter 4-2. In the Waddle Dee section, jump constantly and never advance RNG. Destroy all 3 Sparkys so that they don't continue to advance RNG either. In the final room, throw away the dynamite ability and stand still afterwards to advance RNG a total of 2 times while waiting for the moving pillars. Be sure not to grab the enemy info card from the picnic.
Picnic that gives the correct RNG value
4-3
Practice Setup
To practice the manip starting at this stage, reset the game and mash A quickly to skip the opening screens and go straight to file select. Select 100-Yard Hop and choose a character, then press B to exit and choose another character until the COMs are one of the following combinations, in order: Kirby, King Dedede, King Dedede; King Dedede, King Dedede, Kirby; or King Dedede, Kirby, Kirby. If no combination appears within 2 iterations, reset and start from the beginning. Once a combination appears, choose a file with 4-3 unlocked. If the first combination appeared, enter the level and then advance RNG once, then exit the level. If the second combination appeared, enter and exit the level. If the third combination appeared, no extra steps are needed. At this point the RNG value will be correct and 4-3 can be practiced.
Route
Don't advance RNG when combining for drill or discarding it. Allow the Bonehead to live so that it can advance RNG two times total. Don't advance RNG while combining for curling stone or at any point during the level. Adeleine should select top hat as the sculpture that needs to be created.
Picnics that give the correct RNG value
The RNG values 2 after and 4 after the target value will also work.
4-4
Practice Setup
To practice the manip starting at this stage, reset the game and mash A to skip the opening screens and go straight to file select. Play single-player 100-Yard Hop and immediately pause and choose 'Play Again' 3 times, then 'Play Another Game.' Select 100-Yard Hop again and keep choosing a character, then pressing B to exit and choosing another character until the COMs are King Dedede, Kirby, King Dedede, in that order. If the combination doesn't appear within a few iterations, reset and start from the beginning. Once that combination appears, choose a file with 5-1 unlocked, go to 5-1, and swallow the Frigis after it drops 2 projectiles but before it drops a third, not advancing RNG otherwise. Exit the stage and go to either 3-1, 4-1, or 4-3 to combine with stone by throwing ice at the stone enemy. Swallow the ability star and exit the level. At this point the RNG value will be correct and 4-4 can be practiced.
Route
Traverse the first room as quickly as possible. It's nearly impossible to exit the first room with the same RNG value every time, so the next couple of rooms will change depending on which value the RNG was at.
In the second room, if the first Magoo jumps just above floor height, avoid freezing any Burnises in the room. In the Dedede section, destroy the first 2 Bos with one attack and the third by jumping into it from below, then jump over the Magoo directly before the crystal shard rather than destroying it. Destroy the final Bo as soon as possible.
In the second room, if the first Magoo jumps well above Kirby's head, destroy the Burnis immediately after, then pay attention to the set of 3 Magoos. If the third Magoo jumps just above floor height, avoid freezing any more Burnises in the room. If the second Magoo jumps just above floor height, destroy the final Burnis of the room. In the Dedede section, destroy the first 3 Bos with a single attack, and also destroy the Magoo directly before the crystal shard. Destroy the final Bo as soon as possible.
In either scenario, the RNG value should be the same when exiting the Dedede section if done correctly. In the room after the Dedede section, use the curling stone to destroy any Burnises that can be reached without losing time, as well as destroying both Sparkys as soon as possible. Be sure to activate every Magoo than can be triggered while being at floor height or above. Go quickly enough that the final Burnis doesn't have time to drop a sixth shot. Grab the crystal shard, making sure to have at least 2 HP so that Kirby advances RNG when the lava wall activates in the next room. Once in the next room, throw away curling stone and spit the Bobo to combine for double fire. After the lava wall appears, use double fire once and then run to the right, waiting to jump so that the first Magoo is activated. Use double fire high enough to destroy the Burnis, then make sure not to jump too high when using it the next time so that the Boneheads aren't destroyed before they can advance RNG. Destroy the next Burnis in the room as well, then slide underneath the Magoo immediately afterward and use double fire before hitting the magma. Use double fire underneath the final Burnis, leaving it alive. In the final room, float all the way up to the Sandman and exhale on it to destroy it, then jump up, grab the crystal shard, and continue floating, staying near the left wall. Don't destroy the Bonehead, then get rid of double fire by throwing it upwards, destroying the star blocks in the way. Grab cutter on the way out of the level. If Kirby has one HP, pick up some health from the picnic.
Picnic that gives the correct RNG value
Magman
Practice Setup
To practice the manip starting at this boss, reset the game and don't press anything until the opening cutscene plays. Skip the cutscene and mash A to skip the title screen, then play single-player 100-Yard Hop. Immediately pause and choose 'Play Again' 15 times, then 'Play Another Game.' Select 100-Yard Hop again and keep choosing a character, then pressing B to exit and choosing another character until the COMs are Kirby, Waddle Dee, King Dedede, in that order. If the combination doesn't appear within a few iterations, reset and start from the beginning. Once that combination appears, choose a file with Magman unlocked, get cutter from 1-1, and exit the level. At this point the RNG value will be correct and Magman can be practiced.
Route
Advance RNG 5 times immediately, then take out cutter and prepare to spit it at the Magoo directly to the left of Kirby. After spitting it out, stand still briefly to advance RNG, then inhale the combination and stand still again after swallowing it to advance RNG again. Pull out the fire sword to hit the tentacle rising out of the middle of the stage 3 times. Throw the sword and stand still to advance RNG once, then pull out another one. After finishing off the first phase, throw the sword and advance RNG twice before the second phase starts. Magman should drop rocks from the ceiling; hit him 3 times and then throw the sword for the fourth hit. Jump, pull out the ability star, then throw it at Magman to finish the fight, not advancing RNG afterwards.
World 5
5-1
Practice Setup
To practice the manip starting at this stage, reset the game and don't press anything until the opening cutscene plays. Skip the cutscene and mash A to skip the title screen, then play single-player 100-Yard Hop. Immediately pause and choose 'Play Again' 21 times, then 'Play Another Game.' Select 100-Yard Hop again and keep choosing a character, then pressing B to exit and choosing another character until the COMs are all Kirby. If the combination doesn't appear within a couple iterations, reset and start from the beginning. Once that combination appears, choose a file with 5-1 unlocked. At this point the RNG value will be correct and 5-1 can be practiced.
Route
Get single fire and destroy the first and third Frigis directly after, as well as the next one that's also moving to the left. Don't touch any other Frigises. Constantly jump in the Waddle Dee section except for 2 instances: Destroy the Sparky and stay on the ground long enough to advance RNG once. Advance RNG again while grabbing the crystal shard. Be sure to take out the miniboss as quickly as possible or too many Frigises will spawn and advance RNG more than they're supposed to. Be sure that every Propeller is activated and chases after Kirby. In the final room, destroy the first Frigis after it drops 2 attacks, then leave the rest alive all the way to the end of the level.
Picnic that gives the correct RNG value
Alternate picnic that gives a workable RNG value
The RNG value directly after the target value will result in this picnic. If this picnic is created, fire must be spat out instead of thrown when obtaining needle in 5-2.
5-2
Practice Setup
To practice the manip starting at this stage, reset the game and go to the title screen, then wait until the first demo starts playing. Immediately press A to skip it and mash A through the title screen to get to file select. Play single-player 100-Yard Hop, but if the COMs are Waddle Dee, Adeleine, and Waddle Dee, in that order, press B and choose a character again, then enter the game. Immediately pause and choose 'Play Again' 15 times, then 'Play Another Game.' Select 100-Yard Hop again and keep choosing a character, then pressing B to exit and choosing another character until the COMs are Kirby, Waddle Dee, Waddle Dee, in that order. If the combination doesn't appear within a couple iterations, reset and start from the beginning. Once that combination appears, choose a file with 5-2 unlocked. At this point the RNG value will be correct and 5-2 can be practiced.
Route
Do 5 grounded fires and then hold forward to walk off the edge into the Zebon. Be sure to not make any mistakes in the room with multiple Zebons. Throw fire away when obtaining needle. Put needle into Kirby's mouth before spawning the Sparky, then spit it at the Sparky right after it hits the ground and starts to attack, but before the attack is anywhere near finished. After entering the miniboss room, walk, don't run to the center and hit the miniboss twice for 4 damage total, also destroying the middle Propeller. Move to the left and attack one more time to finish it off, then grab the crystal shard and finish the level.
Picnics that give the correct RNG value
The RNG value 2 before the target value will also work.
5-3
Practice Setup
To practice the manip starting at this stage, reset the game and mash A to skip the opening screens and go straight to file select. Play single-player 100-Yard Hop and immediately pause and choose 'Play Again' 15 times, then 'Play Another Game.' Select 100-Yard Hop again and keep choosing a character, then pressing B to exit and choosing another character until the COMs are all Adeleine. If the combination doesn't appear within a few iterations, reset and start from the beginning. Choose a file with 5-3 unlocked, go to 4-3, and combine the first 2 enemies to get a double star, also advancing RNG once in the process. Swallow the ability star and exit the level. At this point the RNG value will be correct and 5-3 can be practiced.
Route
Have Kirby pull out the ability star and hold it over his head before entering the first loading zone. Once in the next room, run right and do a full jump just before Kirby's feet touch the first white square on the ground, then do another full jump as soon as Kirby is fully on the next landing, turning around as soon as the jump starts. Throw the ability star as soon as Kirby hits the ground, then continue running left. If done correctly, the Floras should advance RNG the correct amount to allow the best pattern from Adeleine. In the next room, do a full jump over the third platform that had a Mahall on it to spawn the Glom above and be sure to make all 3 Gloms attack. Obtain needle. Defeat the miniboss quickly without advancing RNG, then wait for the Bo on the right to start moving straight down after moving down-left to enter the loading zone, not advancing RNG while waiting. If everything was done correctly, Adeleine should choose the first 3 switches to be pressed. Don't advance RNG when combining for drill but do make sure both Propellers activate and move towards Kirby.
Picnics that give the correct RNG value
The RNG value 2 before the target value will also work.
Alternate picnic that gives a workable RNG value
The RNG value 2 after the target value will result in this picnic. If this picnic is created, RNG must be advanced 6 times in the first room of 5-4.
5-4
Practice Setup
To practice the manip starting at this stage, reset the game and don't press anything until the opening cutscene plays. Skip the cutscene and mash A to skip the title screen, then play single-player 100-Yard Hop. Immediately pause and choose 'Play Again' 5 times, then 'Play Another Game.' Select 100-Yard Hop again and keep choosing a character, then pressing B to exit and choosing another character until the COMs are all Waddle Dee. If the combination doesn't appear within a couple iterations, reset and start from the beginning. Once that combination appears, choose a file with 5-4 unlocked, go to 4-3, and combine the first 2 enemies to get drill, also advancing RNG once in the process. Swallow the ability star and exit the level. At this point the RNG value will be correct and 5-4 can be practiced.
Route
Take out the ability star in the first room and put it into Kirby's mouth in the second room, then swallow it as Kirby runs off the ledge and go through the semisolid platforms as quickly as possible, shooting drill downwards after clearing the last one. Quickly run left and throw drill away, inhaling the Burnis before it drops a second projectile and swallowing it. After the Dedede room, pay attention to which way the first Flora is moving when it spawns. If it moved to the right first, RNG will need to be advanced 13 total times before the final room. If it moved to the left first, RNG will need to be advanced 12 total times before the final room. It is recommended to throw fire away and throw cutter when combining with spark to account for 2 advancements, leaving 11 or 10 left, respectively. Additionally, 4 health is required to beat the miniboss optimally, so carefully grab some cake and/or a sandwich if low. In the miniboss room, listen to how many rocks the large Burnis drops, since it won't be visible immediately. Break the cage and jump into the large Burnis 4 times, using the lightsaber each time to damage it. Take out the ability star and throw it at the miniboss for the final 2 damage, then swallow the Magoo to get single fire. Be sure to have at least 2 HP after the fight, or Kirby won't be able to advance RNG. Each attack from the large Burnis will advance RNG by 1, as will throwing the ability star and the Magoo jumping. Add all of those advancements to the 2 from the previous room, then in the next room advance RNG however many times is necessary to get to the required 13 or 12 advancements total. In the final room, the Zooses should throw 4 lightningbolts total, and fire should be thrown away for a total of 5 RNG advancements. Get spark from the second Zoos. If either Zoos drops a raindrop instead, RNG will have to be advanced once per raindrop to make up for that. Make sure to have at least 2 HP after the picnic.
Picnic that gives the correct RNG value
HR-H
Practice Setup
To practice the manip starting at this boss, reset the game and go to the title screen, then wait until the first demo starts playing. Immediately press A to skip it and mash A through the title screen to get to file select. Play single-player 100-Yard Hop, but if the COMs are Waddle Dee, Adeleine, and Waddle Dee, in that order, press B and choose a character again, then enter the game. Immediately pause and choose 'Play Again' 10 times, then 'Play Another Game.' Select 100-Yard Hop again and keep choosing a character, then pressing B to exit and choosing another character until the COMs are Adeleine, Kirby, Kirby, in that order. If the combination doesn't appear within a few iterations, reset and start from the beginning. Once that combination appears, choose a file with 6-1 unlocked. Enter 6-1 and obtain spark, advance RNG twice after entering the stage, then exit the level. At this point the RNG value will be correct and HR can be practiced.
Route
Advance RNG twice before the first attack. After HR slaps, advance RNG one more time. Don't advance RNG during the rest of the fight. HR should clap and then slap for a 3-cycle first phase. Make sure to do the second phase quickly enough that only 7 platforms fall, or RNG will advance too far. After the fight is done, throw away spark and stand still to advance RNG twice total, then grab the crystal shard.
World 6
6-1
Practice Setup
To practice the manip starting at this stage, reset the game and go to the title screen, then wait until the first demo starts playing. Immediately press A to skip it and mash A through the title screen to get to file select. Play single-player 100-Yard Hop, but if the COMs are Waddle Dee, Adeleine, and Waddle Dee, in that order, press B and choose a character again, then enter the game. Immediately pause and choose 'Play Again' 12 times, then 'Play Another Game.' Select 100-Yard Hop again and keep choosing a character, then pressing B to exit and choosing another character until the COMs are King Dedede, King Dedede, Waddle Dee, in that order. If the combination doesn't appear within a few iterations, reset and start from the beginning. Once that combination appears, choose a file with 6-1 unlocked. Enter 6-1 and exit immediately. At this point the RNG value will be correct and 6-1 can be practiced.
Route
Throw fire away before inhaling the Ghost Knight and don't advance RNG during the miniboss fight. In the room after the fight, avoid the Sparky, then jump onto the Galbo and pull out needle at the same time so that the ability star goes into Kirby's mouth. Jump over the first Shotzo and then run off the ledge so that Kirby bonks slightly against the star block underneath the next Shotzo. Make sure not to bonk into any walls unintentionally or the Flutters will advance RNG too much. With needle still in Kirby's mouth, avoid the Propellers and run straight into the bomb that the Poppy Bros. Jr. throws, then spit out needle to make the combination and swallow it. Take out the ability star while exiting the level to get rid of it.
Picnics that give the correct RNG value
The RNG values 2 after and 4 after the target value will also work.
6-2
Practice Setup
To practice the manip starting at this stage, reset the game and don't press anything until the opening cutscene plays. Skip the cutscene and mash A to skip the title screen, then play single-player 100-Yard Hop. Immediately pause and choose 'Play Again' 6 times, then 'Play Another Game.' Select 100-Yard Hop again and keep choosing a character, then pressing B to exit and choosing another character until the COMs are King Dedede, Adeleine, Adeleine, in that order. If the combination doesn't appear within a few iterations, reset and start from the beginning. Once that combination appears, choose a file with 6-2 unlocked, go to 6-1 to get spark, and exit the level. At this point the RNG value will be correct and 6-2 can be practiced.
Route
Go to 6-1 to get spark from the Plugg and exit the level. Don't throw the ability star when combining it with the Fishbone to get lightsaber. In the next room, bonk into the left side of the hole underneath the first Bo to despawn a Bo on the right side of the room, then when exiting the water do a full jump and hold right so that the Bo spawns for the correct amount of time. Stand still to advance RNG once while waiting for Adeleine.
Picnic that gives the correct RNG value
6-3
Practice Setup
To practice the manip starting at this stage, reset the game and don't press anything until the opening cutscene plays. Skip the cutscene and mash A to skip the title screen, then play single-player 100-Yard Hop. Immediately pause and choose 'Play Again' 17 times, then 'Play Another Game.' Select 100-Yard Hop again and keep choosing a character, then pressing B to exit and choosing another character until the COMs are Waddle Dee, Adeleine, Waddle Dee, in that order. If the combination doesn't appear within a few iterations, reset and start from the beginning. Once that combination appears, choose a file with 6-3 unlocked and go to 1-1 to get cutter. Enter 6-1 to get combine cutter with spark, advancing RNG once in the process. Swallow the ability star and exit the level. At this point the RNG value will be correct and 6-3 can be practiced.
Route
Defeat the one Sparky in the level before it can move and don't advance RNG while combining for any abilities. Do throw away the ability star to advance RNG before combining fire and needle and also after grabbing the second crystal shard. Make sure to immediately eliminate enemies that can advance RNG, but leave the three Propellers alive for a split second so that they can start moving and advance RNG before being destroyed.
Picnics that give the correct RNG value
The RNG value 2 after the target value will also work.
Miracle Matter
Practice Setup
To practice the manip starting at this boss, reset the game and go to the title screen, then wait until the first demo starts playing. Immediately press A to skip it and mash A through the title screen to get to file select. Play single-player 100-Yard Hop, but if the COMs are Waddle Dee, Adeleine, and Waddle Dee, in that order, press B and choose a character again, then enter the game. Immediately pause and choose 'Play Again' 12 times, then 'Play Another Game.' Select 100-Yard Hop again and choose a character, and the COMs should be King Dedede, Kirby, Kirby, in that order. If not, reset and start from the beginning. Choose a file with Miracle Matter unlocked, go to 1-1 and get cutter. Enter 6-1 and combine cutter with spark, making sure to spit out cutter to combine it rather than throwing it. Swallow the ability star and exit the level. At this point the RNG value will be correct and Miracle Matter can be practiced.
Route
Make sure to one-cycle every phase or the manip will be lost. Finish the cutter and spark phases as quickly as possible, then advance RNG twice after stone starts by throwing away lightsaber and standing still. Wait for the bomb phase to start, then quickly advance RNG 7 times by quickly inhaling and standing still briefly between inhales, making sure to finish before the bubbles split. Finish the bomb phase and move to the right side of the screen, then advance RNG 6 times during the needle phase while waiting to be able to attack. Don't advance RNG during or after the rest of the fight, even when discarding abilities.
Dark Star and 02
Practice Setup
To practice the manip starting at this boss, reset the game and go to the title screen, then wait until the first demo starts playing. Immediately press A to skip it and mash A through the title screen to get to file select. Play single-player 100-Yard Hop, but if the COMs are Waddle Dee, Adeleine, and Waddle Dee, in that order, press B and choose a character again, then enter the game. Immediately pause and choose 'Play Again' 14 times, then 'Play Another Game.' Select 100-Yard Hop again and keep choosing a character, then pressing B to exit and choosing another character until the COMs are Kirby, Kirby, King Dedede, in that order. If the combination doesn't appear within several iterations, reset and start from the beginning. Once that combination appears, choose a file with Dark Star unlocked, then enter and immediately exit the level, being careful to not advance RNG when inside the level. At this point the RNG value will be correct and 02 can be practiced.
Route
When fighting 02, make sure not to miss shots or 02 will get an extra attack off, advancing RNG too far. Once 02's weak spot is exposed, shoot 9 sets of 4 crystals into it, then prepare for the one-cycle.
