K64:Any% Manip Route: Difference between revisions
DarkRiolu27 (talk | contribs) m (→3-2) |
DarkRiolu27 (talk | contribs) (→3-4) |
||
| (11 intermediate revisions by the same user not shown) | |||
| Line 280: | Line 280: | ||
If multiple pairs of rocks hit the ground close together and there were 11 rocks total, throw the [https://wikirby.com/wiki/Flopper Flopper] after using it and wait for 2 extra rocks to break on the wall at the end of the last room before leaving the level. | If multiple pairs of rocks hit the ground close together and there were 11 rocks total, throw the [https://wikirby.com/wiki/Flopper Flopper] after using it and wait for 2 extra rocks to break on the wall at the end of the last room before leaving the level. | ||
| Line 316: | Line 313: | ||
<p class="h3-no-toc">Route</p> | <p class="h3-no-toc">Route</p> | ||
Obtain single fire and advance RNG once by standing still on the first swinging log. In the last room, any mistakes will likely allow the [https://wikirby.com/wiki/Flora Floras] to advance RNG and ruin the manip. | Obtain single fire and advance RNG once by standing still on the first swinging log after the miniboss. In the last room, any mistakes will likely allow the [https://wikirby.com/wiki/Flora Floras] to advance RNG too far and ruin the manip. Use single fire 3 times on the ground, then jump and use single fire 3 more times, destroying the first 4 [https://wikirby.com/wiki/Flora Floras] as quickly as possible. Land on the ground and jump again before using single fire so that Kirby goes over top of the next [https://wikirby.com/wiki/Flora Flora], leaving it alive, then land on the far right of the platform with the [https://wikirby.com/wiki/Bobo Bobo] on it so that the [https://wikirby.com/wiki/Flora Flora] despawns. Throw single fire to obtain double fire, then use double fire high enough to destroy the next 2 [https://wikirby.com/wiki/Flora Floras]. | ||
| Line 351: | Line 348: | ||
<p class="h3-no-toc">Route</p> | <p class="h3-no-toc">Route</p> | ||
Destroy the [https://wikirby.com/wiki/bonehead Bonehead] and don't advance RNG at any point during the level. Adeleine should select top hat as the sculpture | Destroy the [https://wikirby.com/wiki/bonehead Bonehead] and don't advance RNG at any point during the level. Adeleine should select top hat as the sculpture. | ||
| Line 370: | Line 367: | ||
==4-4== | ==4-4== | ||
<p class="h3-no-toc">Practice Setup</p> | <p class="h3-no-toc">Practice Setup</p> | ||
To practice the manip starting at this stage, reset the game and mash A to skip the opening screens and go straight to file select. Play single-player 100-Yard Hop and immediately pause and choose 'Play Again' 17 times, then 'Play Another Game.' Select 100-Yard Hop again and keep choosing a character, then pressing B to exit and choosing another character until the COMs are | To practice the manip starting at this stage, reset the game and mash A to skip the opening screens and go straight to file select. Play single-player 100-Yard Hop and immediately pause and choose 'Play Again' 17 times, then 'Play Another Game.' Select 100-Yard Hop again and keep choosing a character, then pressing B to exit and choosing another character until the COMs are Adeleine, Adeleine, Adeleine. If the combination doesn't appear within a few iterations, reset and start from the beginning. Once that combination appears, choose a file with 4-4 unlocked, obtain double fire from 1-1 or 2-1 and advance RNG twice after entering the stage, then exit the level. At this point the RNG value will be correct and 4-4 can be practiced. | ||
| Line 415: | Line 412: | ||
==5-1== | ==5-1== | ||
<p class="h3-no-toc">Practice Setup</p> | <p class="h3-no-toc">Practice Setup</p> | ||
To practice the manip starting at this stage, reset the game and go to the title screen, then wait until the first demo starts playing. Immediately press A to skip it and mash A through the title screen to get to file select. Play single-player 100-Yard Hop, but if the COMs are Waddle Dee, Adeleine, and Waddle Dee, in that order, press B and choose a character again, then enter the game. Immediately pause and choose 'Play Again' 9 times, then 'Play Another Game.' Select 100-Yard Hop again and choose a character | To practice the manip starting at this stage, reset the game and go to the title screen, then wait until the first demo starts playing. Immediately press A to skip it and mash A through the title screen to get to file select. Play single-player 100-Yard Hop, but if the COMs are Waddle Dee, Adeleine, and Waddle Dee, in that order, press B and choose a character again, then enter the game. Immediately pause and choose 'Play Again' 9 times, then 'Play Another Game.' Select 100-Yard Hop again and choose a character. The COMs should all be Kirby. If not, reset and start from the beginning. If that combination appears, choose a file with 5-1 unlocked, obtain double fire from 1-1 or 2-1 and advance RNG once after entering the stage, then exit the level. At this point the RNG value will be correct and 5-1 can be practiced. | ||
| Line 429: | Line 426: | ||
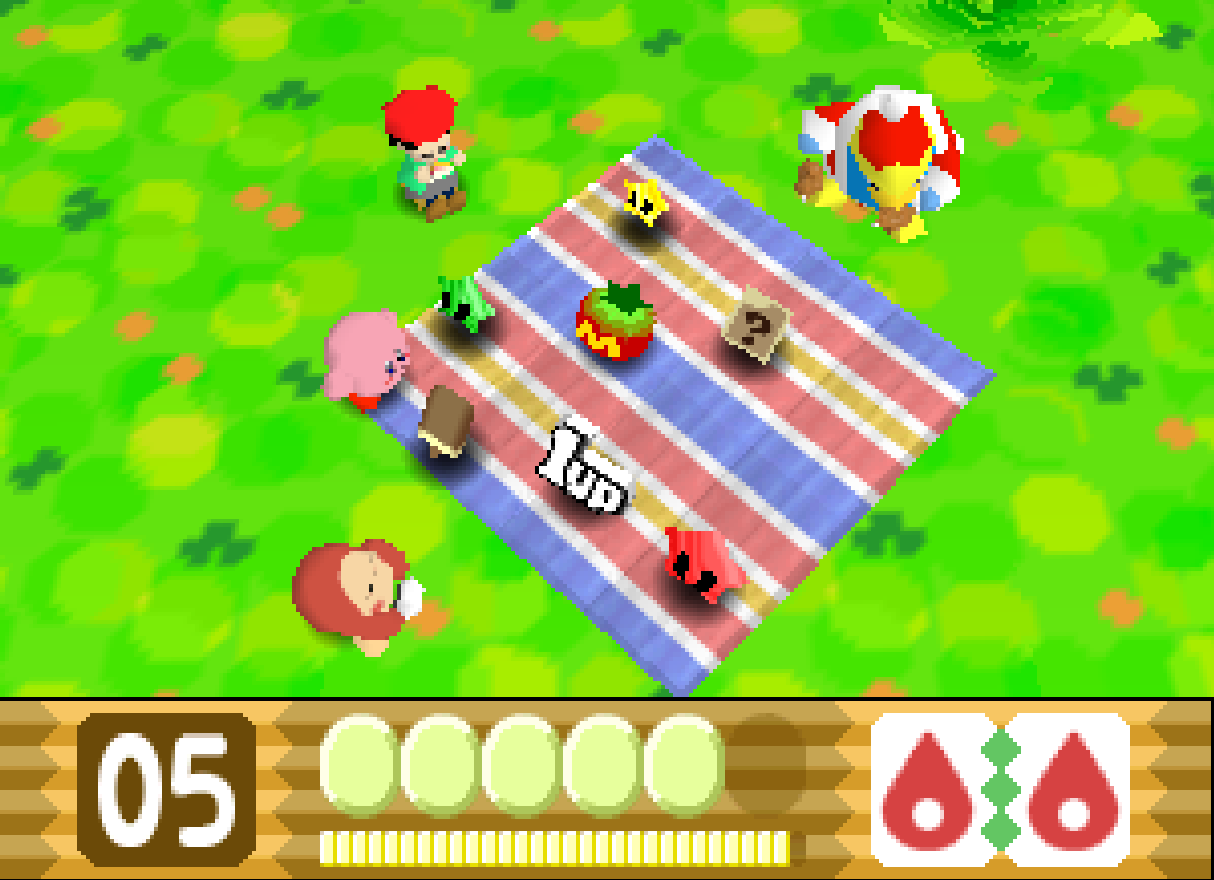
<p class="h3-no-toc">Picnic that gives the correct RNG value</p> | <p class="h3-no-toc">Picnic that gives the correct RNG value</p> | ||
[[File:5-1 Picnic A.png|500px|The correct picnic for 5-1]] | [[File:5-1 Picnic A.png|500px|The correct picnic for 5-1]] | ||
==5-2== | ==5-2== | ||
| Line 473: | Line 469: | ||
==5-4== | ==5-4== | ||
<p class="h3-no-toc">Practice Setup</p> | <p class="h3-no-toc">Practice Setup</p> | ||
To practice the manip starting at this stage, reset the game and mash A to skip the opening screens and go straight to file select. Play single-player 100-Yard Hop and immediately pause and choose 'Play Again' 5 times, then 'Play Another Game.' Select 100-Yard Hop again and keep choosing a character, then pressing B to exit and choosing another character until the COMs are Adeleine, Adeleine, Adeleine | To practice the manip starting at this stage, reset the game and mash A to skip the opening screens and go straight to file select. Play single-player 100-Yard Hop and immediately pause and choose 'Play Again' 5 times, then 'Play Another Game.' Select 100-Yard Hop again and keep choosing a character, then pressing B to exit and choosing another character until the COMs are Adeleine, Adeleine, Adeleine. If the combination doesn't appear within a couple iterations, reset and start from the beginning. Once that combination appears, choose a file with 5-4 unlocked, obtain double fire from 1-1 or 2-1 without advancing RNG after entering the stage, then exit the level. At this point the RNG value will be correct and 5-4 can be practiced. | ||
| Line 490: | Line 486: | ||
Don't advance RNG when waiting in between the [https://wikirby.com/wiki/I%C2%B3 I³s], and put single fire into Kirby's mouth, then spit it at the [https://wikirby.com/wiki/Sir_Kibble Sir Kibble] instead of throwing it. In the miniboss room, immediately spawn the [https://wikirby.com/wiki/Magoo Magoo] to the left. If it jumps low, advance RNG 6 times in the next room, or 7 times if the miniboss was destroyed before it could drop another rock. If the [https://wikirby.com/wiki/Magoo Magoo] jumps high, advance RNG 4 times in the next room, or 5 times if the miniboss was destroyed before it could drop another rock. | Don't advance RNG when waiting in between the [https://wikirby.com/wiki/I%C2%B3 I³s], and put single fire into Kirby's mouth, then spit it at the [https://wikirby.com/wiki/Sir_Kibble Sir Kibble] instead of throwing it. In the miniboss room, immediately spawn the [https://wikirby.com/wiki/Magoo Magoo] to the left. If it jumps low, advance RNG 6 times in the next room, or 7 times if the miniboss was destroyed before it could drop another rock. If the [https://wikirby.com/wiki/Magoo Magoo] jumps high, advance RNG 4 times in the next room, or 5 times if the miniboss was destroyed before it could drop another rock. | ||
In any case, spawn a second [https://wikirby.com/wiki/Magoo Magoo] and inhale it to get single fire. After advancing RNG the required number of times, move in such a way that the [https://wikirby.com/wiki/zoos Zooses] in the final room throw 4 projectiles and move close together. Throw away single fire to advance RNG an extra time, then inhale both [https://wikirby.com/wiki/zoos Zooses] simultaneously to get double spark. RNG should advance 5 times total in this room. | In any case, spawn a second [https://wikirby.com/wiki/Magoo Magoo] and inhale it to get single fire. After advancing RNG the required number of times, move in such a way that the [https://wikirby.com/wiki/zoos Zooses] in the final room throw 4 projectiles and move close together. Throw away single fire to advance RNG an extra time, then inhale both [https://wikirby.com/wiki/zoos Zooses] simultaneously to get double spark. RNG should advance 5 times total in this room. | ||
| Line 518: | Line 515: | ||
==6-1== | ==6-1== | ||
<p class="h3-no-toc">Practice Setup</p> | <p class="h3-no-toc">Practice Setup</p> | ||
To practice the manip starting at this stage, reset the game and don't press anything until the opening cutscene plays. Skip the cutscene and mash A to skip the title screen, then play single-player 100-Yard Hop. Immediately pause and choose 'Play Again' 10 times, then 'Play Another Game.' Select 100-Yard Hop again | To practice the manip starting at this stage, reset the game and don't press anything until the opening cutscene plays. Skip the cutscene and mash A to skip the title screen, then play single-player 100-Yard Hop. Immediately pause and choose 'Play Again' 10 times, then 'Play Another Game.' Select 100-Yard Hop again and choose a character. The COMs should be Waddle Dee, Waddle Dee, Kirby, in that order. If not, reset and start from the beginning. If that combination appears, choose a file with 6-1 unlocked, enter the stage, and advance RNG once after entering the level. At this point the RNG value will be correct and 6-1 can be practiced. | ||
| Line 559: | Line 556: | ||
<p class="h3-no-toc">Route</p> | <p class="h3-no-toc">Route</p> | ||
Combine fire and bomb without advancing RNG and defeat every enemy as quickly as possible with the following exceptions: When the 2 [https://wikirby.com/wiki/flora Floras] spawn, the one on the right needs to advance RNG twice, for a total of 4 values advanced (6 if including the [https://wikirby.com/wiki/flora Flora] on the left). Be sure to let it live for a few extra frames so that it has time to advance RNG. Also let the [https://wikirby.com/wiki/Propeller Propellers] live for a couple of frames so that all 3 of them advance RNG before dying. | |||
| Line 587: | Line 581: | ||
<p class="h3-no-toc">Route</p> | <p class="h3-no-toc">Route</p> | ||
Advance RNG twice after [https://wikirby.com/wiki/Miracle_Matter Miracle Matter] chooses fire. It is recommended to advance RNG once after each set of 3 firework attacks that Kirby does. Don't advance RNG during the bomb phase or when discarding Kirby's ability. Don't advance RNG during the cutter phase. Advance RNG once immediately upon [https://wikirby.com/wiki/Miracle_Matter Miracle Matter] choosing spark, and bait the last attack | Advance RNG twice after [https://wikirby.com/wiki/Miracle_Matter Miracle Matter] chooses fire. It is recommended to advance RNG once after each set of 3 firework attacks that Kirby does. Don't advance RNG during the bomb phase or when discarding Kirby's ability. Don't advance RNG during the cutter phase. Advance RNG once immediately upon [https://wikirby.com/wiki/Miracle_Matter Miracle Matter] choosing spark, and bait the last attack towards the corner of the screen so that it doesn't go offscreen before it can be inhaled. Advance RNG once during the needle phase. Throw away needle to advance RNG before [https://wikirby.com/wiki/Miracle_Matter Miracle Matter] chooses ice. Stone will be last. | ||
Latest revision as of 23:26, 22 March 2025
This article is a guide on how to perform the RNG manipulation for the Any% speedrun of Kirby 64: The Crystal Shards. For a general explanation on how RNG works in this game, click here. It is recommended that players learn the normal speedrun route before attempting any RNG manipulation.
How to use this guide
In order to use RNG manipulation in a run, the instructions in the next section must be followed first, and then the manip must be carried throughout each level, with instructions on how to do so presented below. Kirby 64 takes so long to reset that it would typically not be worth it to try and recover the manip once it is lost, so the run must either be carried forward without the manip or restarted from the beginning. Because of this, it is recommended that runners who wish to learn manip do so sequentially, starting at 1-1, as trying to reset in the middle of a run to achieve a specific RNG value will most likely be slower than dealing with bosses' random actions. Unfortunately, since most of the timeloss due to randomness typically comes from bosses in the later worlds, runners have to learn and perform the majority of the manip before the largest timesaves can be taken advantage of.
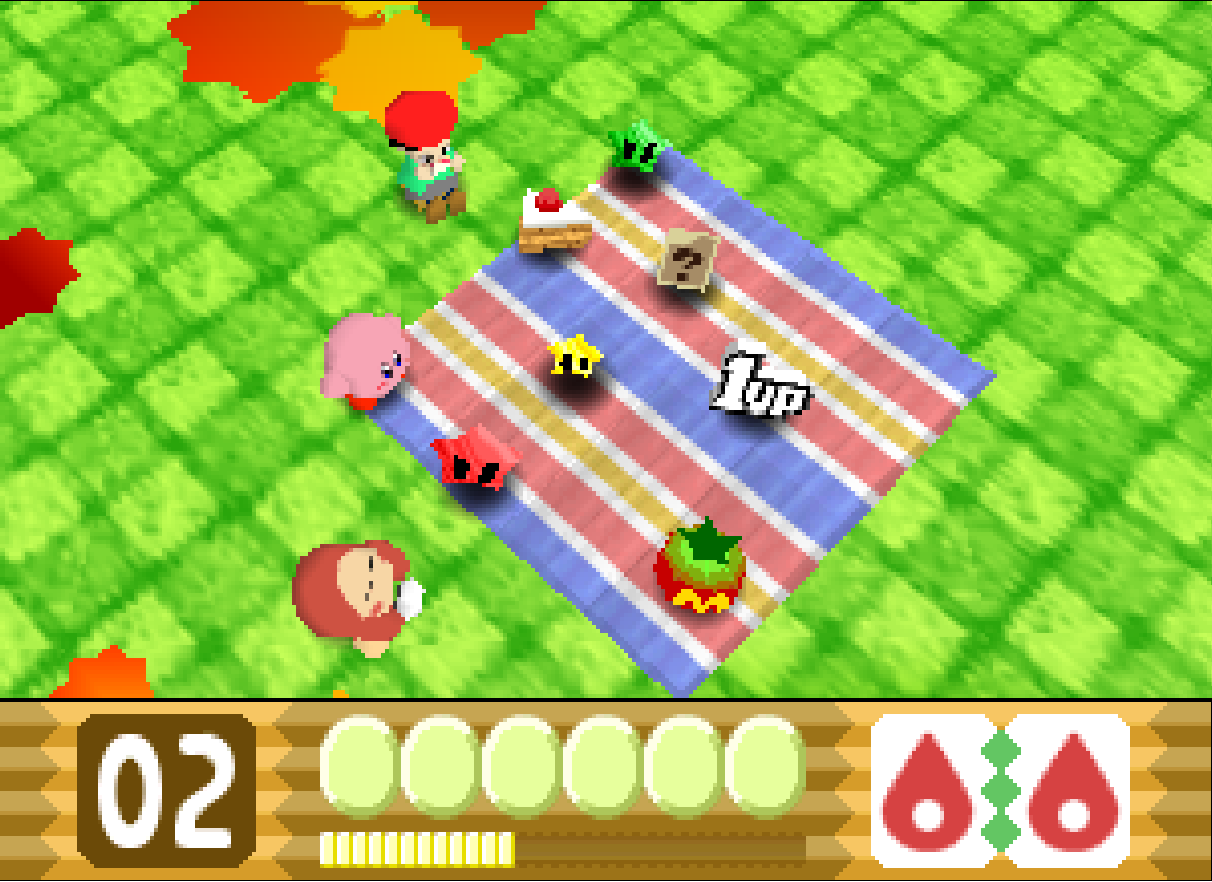
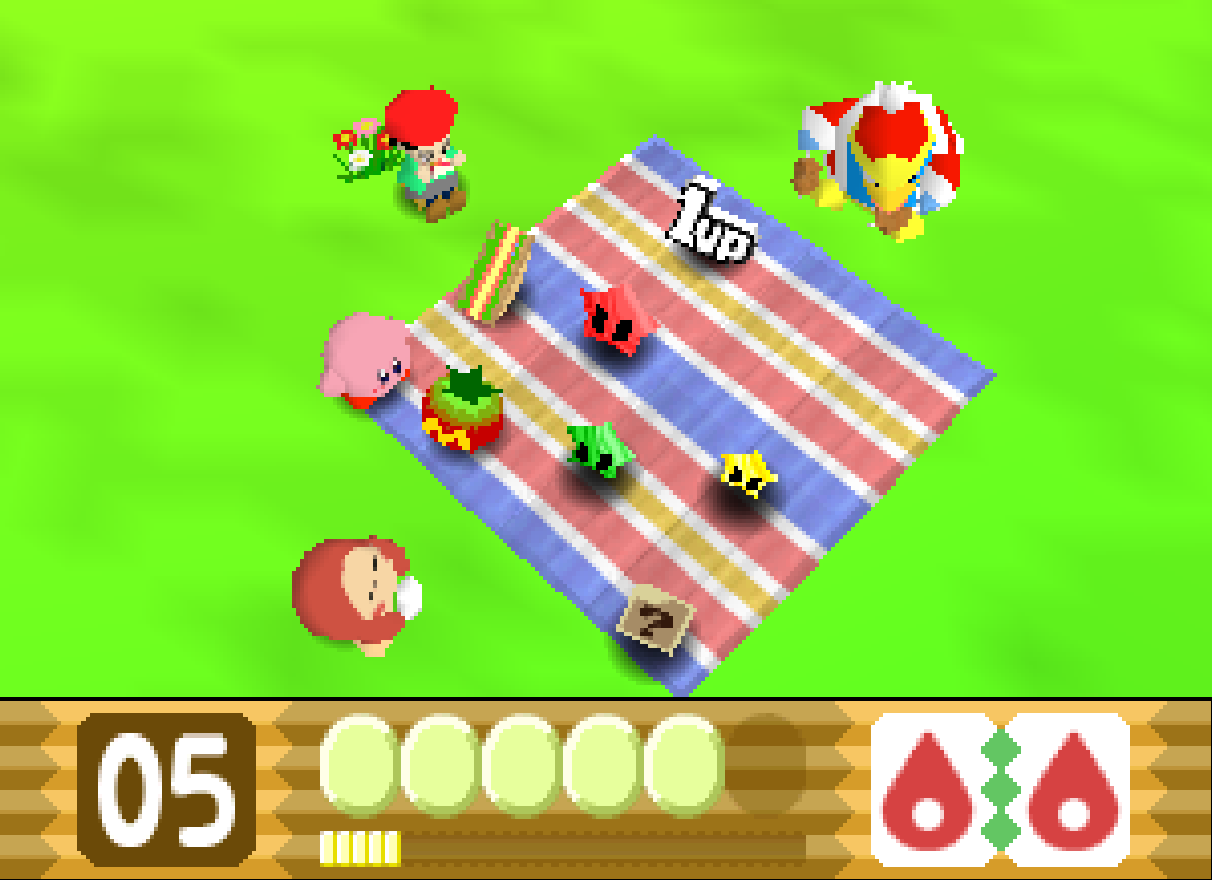
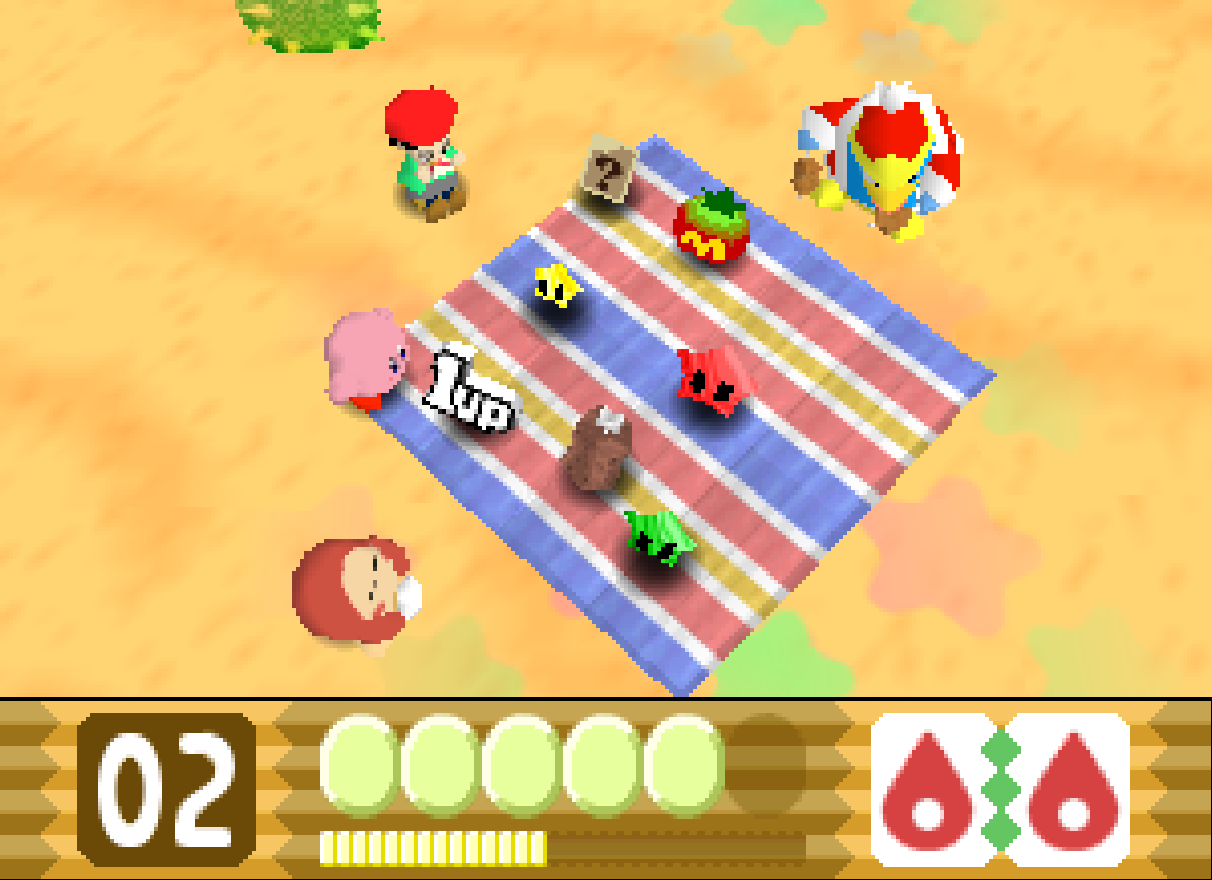
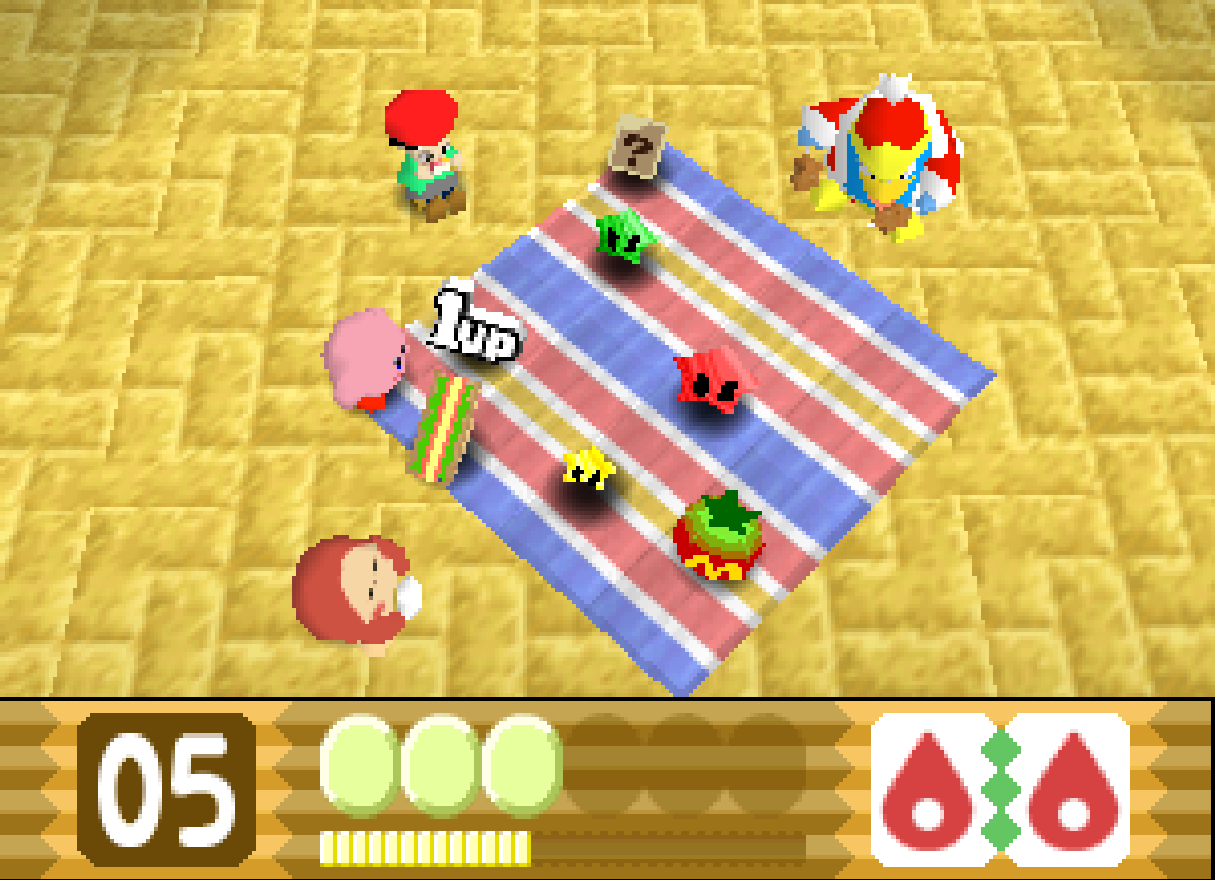
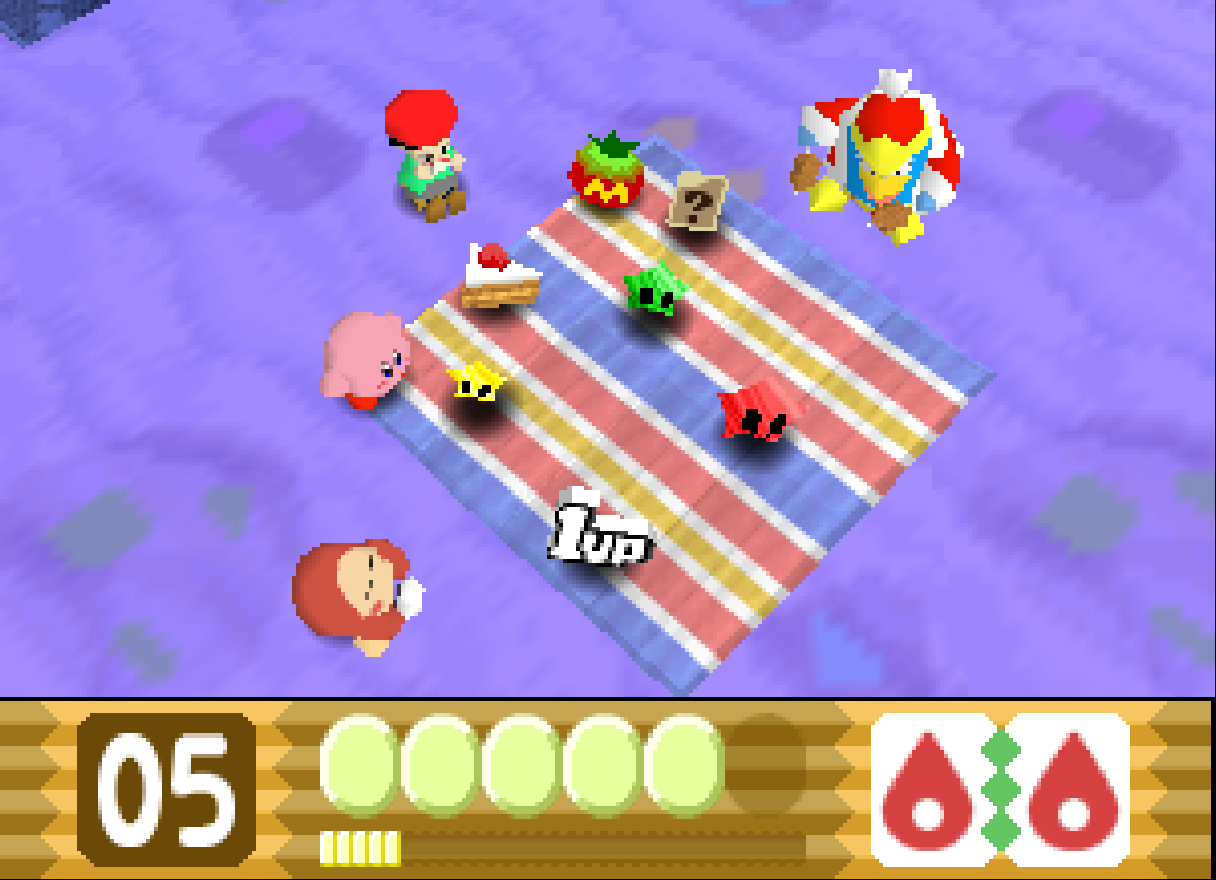
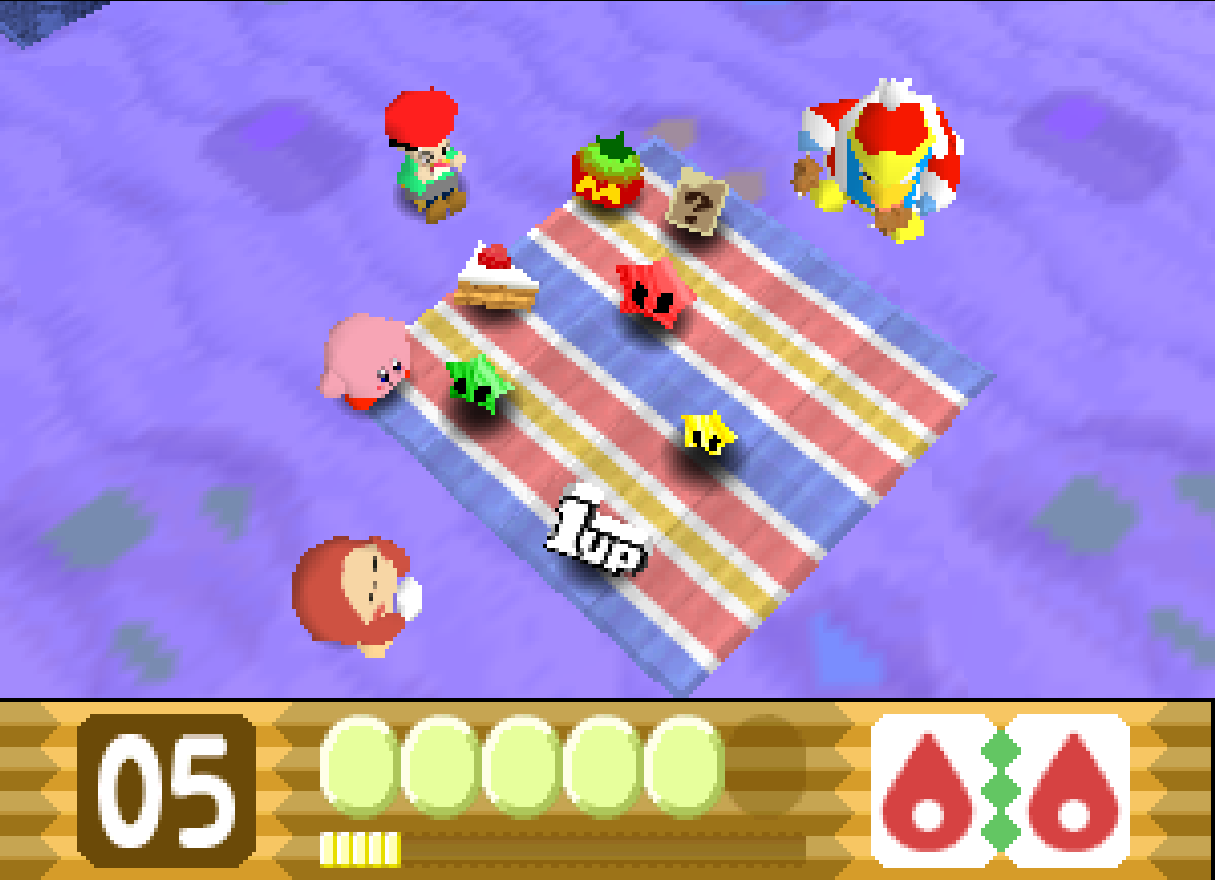
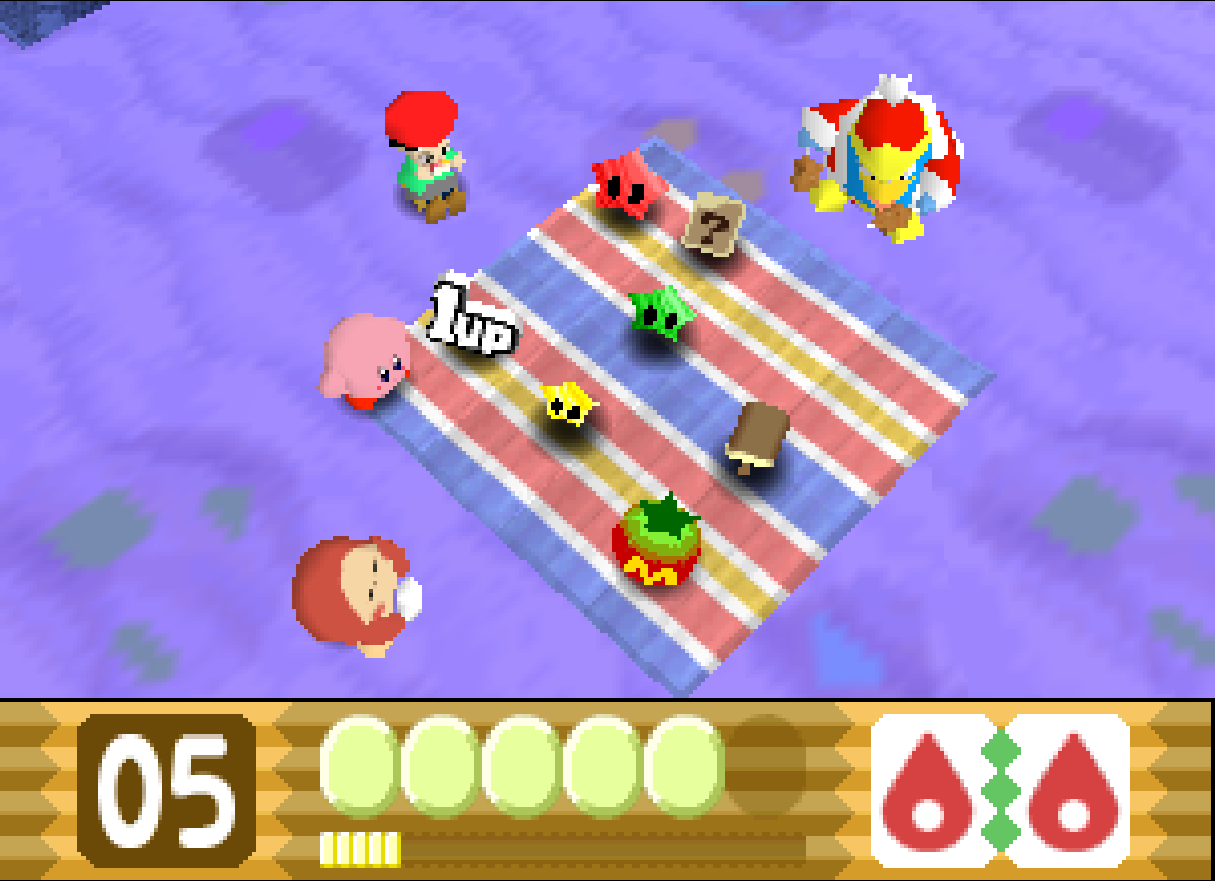
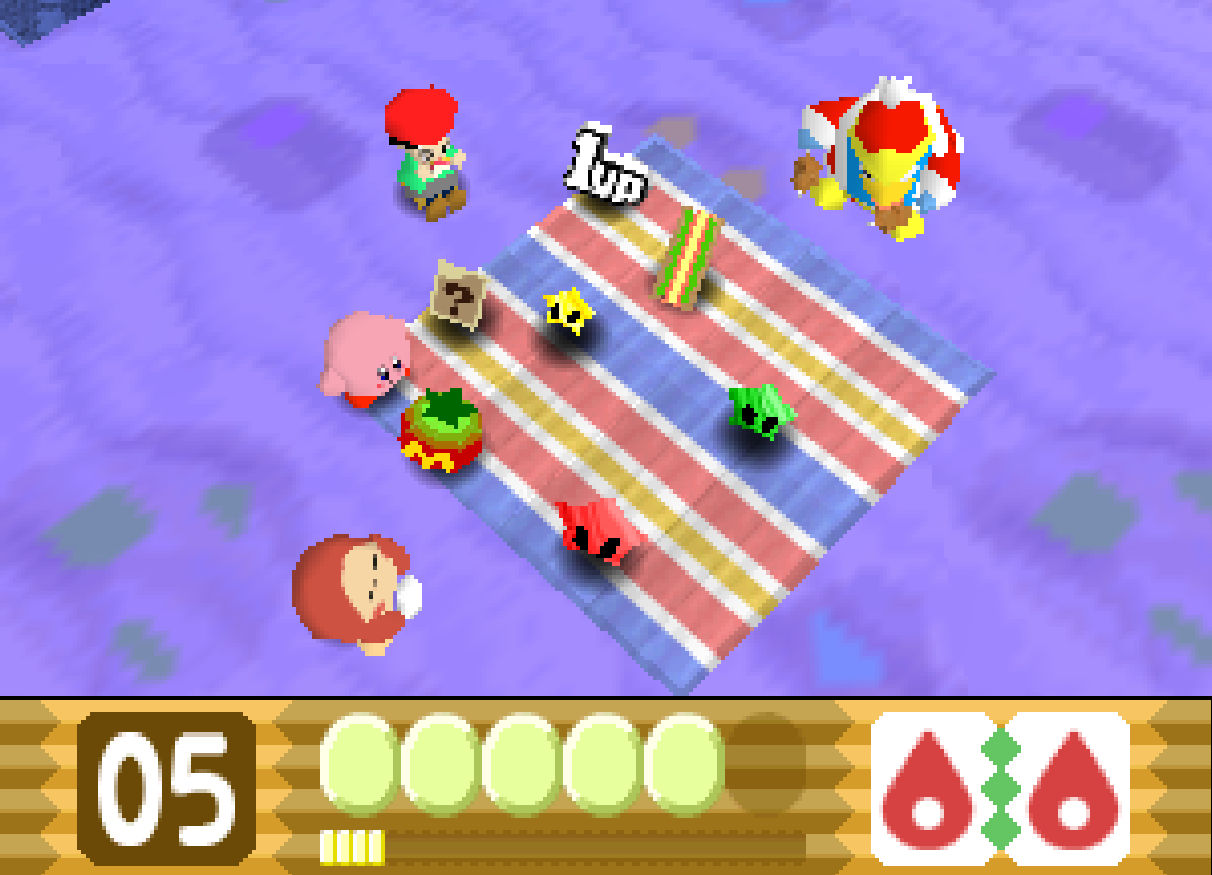
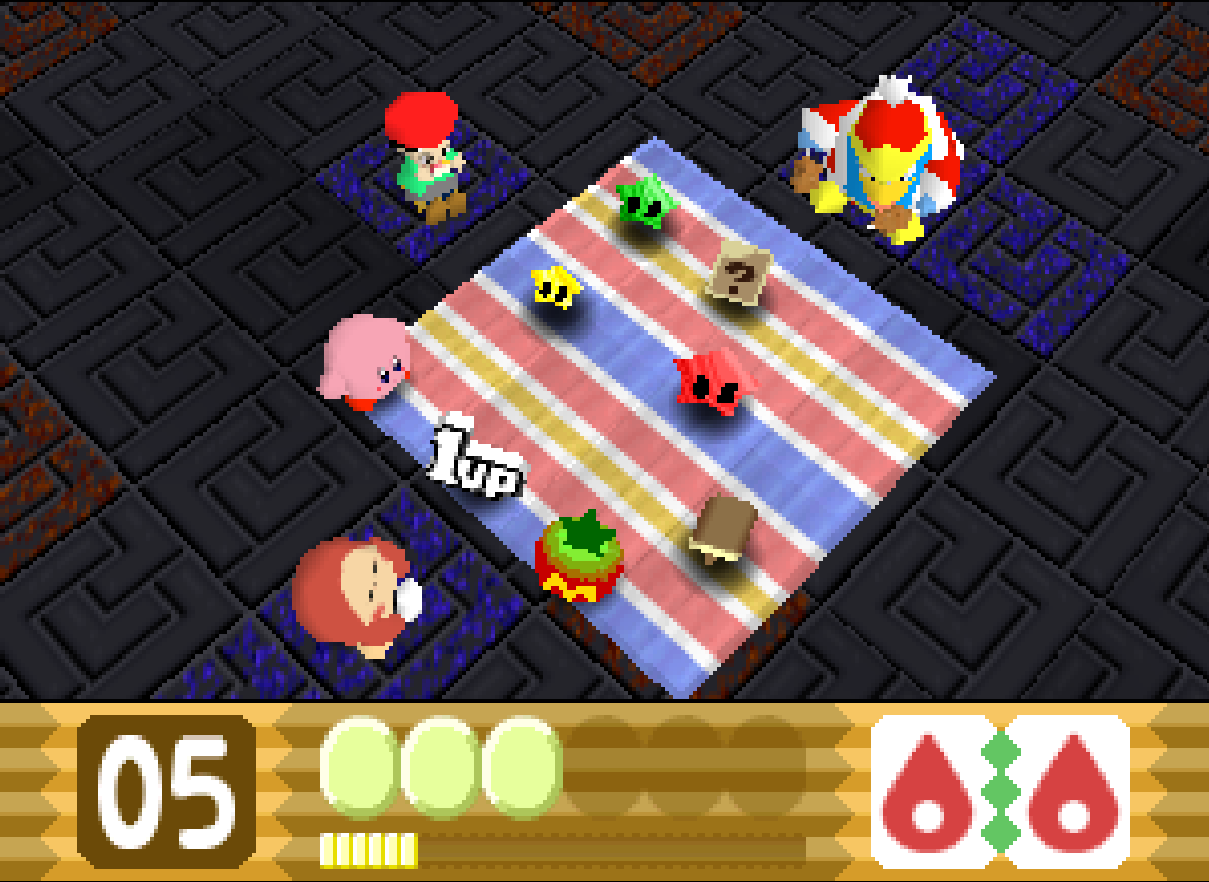
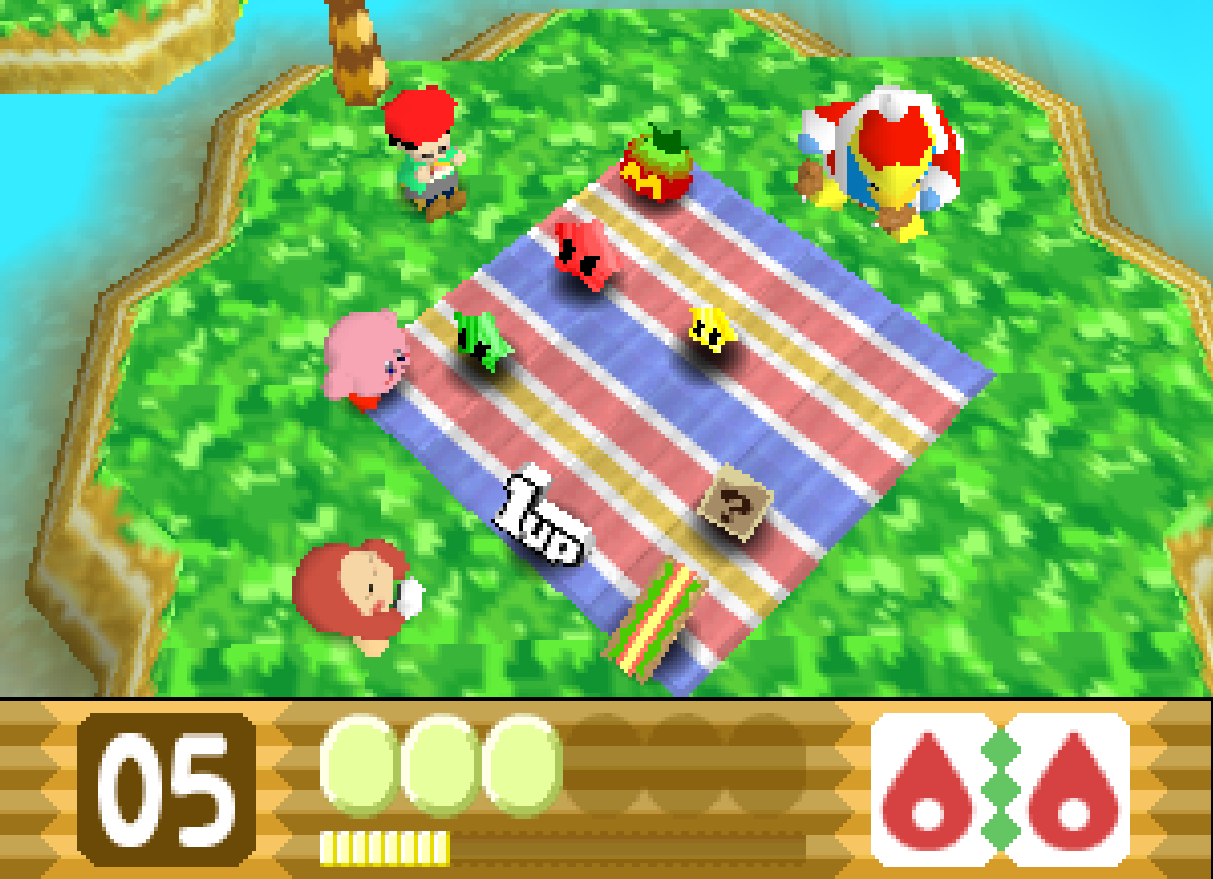
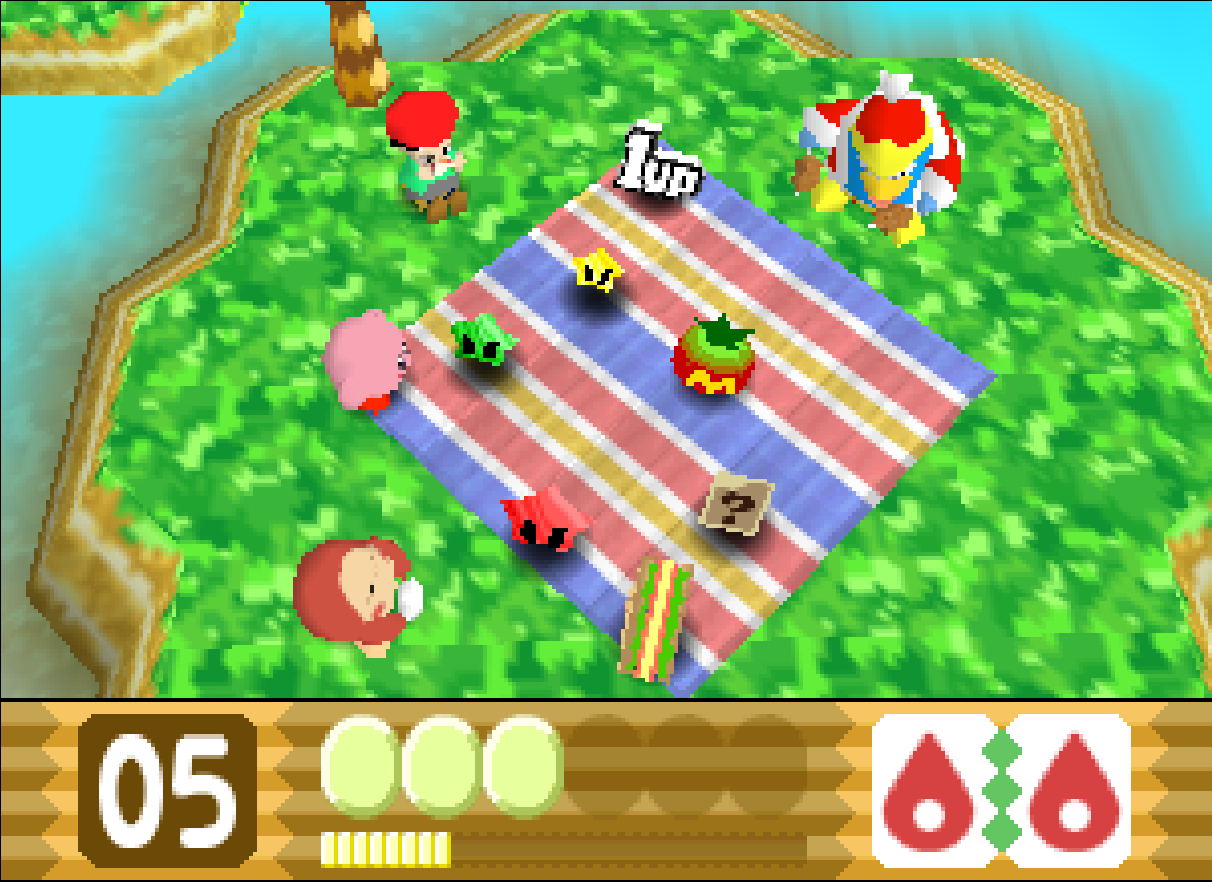
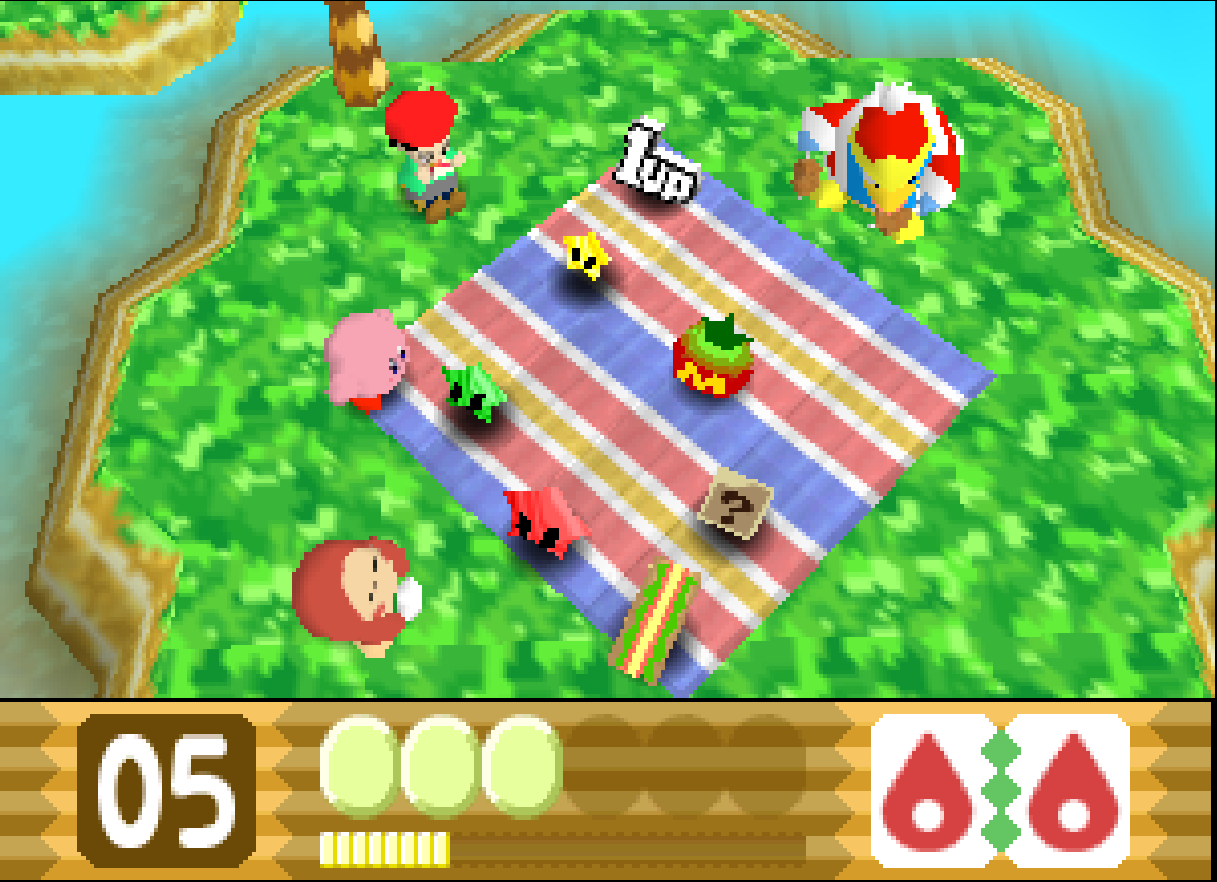
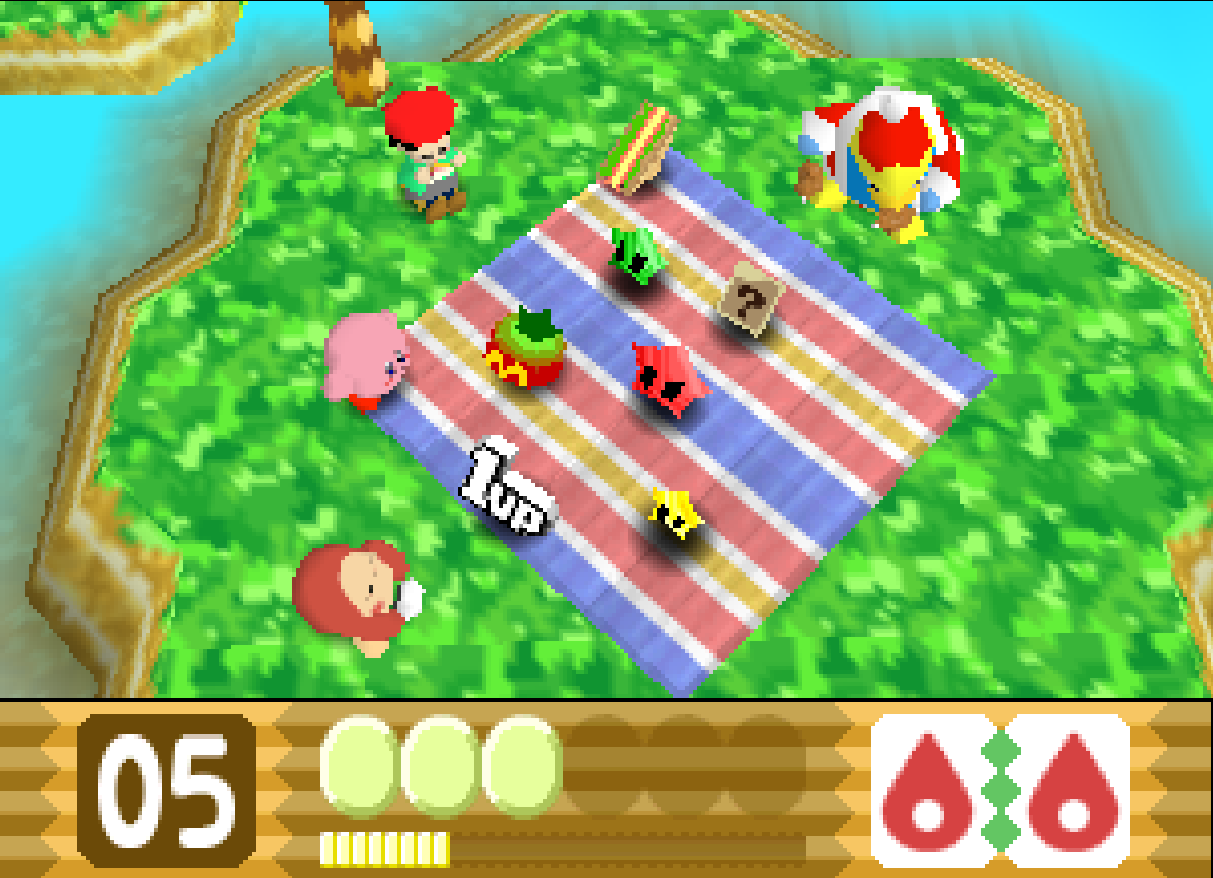
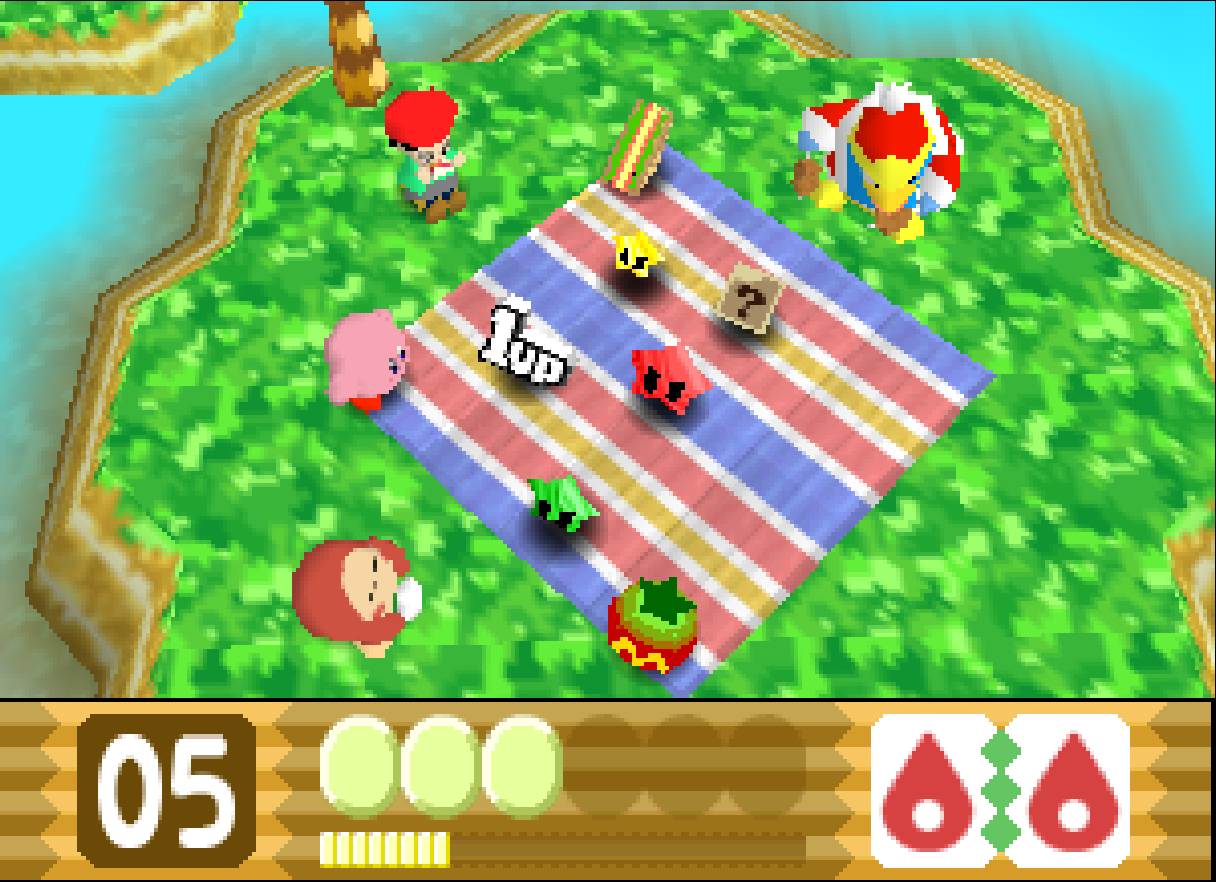
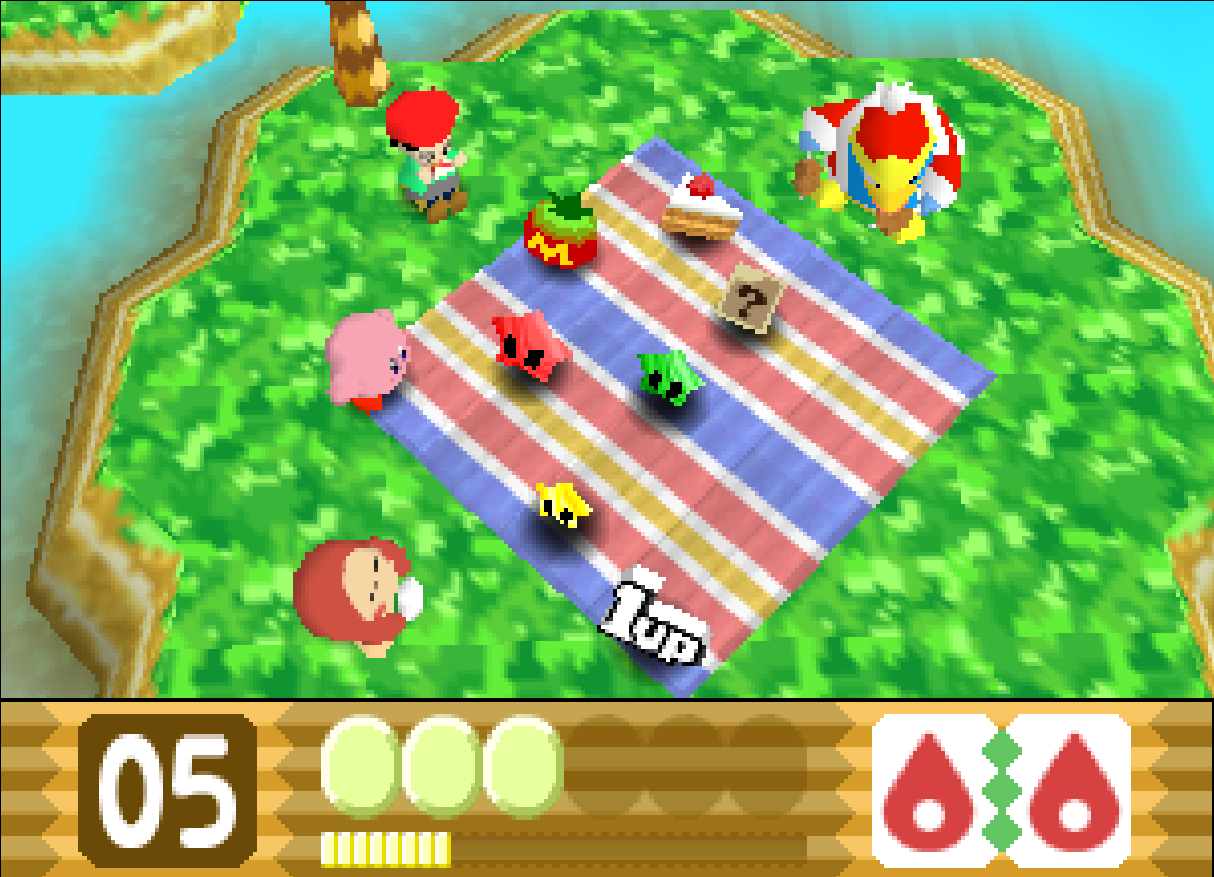
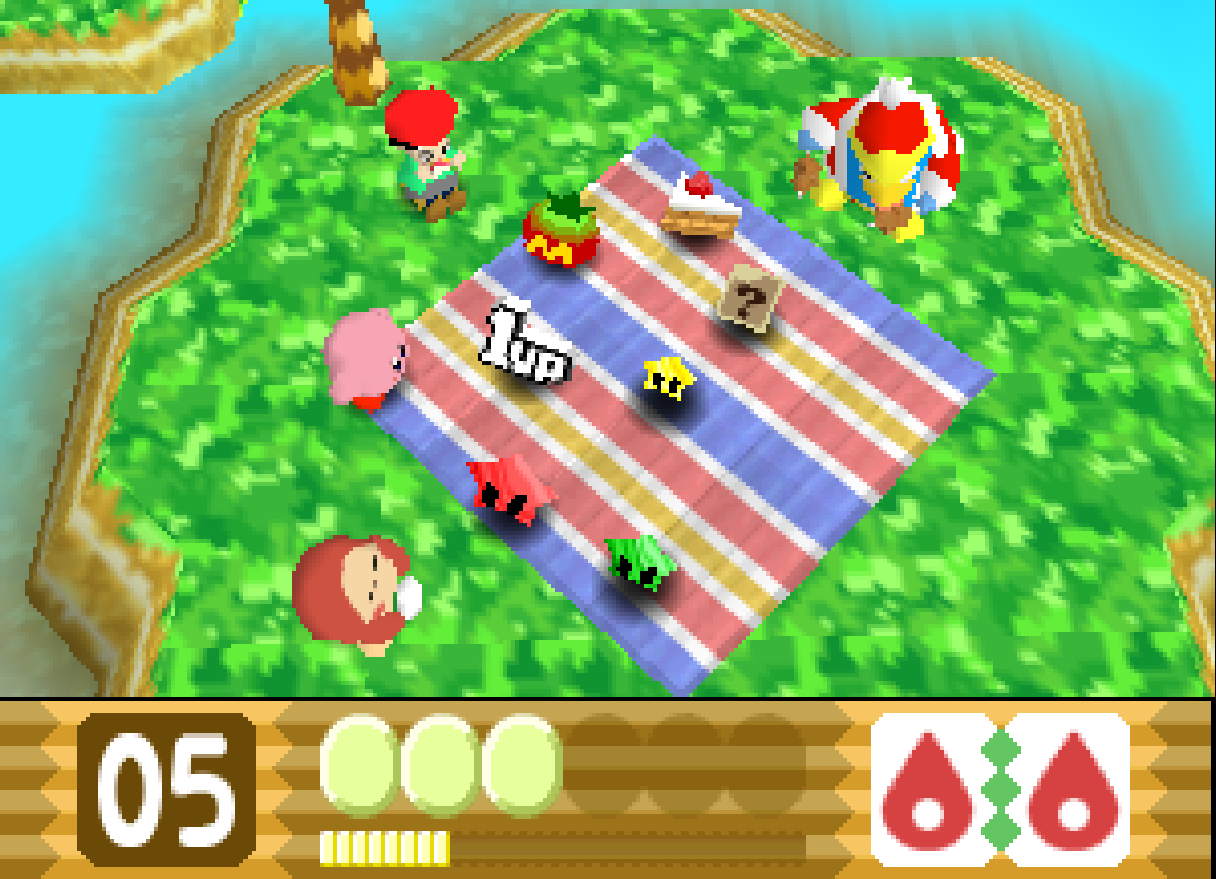
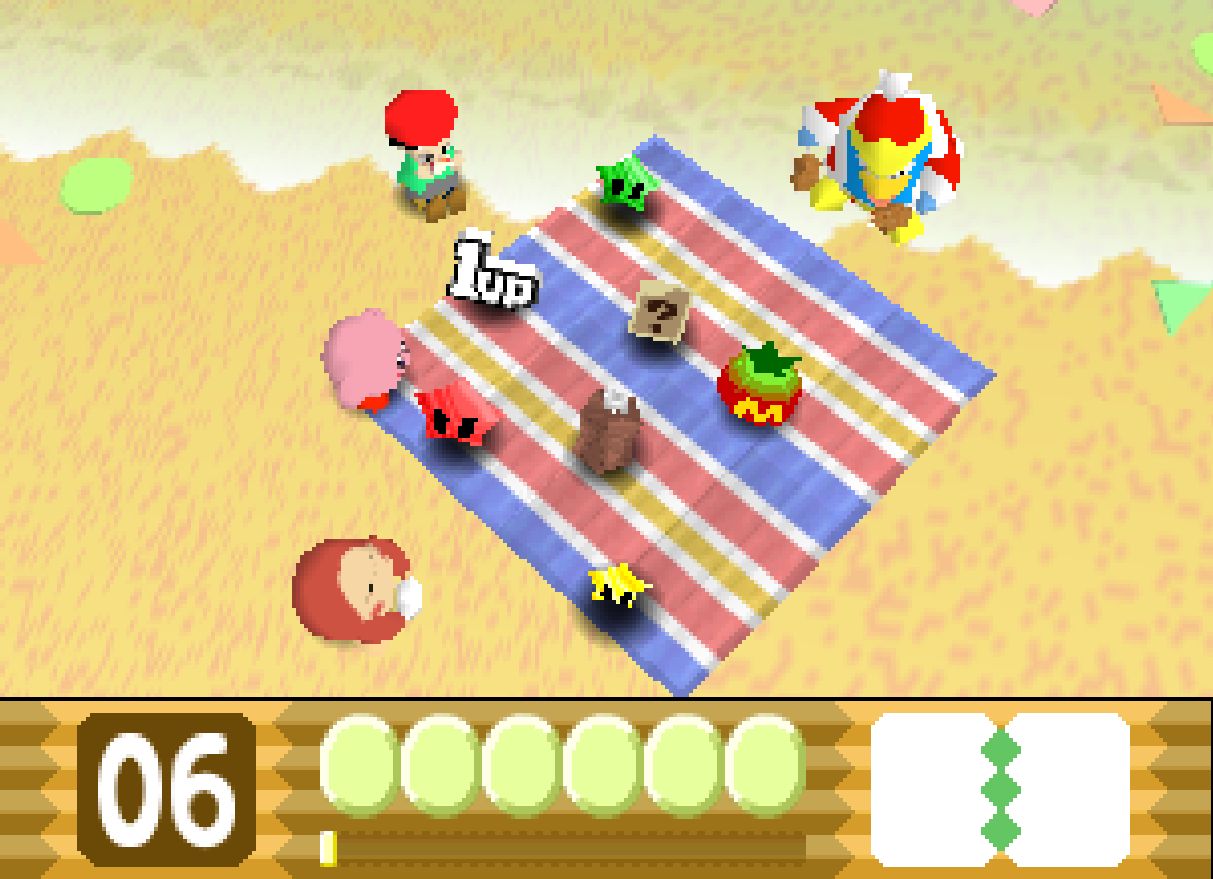
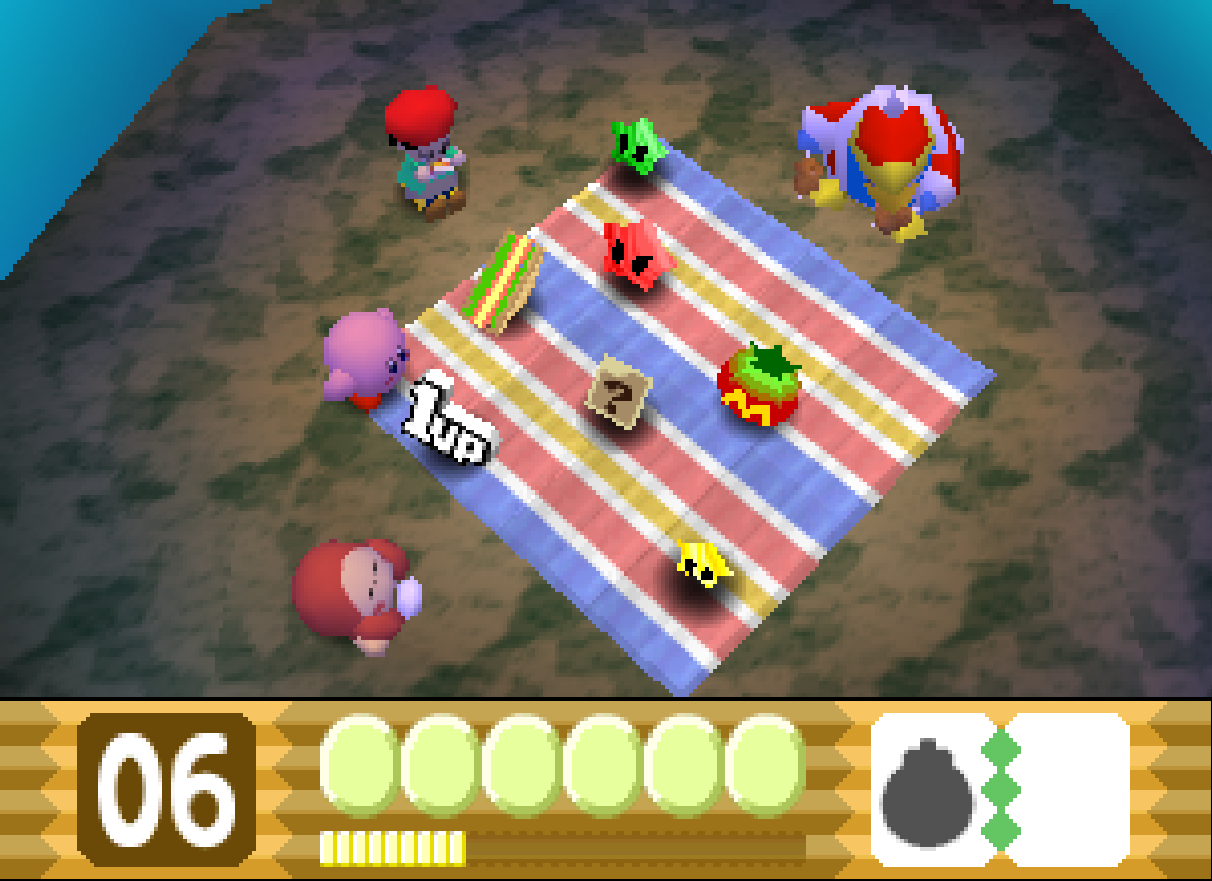
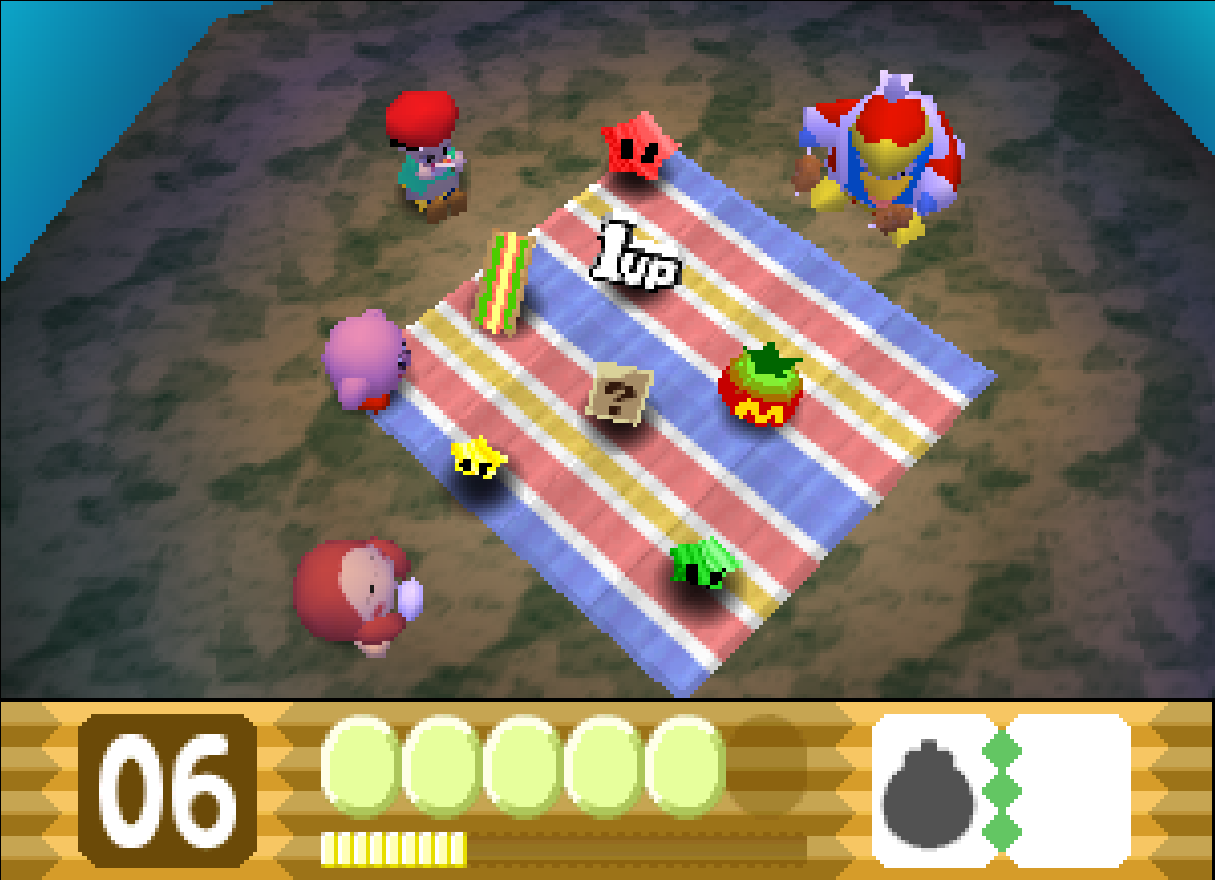
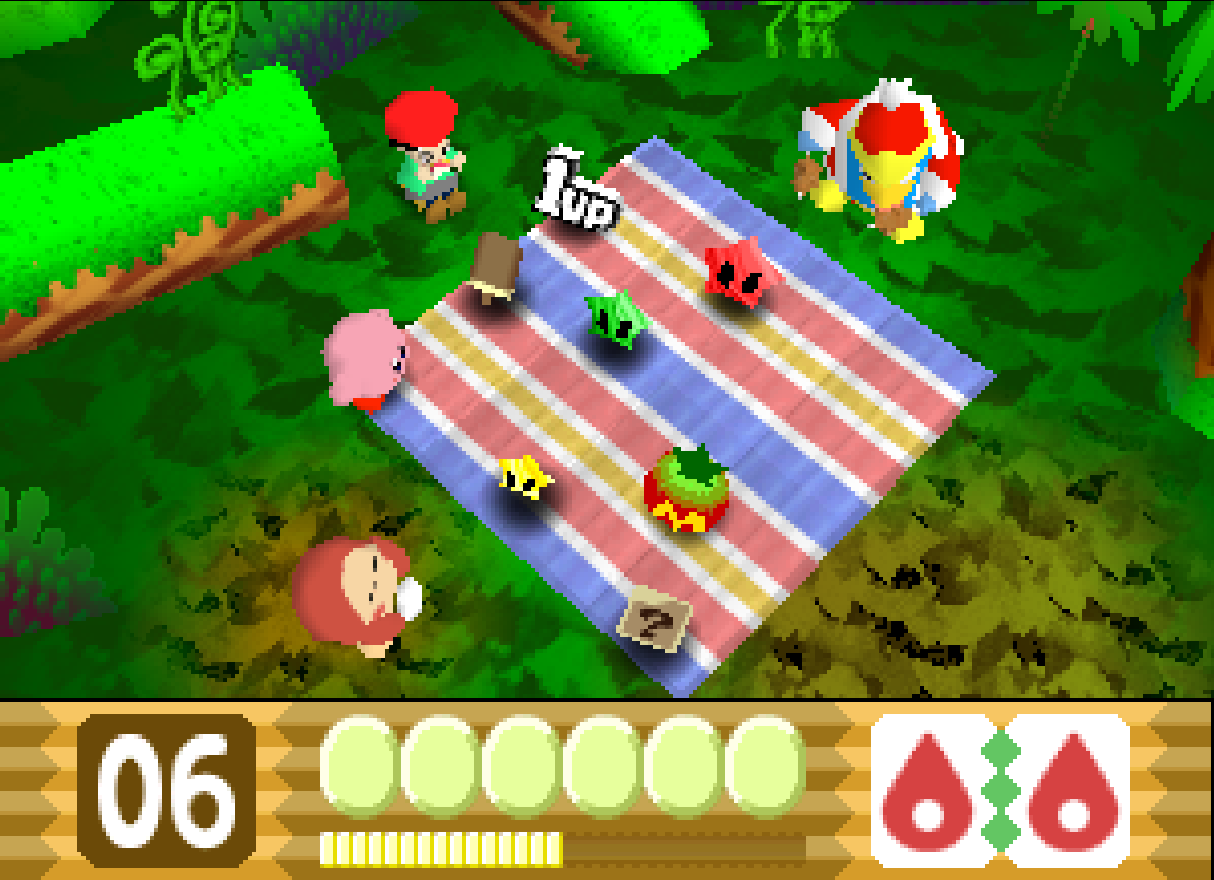
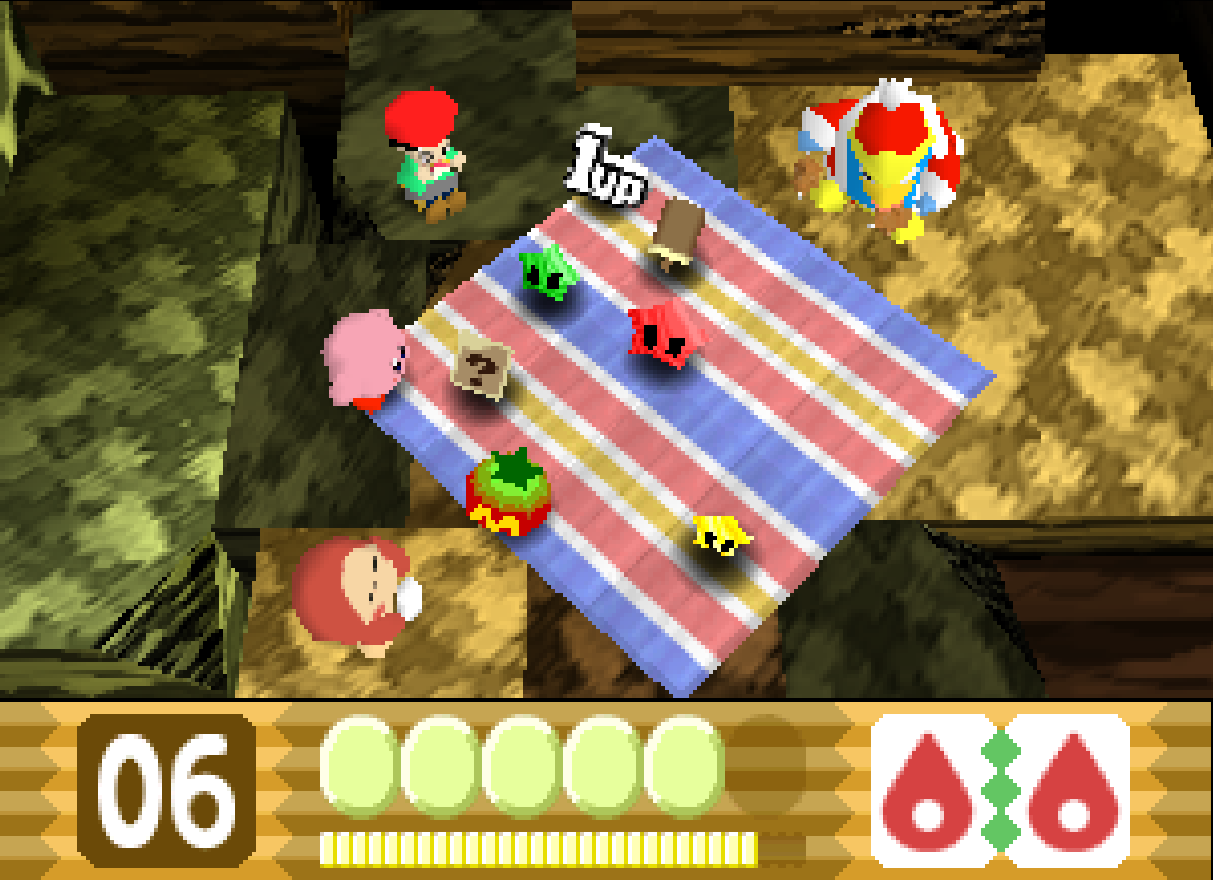
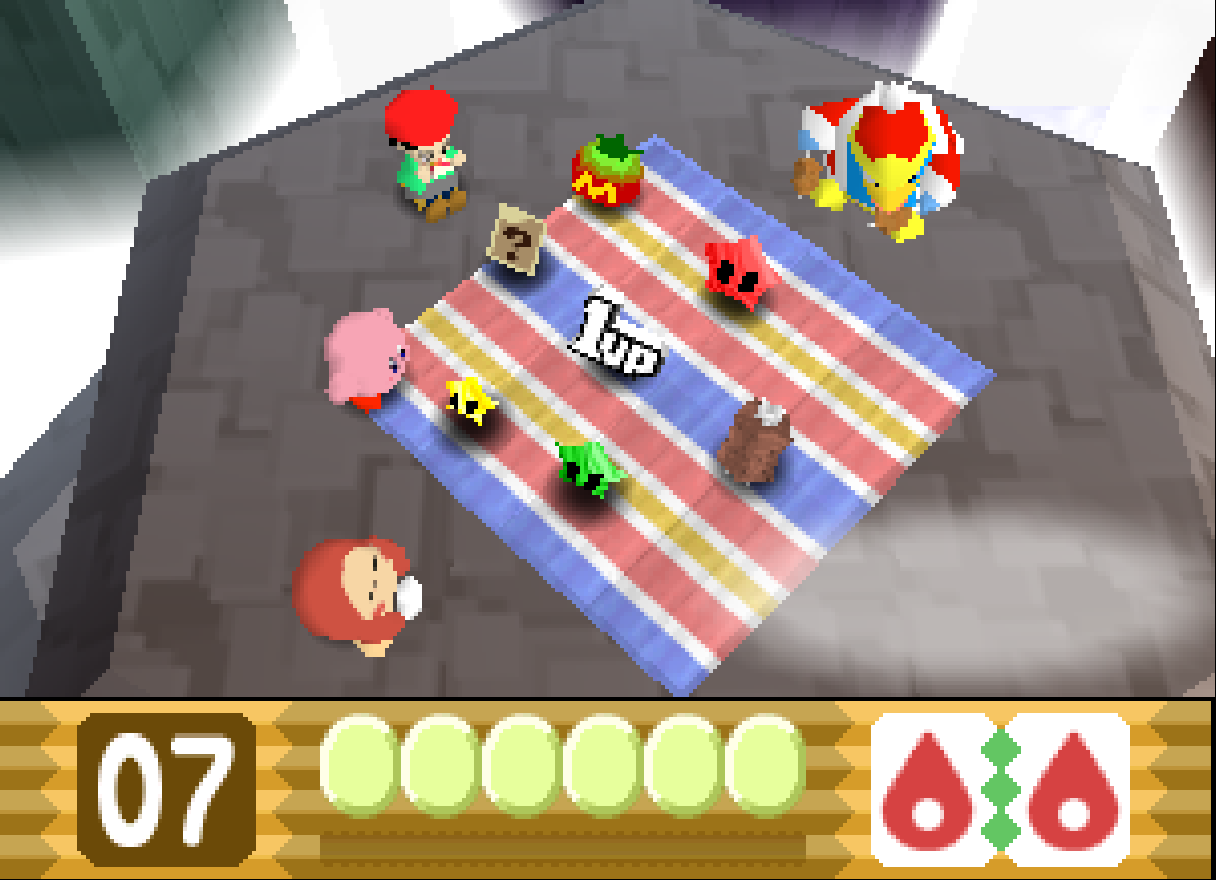
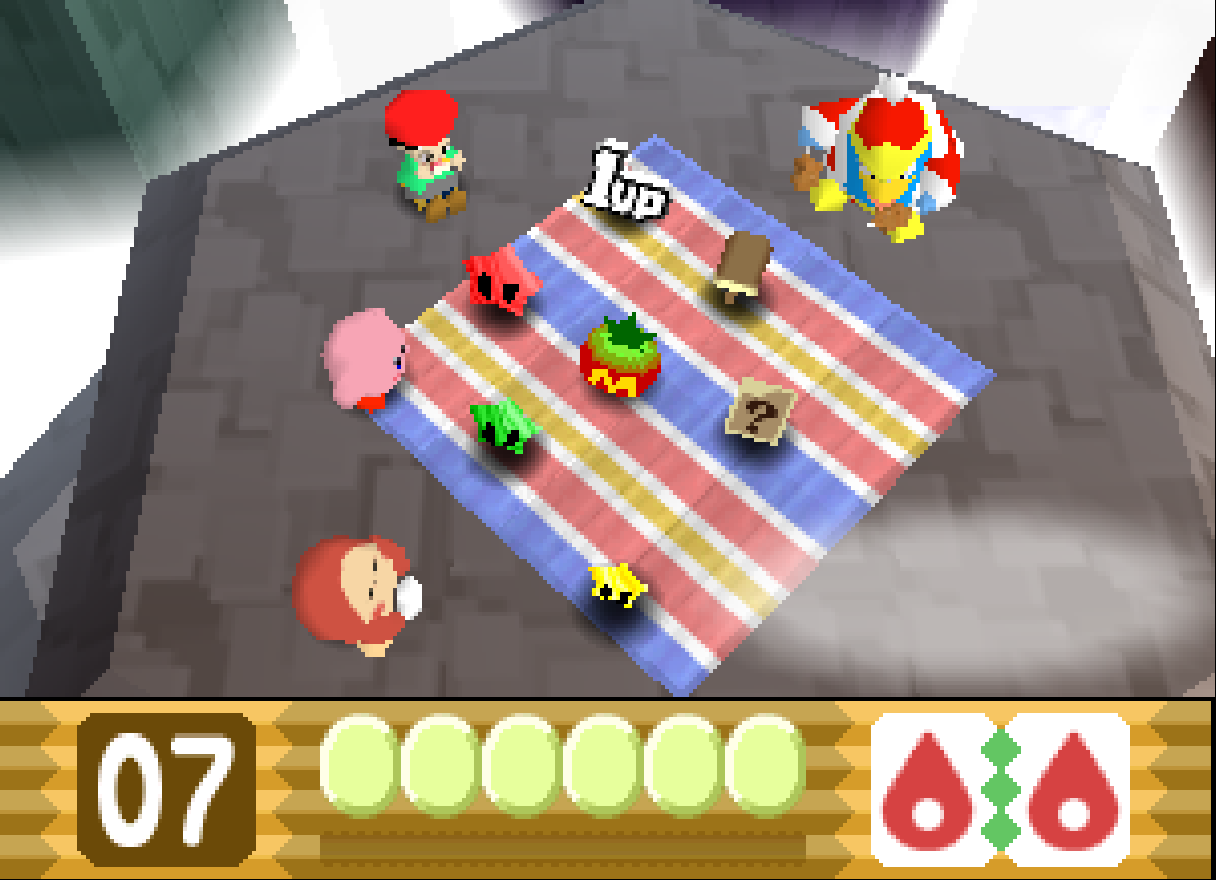
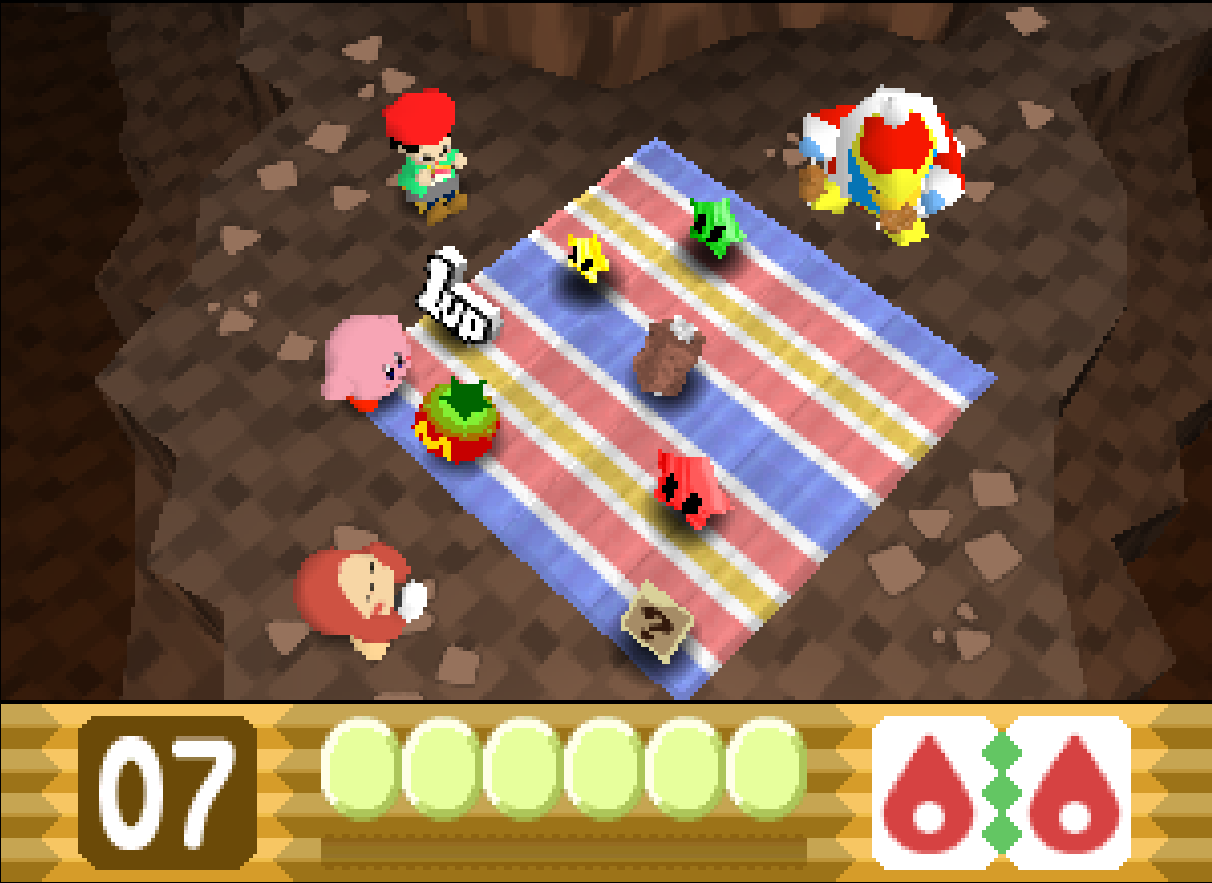
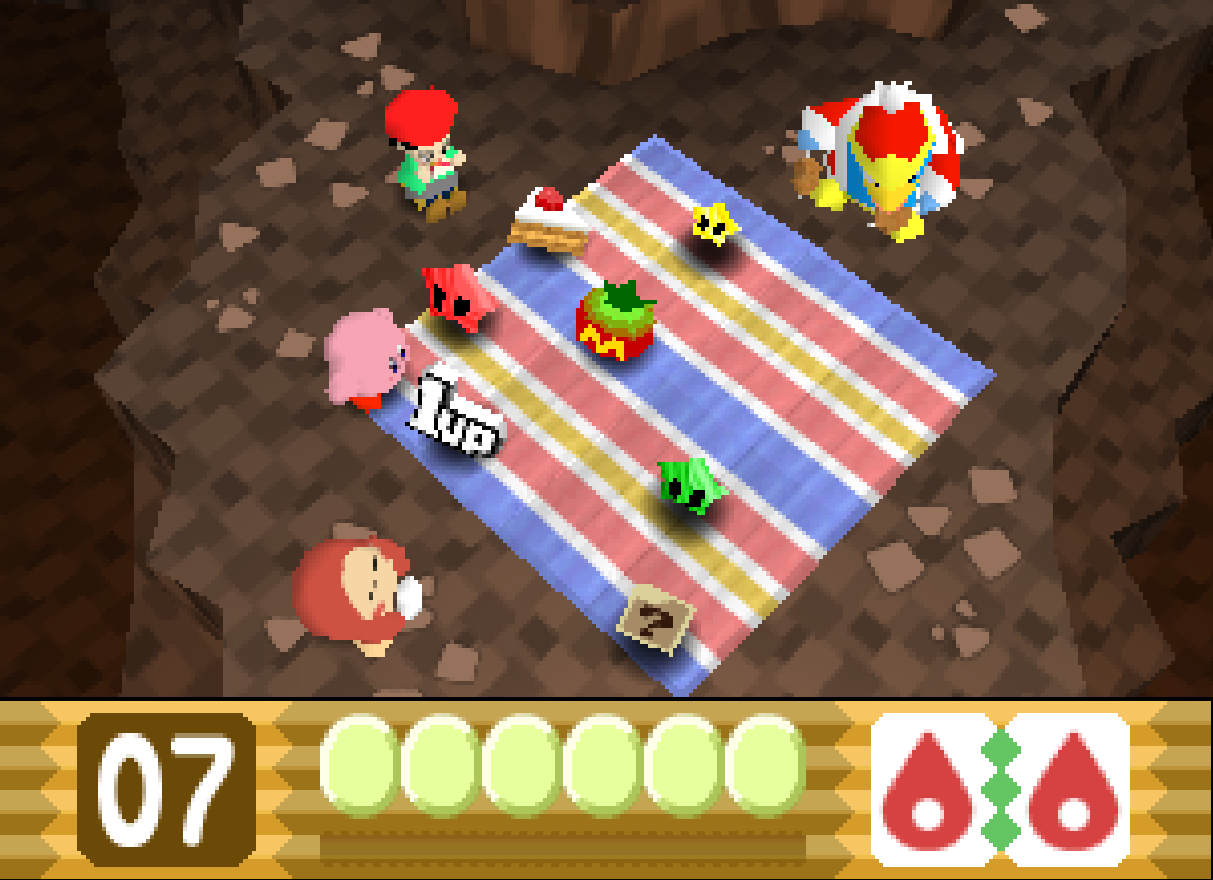
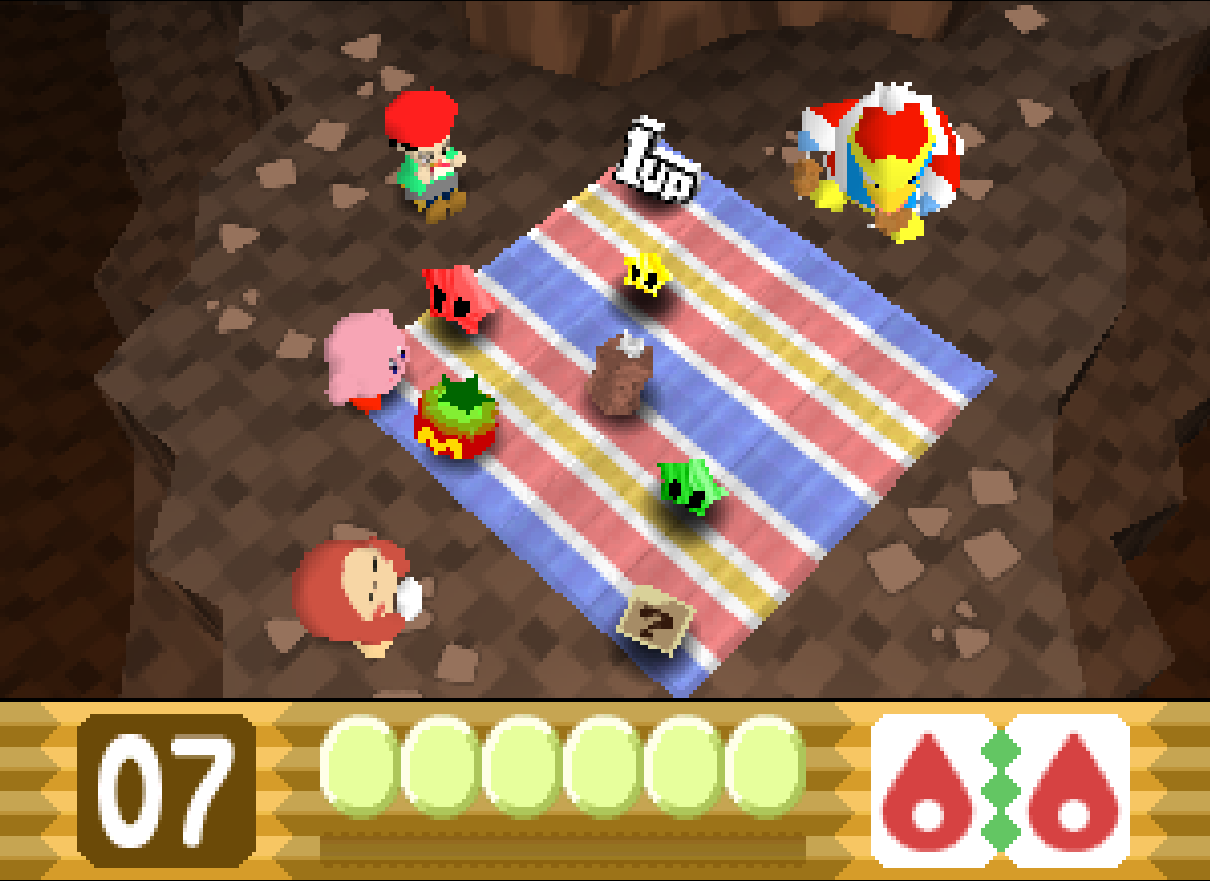
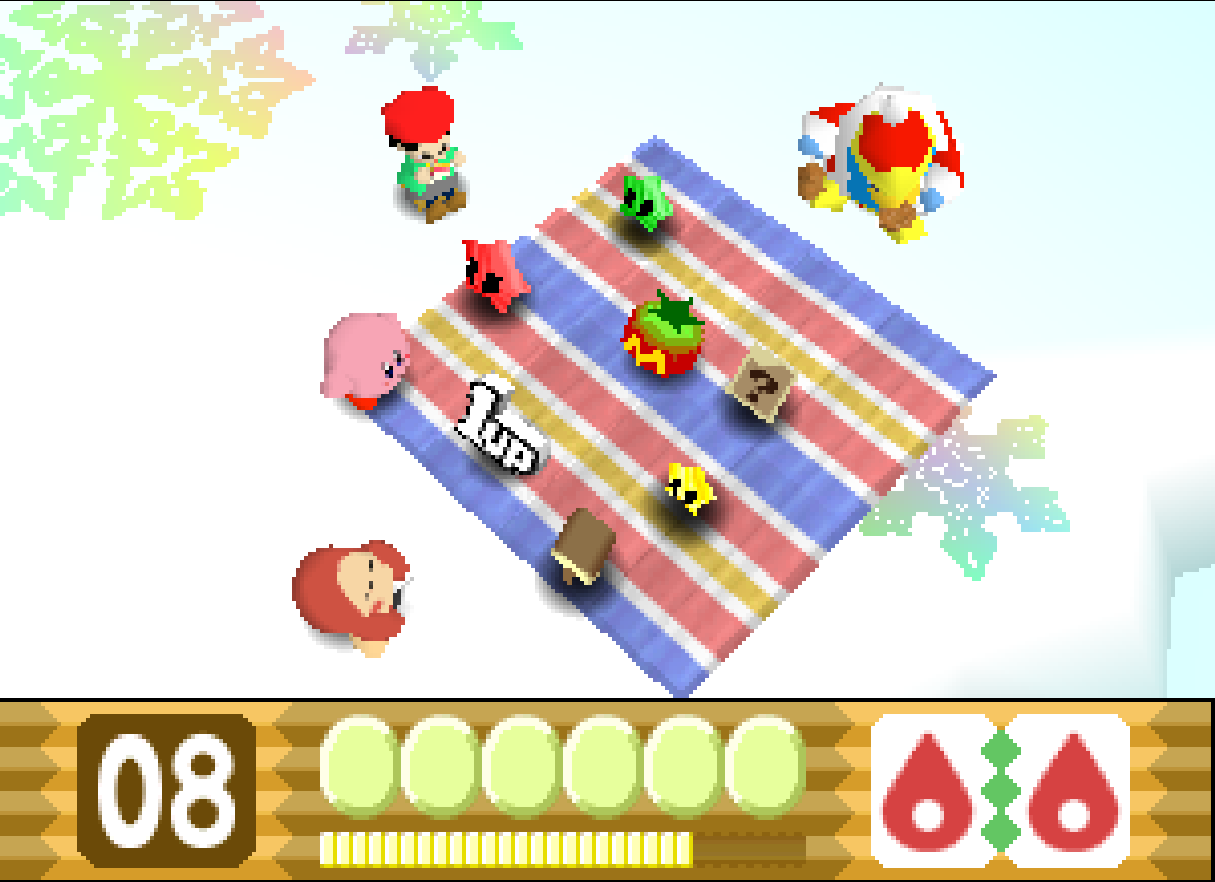
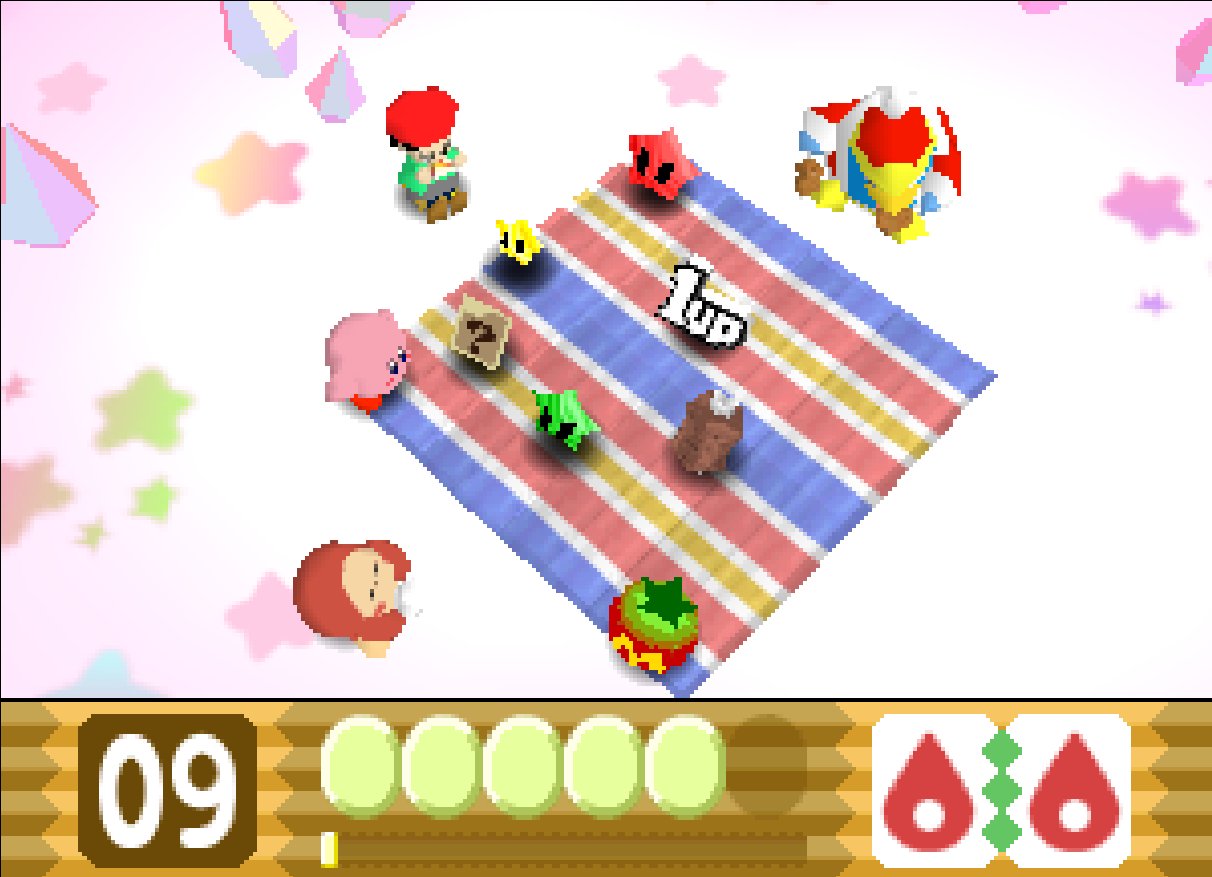
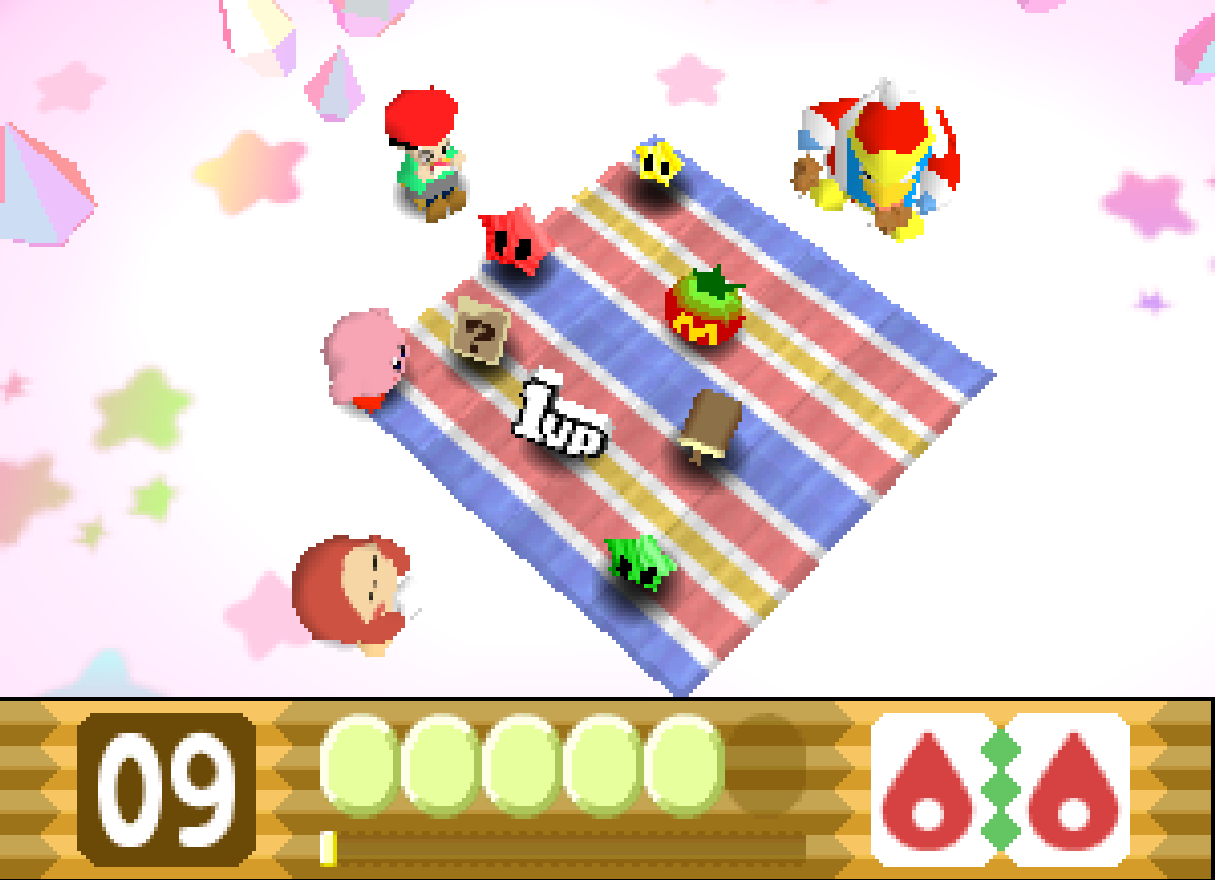
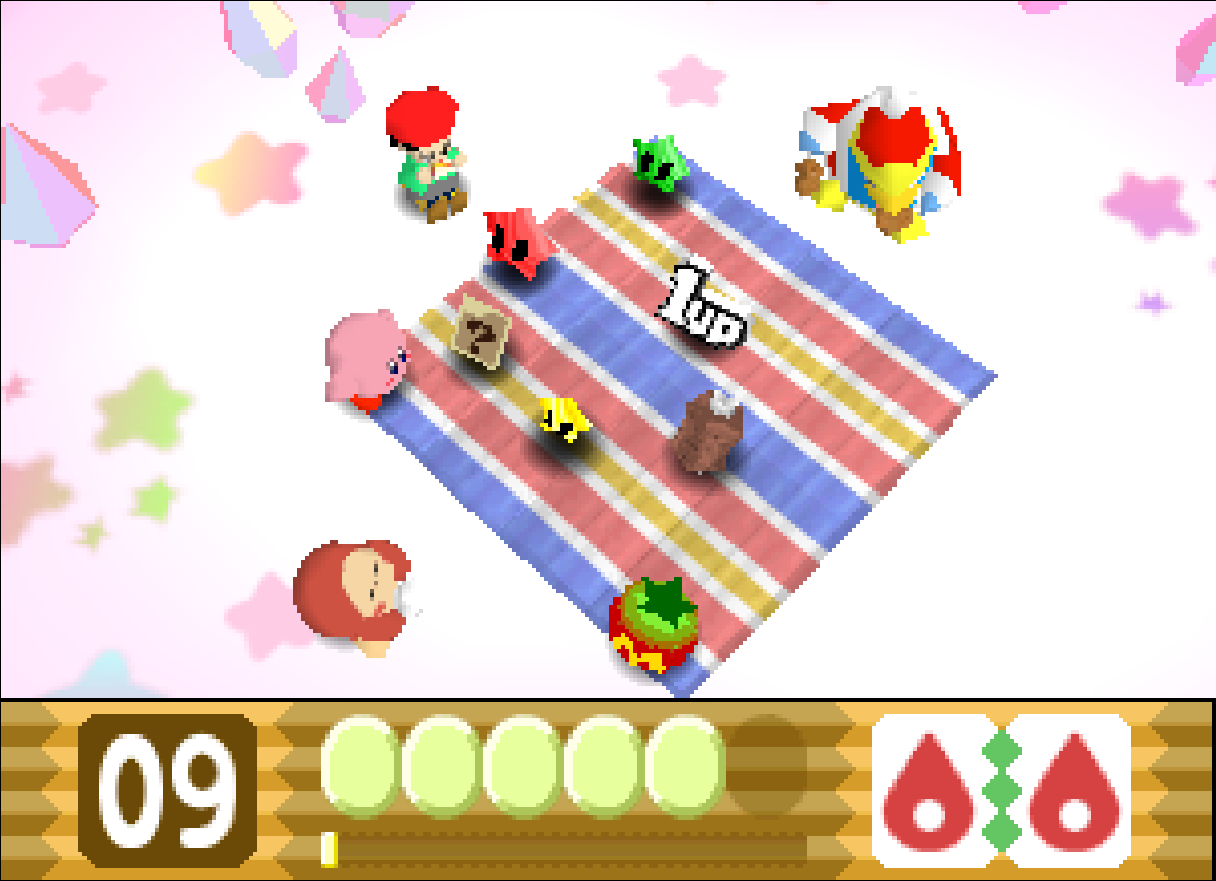
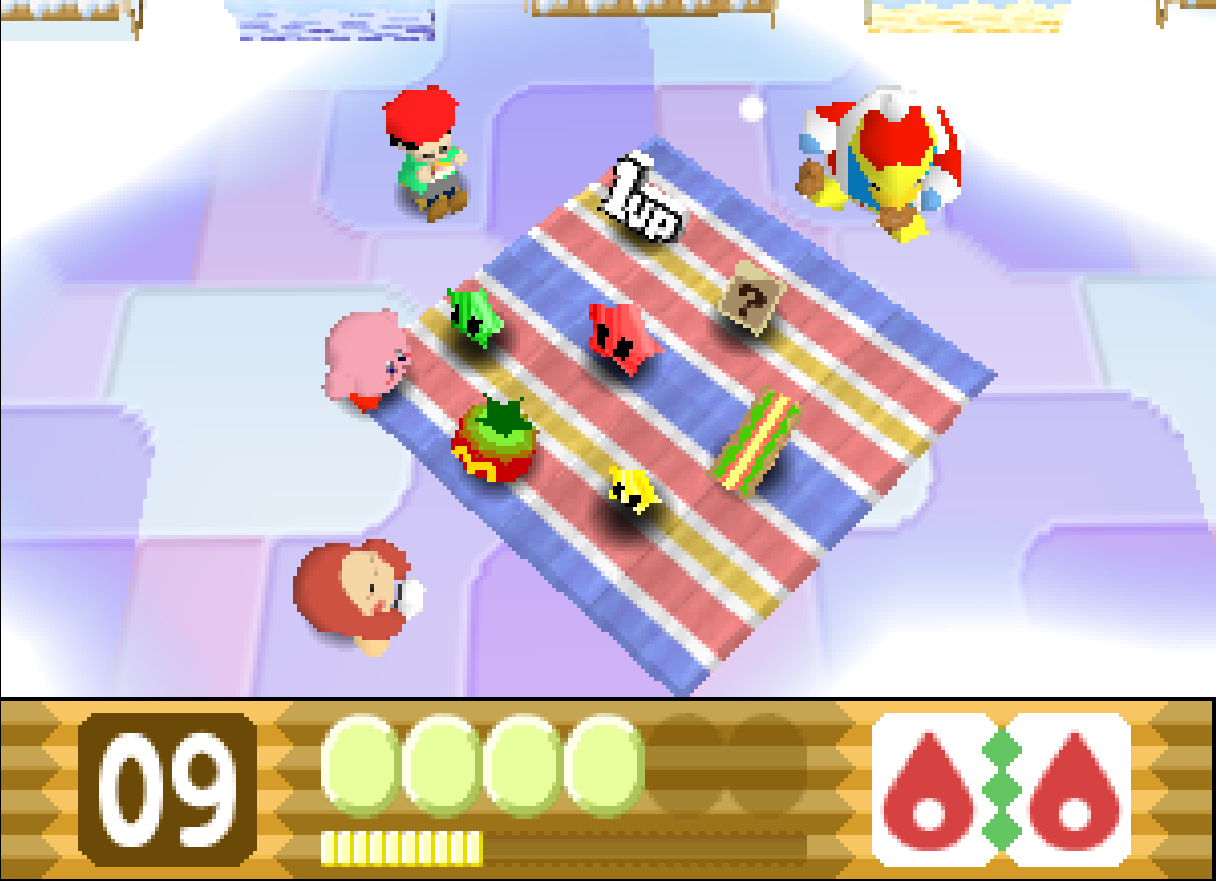
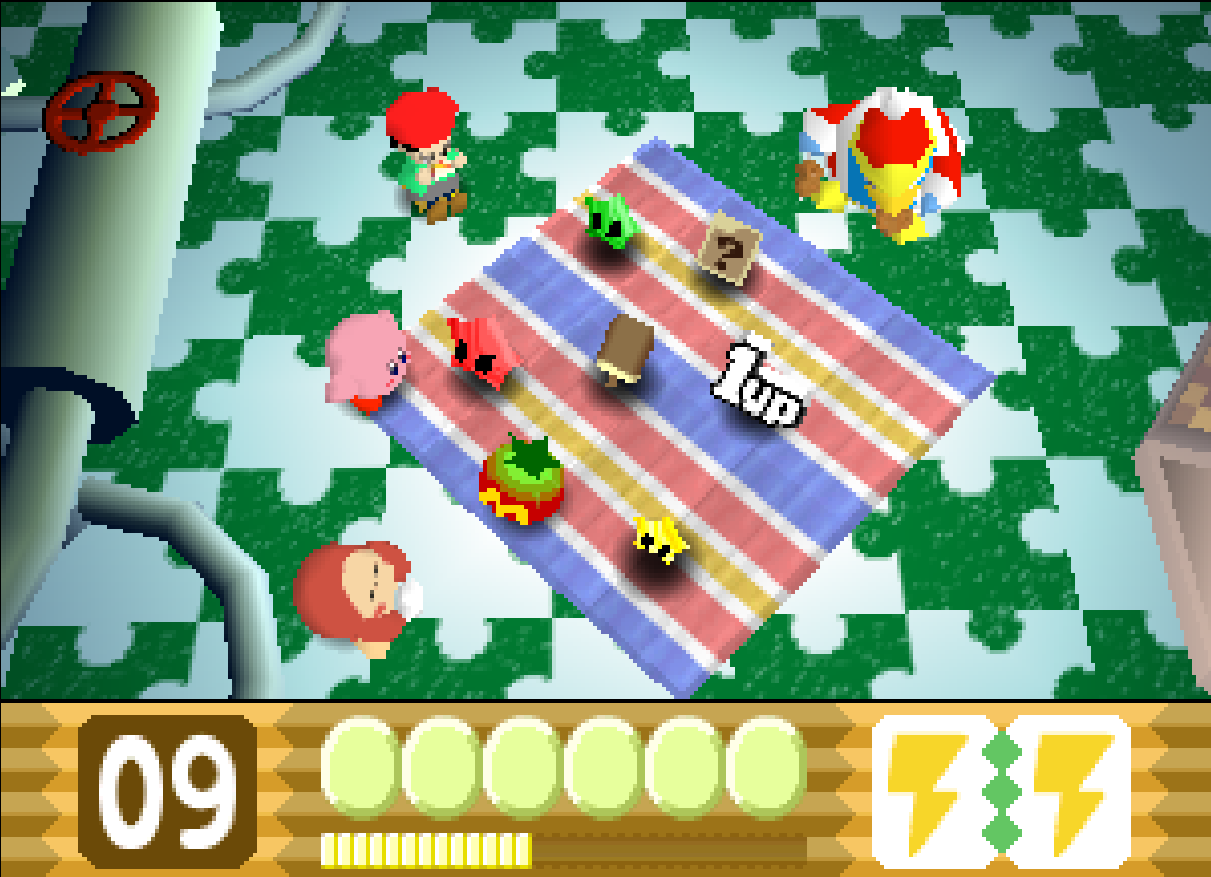
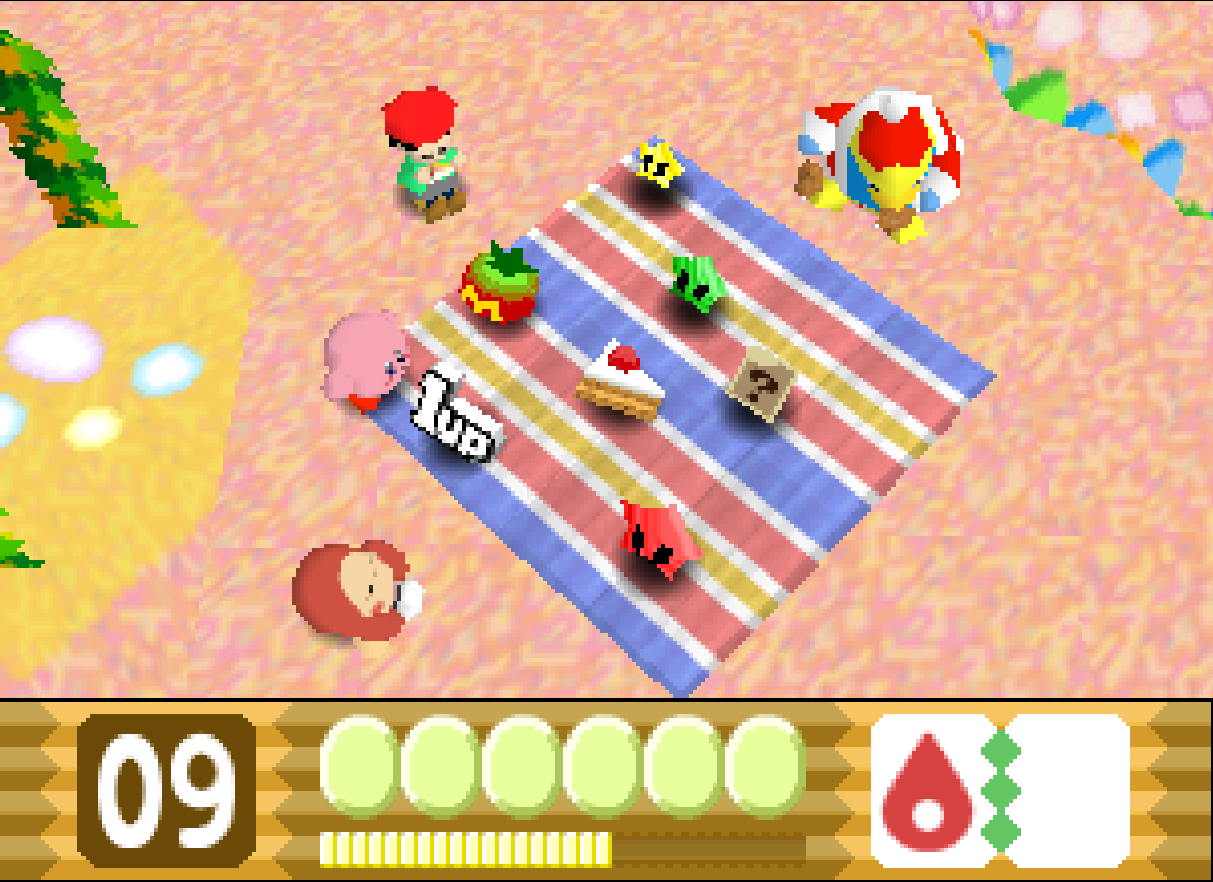
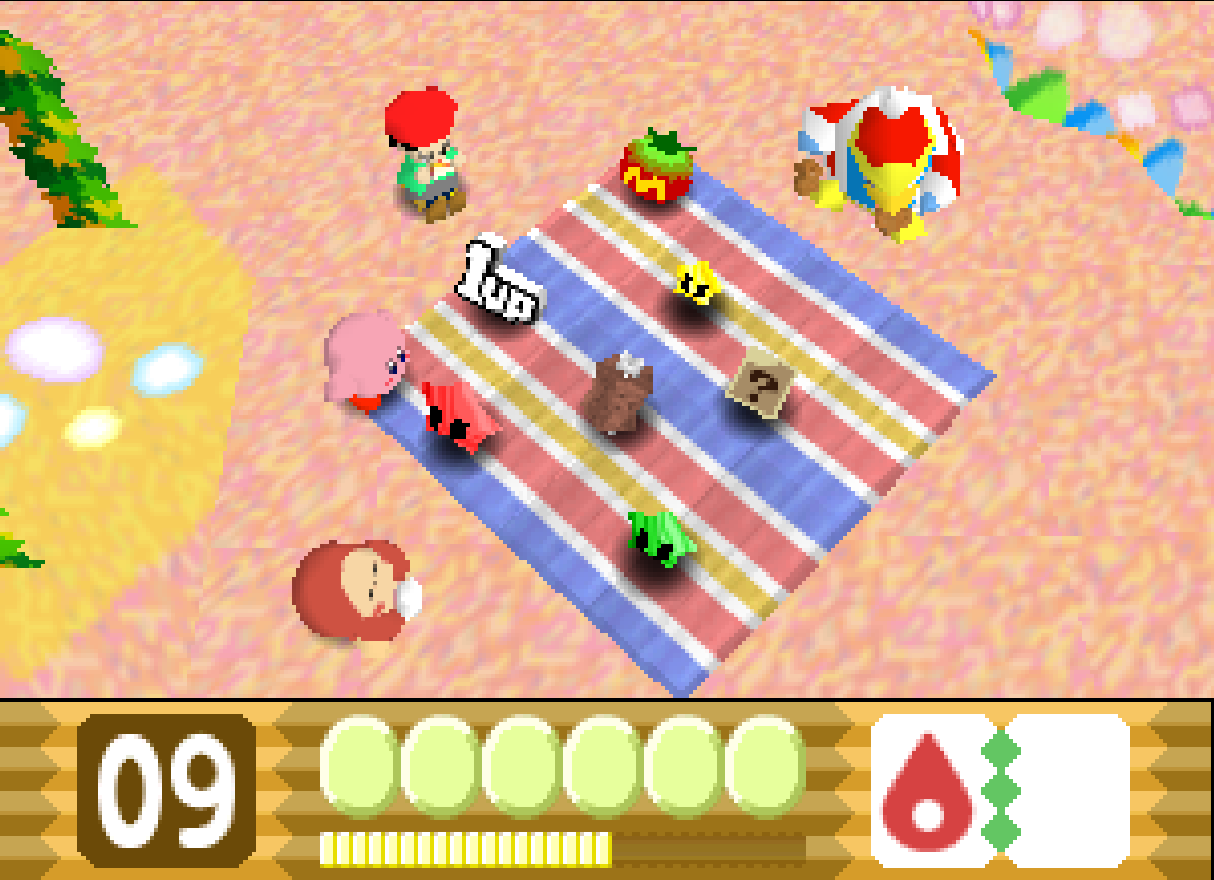
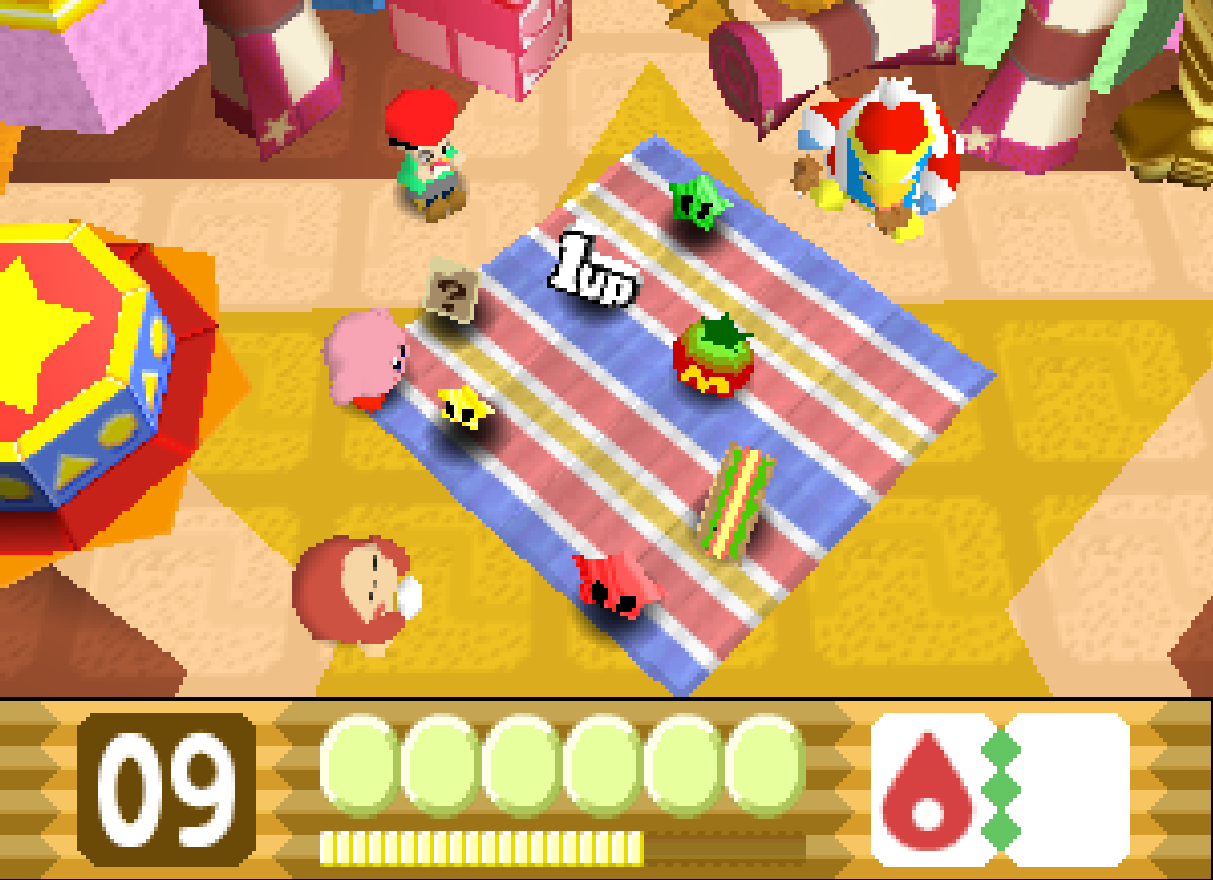
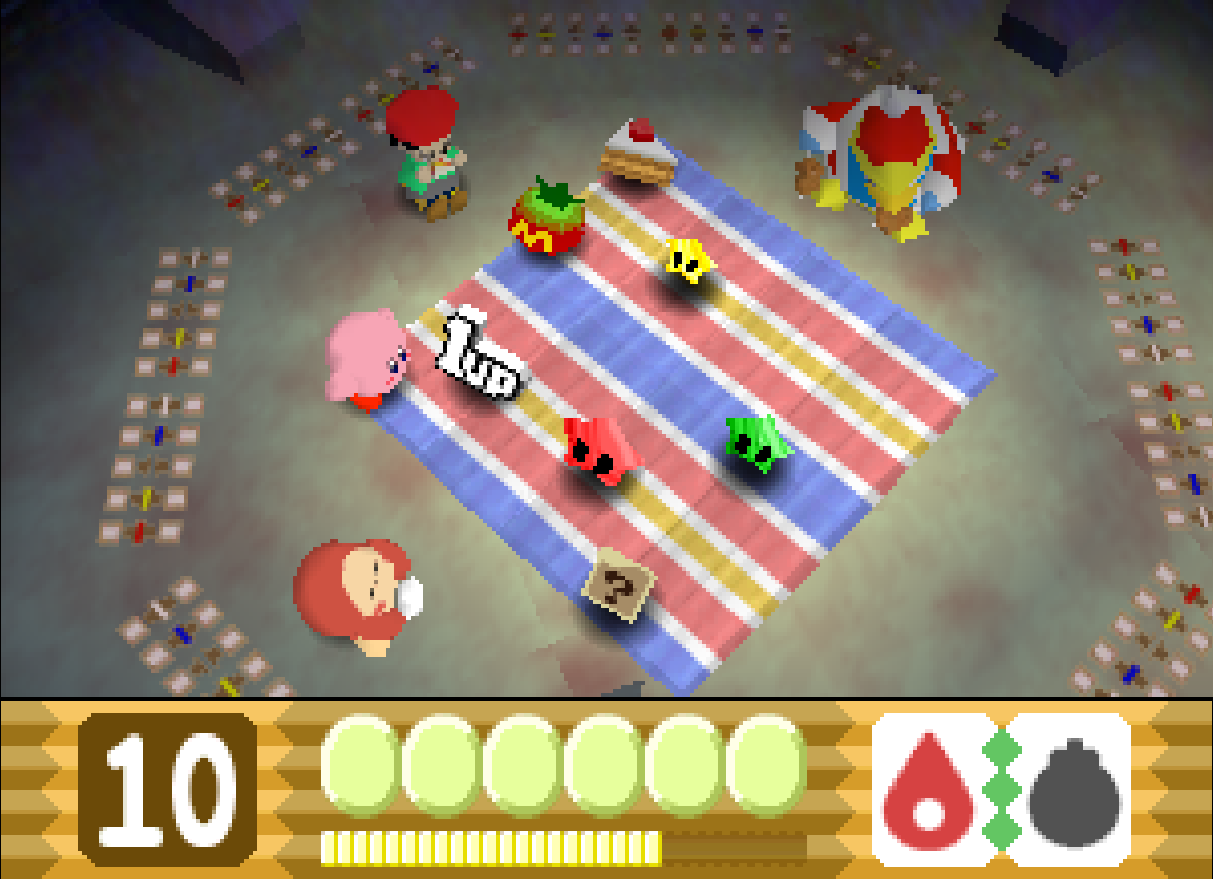
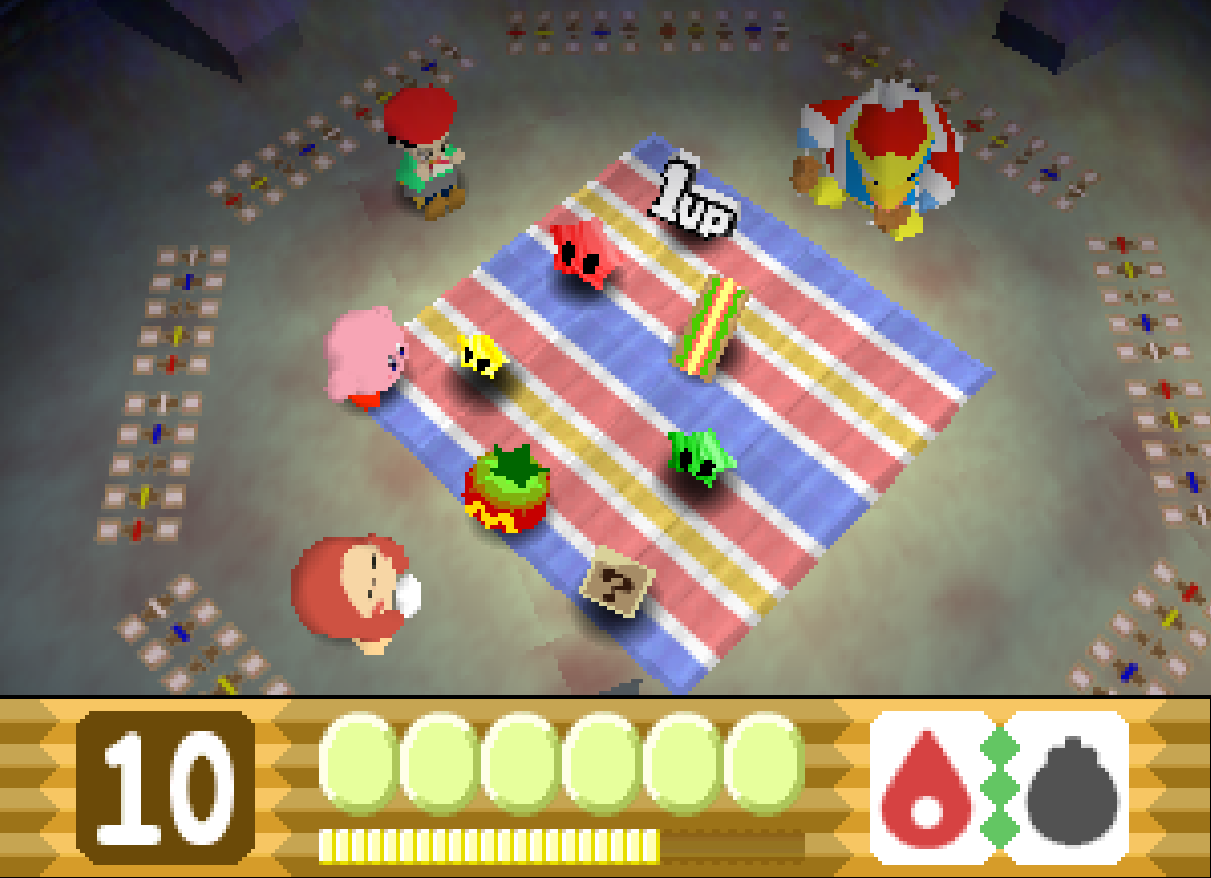
The instructions for each level will start with a relatively consistent method to obtain the correct RNG value and copy ability starting from a reset; that way, runners can practice each level on console with the same RNG as during a run. Any time Kirby should advance RNG will be noted, as well as any noteworthy interactions with random enemies. For any sections of a level that do not have explicit instructions, the runner should use normal speedrun strategies and not go out of their way to interact with or avoid enemies. Each section will end with a picture of the picnic or picnics that will indicate that the RNG value is correct, starting with the picnic that will appear if the manip was performed correctly (in some cases multiple RNG values will result in the same value after the picnic is spawned, even though the picnics themselves will be different). Any picnics that give an RNG value nearby the target value will also be shown. If there is more than one level-end RNG value that will result in the correct or a usable value after the picnic spawns, the distance between those RNG values and the target value will be noted. The enemy info card from the picnic should not be collected unless specifically instructed to do so.
Before the run starts
Reset the game and mash A through the opening screens to get to the file select screen as quickly as possible. It is recommended to keep a completed file in order to set up the manip before each run. Select any file and choose the mini-games option. Choose any mini-game on any difficulty and pick a character, paying attention to the characters the COM chooses. If the COMs are any of the three following combinations (listed from left to right - order matters), follow the given instructions:
- King Dedede, Kirby, Kirby: Either connect a second controller and choose two characters at once so that there are two COMs, then start the run, or enter and immediately exit Boss Battles twice, then start the run.
- Kirby, Kirby, Waddle Dee: Either connect a second and third controller and choose three characters at once so that there is one COM, or enter and immediately exit Boss Battles once, then start the run.
- Kirby, Waddle Dee, Kirby: Start the run.
If none of the above combinations appear, press B to exit out and choose another character. If no above combination appears after 3 iterations, the opening screens were not skipped quickly enough and the process must be restarted from the beginning. Once the run is set up, be sure not to choose more characters, play a mini-game, play the wrong file, or exit back to the title screen; otherwise, the game will have to be reset and the run will need to be set up again.
World 1
This manip aims for the same end-of-level RNG values as the 100% manip for world 1, meaning all of the picnics will be the same for world 1 in both routes.
1-1
Practice Setup
To practice the manip starting at this stage, follow the instructions in the previous section.
Route
Inhale the Bobo at the start of the level, and spit it at the next Bobo to obtain double fire. After the N-Z miniboss, jump high enough to not disturb the first Flutter while using double fire. After the final double fire usage of the room, quickly start running and slide into the loading zone to the Waddle Doo fight so that the Flutter doesn't advance RNG too much. The RNG should be on one of two values at this point, both of which should work. Avoid advancing RNG during or after the fight, but wait until Waddle Doo charges across the screen before ending the fight.
See the video below for an example of a successful 1-1 manip:
Picnic that gives the correct RNG value
1-2
Practice Setup
To practice the manip starting at this stage, reset the game and don't press anything until the opening cutscene plays. Skip the cutscene and mash A to skip the title screen, then go to 'Options,' 'Mini-Games,' and play single-player 100-Yard Hop. Immediately pause and choose 'Play Again' 7 times, then quit as long as the puddle is on the third space. If not, reset and try again. Choose a file with 1-2 unlocked, then obtain double fire from 1-1 without advancing RNG after entering the stage. After this the RNG value will be correct and 1-2 can be practiced.
Route
Run a short distance, jump, and use double fire, trying to land on the second dandelion to destroy it quickly. If too slow, that dandelion will advance RNG an extra time. Slide off of the last stump and quickly use double fire to fly over the Sparky at the end of the room, which should do a small jump. If the Sparky jumps into Kirby and dies, RNG will most likely be 2 values behind, and will need to be advanced 2 extra times at the start of the Adeleine fight. Climb the tree quickly, not advancing RNG and jumping over the last Sparky, which should jump away from Kirby.
Advance RNG 7 times during the first phase of Adeleine (9 if RNG was 2 behind). It's recommended to duck 3 times before destroying the first enemy, then stand still once after each enemy. Immediately stand to the left of where Ice Dragon will spawn to advance RNG once. Adeleine should only nod once after waving her brush. In this case, advance RNG 5 times before Dark Matter spawns. If Ice Dragon was beaten slowly and Adeleine nods twice after waving, advance RNG 4 times before Dark Matter spawns. Advance RNG one more time after defeating it. Stand still to advance RNG one final time before grabbing the crystal shard.
See the video below for an example of a successful 1-2 manip:
Picnic that gives the correct RNG value
1-3
Practice Setup
To practice the manip starting at this stage, reset the game and don't press anything until the opening cutscene plays. Skip the cutscene and mash A to skip the title screen, then play single-player 100-Yard Hop. Immediately pause and choose 'Play Again' 17 times, then 'Play Another Game.' Select 100-Yard Hop again and keep choosing a character, then pressing B to exit and choosing another character until the COMs are Kirby, King Dedede, Waddle Dee, in that order. If the combination doesn't appear within a few iterations, reset and start from the beginning. Once that combination appears, choose a file with 1-3 unlocked, obtain double fire from 1-1 and advance RNG twice after entering the stage, then exit the level. At this point the RNG value will be correct and 1-3 can be practiced.
Route
Advance RNG twice before Dedede performs his first attack. It's recommended to do both advancements at the start of the fight to avoid losing time, but the advancements should theoretically work no matter where in the level they are performed. Land the third hit as Dedede jumps to do his hammer attack, then advance RNG once. Finish off Dedede as quickly as possible and don't advance RNG any further.
See the video below for an example of a successful 1-3 manip:
Picnic that gives the correct RNG value
Whispy Woods
Practice Setup
To practice the manip starting at this boss, reset the game and go to the title screen, then wait until the first demo starts playing. Immediately press A to skip it and mash A through the title screen to get to file select. Play single-player 100-Yard Hop, but if the COMs are Waddle Dee, Adeleine, and Waddle Dee, in that order, press B and choose a character again, then enter the game. Immediately pause and choose 'Play Again' 4 times, then 'Play Another Game.' Select 100-Yard Hop again and keep choosing a character, then pressing B to exit and choosing another character until the COMs are Kirby, King Dedede, Adeleine, in that order. If the combination doesn't appear within a couple iterations, reset and start from the beginning. Once that combination appears, choose a file with Whispy unlocked, obtain double fire from 1-1 without advancing RNG after entering the stage, then exit the level. At this point the RNG value will be correct and Whispy can be practiced.
Route
Jump over the Whispy Jr. to the left, then use double fire to the left, damaging both that Whispy Jr. and the one to the left of it. Turn around and double fire to the right, hitting the same two Whispy Jr.s, then hit the third one twice. RNG should not be advanced by Kirby at any point during the fight. Whispy should give roots first and no puffs and must be 2-cycled to end with the correct RNG value.
See the video below for an example of a successful Whispy manip:
World 2
2-1
Practice Setup
To practice the manip starting at this stage, reset the game and go to the title screen, then wait until the first demo starts playing. Immediately press A to skip it and mash A through the title screen to get to file select. Play single-player 100-Yard Hop, but if the COMs are Waddle Dee, Adeleine, and Waddle Dee, in that order, press B and choose a character again, then enter the game. Immediately pause and choose 'Play Again' 6 times, then 'Play Another Game.' Select 100-Yard Hop again and keep choosing a character, then pressing B to exit and choosing another character until the COMs are Waddle Dee, Kirby, Kirby, in that order. If the combination doesn't appear within a couple iterations, reset and start from the beginning. Once that combination appears, choose a file with 2-1 unlocked, obtain double fire from 1-1 or 2-1 and advance RNG twice after entering the stage, then exit the level. At this point the RNG value will be correct and 2-1 can be practiced.
Route
Advance RNG 10 times in the room that fills with sand. It is recommended to advance RNG 8 times at the start of the room and once while waiting for Waddle Dee, then duck to avoid idle animations so that Kirby advances RNG the final time when Waddle Dee spawns and forces Kirby to stand up.
See the video below for an example of a successful 2-1 manip:
Picnic that gives the correct RNG value
2-2
Practice Setup
To practice the manip starting at this stage, reset the game and don't press anything until the opening cutscene plays. Skip the cutscene and mash A to skip the title screen, then play single-player 100-Yard Hop. Immediately pause and choose 'Play Again' 4 times, then 'Play Another Game.' Select 100-Yard Hop again and choose a character. The COMs should all be Kirby. If not, reset and start from the beginning. If that combination appears, choose a file with 2-2 unlocked, obtain double fire from 1-1 or 2-1 and advance RNG twice after entering the stage, then exit the level. At this point the RNG value will be correct and 2-2 can be practiced.
Route
At the start of the level, run for a short distance and jump, using double fire high enough to leave the Sparky alive and land on top of the middle pillar. If Kirby falls short, RNG will advance at least one extra time. Destroy the second Sparky with double fire ASAP, as it's attacking. For consistent results, in the room before the Dedede section, go slightly slow when either Sparky is spawned, since they both need to advance RNG an extra time. Leave the first Sparky alive and destroy the second one with double fire.
See the video below for an example of a successful 2-2 manip:
Picnic that gives the correct RNG value
2-3
Practice Setup
To practice the manip starting at this stage, reset the game and go to the title screen, then wait until the first demo starts playing. Immediately press A to skip it and mash A through the title screen to get to file select. Play single-player 100-Yard Hop, but if the COMs are Waddle Dee, Adeleine, and Waddle Dee, in that order, press B and choose a character again, then enter the game. Immediately pause and choose 'Play Again' 14 times, then 'Play Another Game.' Select 100-Yard Hop again and keep choosing a character, then pressing B to exit and choosing another character until the COMs are King Dedede, Adeleine, Adeleine, in that order - then King Dedede, Adeleine, Adeleine a second time. If the combinations don't appear within a few iterations, reset and start from the beginning. Once those combinations appear, choose a file with 2-3 unlocked, go to 1-1 or 2-1, obtain double fire and advance RNG once after entering the stage, then exit the level. At this point the RNG value will be correct and 2-3 can be practiced.
Route
Space out the first 2 double fires so that Kirby lands on top of the second star block, then do a running jump and double fire all the way to the top of the skeleton's skull, trying to leave the first two Boneheads alive. Destroy the third Bonehead and pay attention to the rightmost Bo. If it travels up-right, then up, advance RNG once at some point in the level, after despawning all of the Bos. If it travels up-right, then right, do not advance RNG again.
See the video below for an example of a successful 2-3 manip:
Picnics that give the correct RNG value
The RNG values 4 before and 2 before the target value will also work.
Alternate picnic that gives a workable RNG value
The RNG value 1 after the target value will result in this picnic. If this picnic is created, the RNG value will be 3 behind. Advance RNG 3 times in the room with the first crystal shard in 2-4.
Alternate picnic that gives a workable RNG value
The RNG value 2 after the target value will result in this picnic. If this picnic is created, the RNG value will be 6 behind. Advance RNG 5 times in the room with the first crystal shard in 2-4, and once on the elevator to the miniboss.
2-4
Practice Setup
To practice the manip starting at this stage, reset the game and mash A to skip the opening screens and go straight to file select. Play single-player 100-Yard Hop and immediately pause and choose 'Play Again' 17 times, then 'Play Another Game.' Select 100-Yard Hop again and keep choosing a character, then pressing B to exit and choosing another character until the COMs are King Dedede, Adeleine, Waddle Dee, in that order. If the combination doesn't appear within a couple iterations, reset and start from the beginning. Once that combination appears, choose a file with 2-4 unlocked, go to 1-1 or 2-1, obtain double fire and advance RNG twice after entering the stage, then exit the level. At this point the RNG value will be correct and 2-4 can be practiced.
Route
Don't advance RNG at any point. If Kirby is at 1 HP when entering the room with the first crystal shard, advance RNG once after grabbing the Maxim Tomato.
See the video below for an example of a successful 2-4 manip:
Picnic that gives the correct RNG value
Pix
Practice Setup
To practice the manip starting at this boss, reset the game and don't press anything until the opening cutscene plays. Skip the cutscene and mash A to skip the title screen, then play single-player 100-Yard Hop. Immediately pause and choose 'Play Again' 23 times, then 'Play Another Game.' Select 100-Yard Hop again and keep choosing a character, then pressing B to exit and choosing another character until the COMs are King Dedede, Kirby, King Dedede, in that order. If the combination doesn't appear within a couple iterations, reset and start from the beginning. Once that combination appears, choose a file with Pix unlocked, go to 1-1 or 2-1, obtain double fire and advance RNG twice after entering the stage, then exit the level. At this point the RNG value will be correct and Pix can be practiced.
Route
Advance RNG once immediately upon gaining control, then put double fire in Kirby's mouth. Jump over Pix's first attack but don't move for the rest of phase 1 until the very end. Pix should give the droplet pattern. Spit double fire to the right and one-cycle the boss. Don't advance RNG after Pix is defeated.
See the video below for an example of a successful Pix manip:
World 3
3-1
Practice Setup
To practice the manip starting at this stage, reset the game and don't press anything until the opening cutscene plays. Skip the cutscene and mash A to skip the title screen, then play single-player 100-Yard Hop. Immediately pause and choose 'Play Again' 24 times, then 'Play Another Game.' Select 100-Yard Hop again and keep choosing a character, then pressing B to exit and choosing another character until the COMs are Kirby, Waddle Dee, Kirby, in that order. If the combination doesn't appear within a few iterations, reset and start from the beginning. Once that combination appears, choose a file with 3-1 unlocked, then enter and exit the level. At this point the RNG value will be correct and 3-1 can be practiced.
Route
Obtain single fire from the first Bobo. Throw it, don't spit it, at the second Bobo. to get double fire. When in the room with the Zebons, float quickly up the room, as going too slowly will cause the Zebons to advance RNG too much. In the next room, be sure to activate each Glom. The RNG could be on multiple values at this point, but they should all converge in the end. Don't destroy any of the Ticks when battling the miniboss. In the last room, run a short distance and jump before using the first double fire. Hold left while using it. Use the next double fire immediately, while on the ground, and also hold left during it so that the camera is all the way to the left when the Sparky spawns. The Sparky may or may not die, depending on the RNG value. Make sure to use the next double fire far enough to the right that Kirby can immediately slide off the raised platform after the first Zoos, otherwise it may have time to throw an extra lightningbolt and advance RNG.
See the video below for an example of a successful 3-1 manip:
Picnics that give the correct RNG value
The RNG values 4 before, 2 after, 4 after, and 6 after the target value will also work.
Alternate picnics that give a workable RNG value
The RNG values 3 before, 1 before, 1 after, and 3 after the target value will result in one of these picnics. If one of these picnics are created, the RNG value will be 5 too far. Destroy the Sparky at the beginning of the level and perform the Waddle Dee section the same with the following exceptions: Continue to jump when approaching the first 2 waterfalls to avoid advancing RNG when landing. Refrain from jumping after going over the third waterfall. Do not advance RNG when grabbing the ice cream near the end of the section.
3-2
Practice Setup
To practice the manip starting at this stage, reset the game and go to the title screen, then wait until the first demo starts playing. Immediately press A to skip it and mash A through the title screen to get to file select. Play single-player 100-Yard Hop, but if the COMs are Waddle Dee, Adeleine, and Waddle Dee, in that order, press B and choose a character again, then enter the game. Immediately pause and choose 'Play Again' 21 times, then 'Play Another Game.' Select 100-Yard Hop again and keep choosing a character, then pressing B to exit and choosing another character until the COMs are King Dedede, Waddle Dee, Adeleine, in that order. If the combination doesn't appear within a couple iterations, reset and start from the beginning. Once that combination appears, choose a file with 3-2 unlocked, obtain double fire from 1-1 or 2-1 without advancing RNG after entering the stage, then exit the level. At this point the RNG value will be correct and 3-2 can be practiced.
Route
Use double fire immediately, then jump before using it a second time so that the Sparky survives. Do not go out of the way to destroy or save any dandelions. Don't advance RNG when fighting the Kany miniboss. In the Waddle Dee section, follow the pattern of jumping shown below, making sure that consecutive jumps happen as soon as the crate touches the river so that RNG doesn't have a chance to advance.
See the video below for an example of a successful 3-2 manip:
Picnic that gives the correct RNG value
3-3
Practice Setup
To practice the manip starting at this stage, reset the game and mash A to skip the opening screens and go straight to file select. Play single-player 100-Yard Hop and immediately pause and choose 'Play Again' 9 times, then 'Play Another Game.' Select 100-Yard Hop again and keep choosing a character, then pressing B to exit and choosing another character until the COMs are Kirby, King Dedede, King Dedede, in that order. If the combination doesn't appear within a couple iterations, reset and start from the beginning. Once that combination appears, choose a file with 3-3 unlocked, obtain double fire from 1-1 or 2-1 and advance RNG once after entering the stage, then exit the level. At this point the RNG value will be correct and 3-3 can be practiced.
Route
Throw away double fire in the last room to advance RNG once.
See the video below for an example of a successful 3-3 manip:
Picnic that gives the correct RNG value
3-4
Practice Setup
To practice the manip starting at this stage, reset the game and don't press anything until the opening cutscene plays. Skip the cutscene and mash A to skip the title screen, then play single-player 100-Yard Hop. Immediately pause and choose 'Play Again' 3 times, then 'Play Another Game.' Select 100-Yard Hop again and keep choosing a character, then pressing B to exit and choosing another character until the COMs are King Dedede, Kirby, King Dedede, in that order. If the combination doesn't appear within a few iterations, reset and start from the beginning. Once that combination appears, choose a file with 3-4 unlocked, obtain double fire from 1-1 or 2-1 and advance RNG once after entering the stage, then exit the level. At this point the RNG value will be correct and 3-4 can be practiced.
Route
Immediately float to the top of the level while holding right, then exhale and fall straight down without touching the Dpad so that Kirby stays in the headfirst falling position. Make sure Kirby isn't too far to the right or he will bonk on the protrusions from the wall, and also make sure he isn't too far left or he will hit an enemy. Be ready to start holding down in case the third row of torpedoes on the right damages Kirby, since the RNG value will not be consistent throughout this room. If Kirby takes damage, make sure to destroy the torpedo from the fourth row on the right so it doesn't continue to advance RNG. Take note of when the torpedoes in the third and fourth rows on the right spawned. In the next room, listen to the sounds of the falling rocks to determine what actions should be taken in the rest of the level.
If Kirby did not take damage:
If the last 2 right-side torpedoes spawned simultaneously, don't throw the Flopper after using it.
If the last 2 right-side torpedoes did not spawn simultaneously and the 8th, 9th, and 10th rocks hit the ground it quick succession and there were 12 rocks total, don't throw the Flopper after using it.
If the last 2 right-side torpedoes did not spawn simultaneously and the 10th and 11th rocks hit the ground extremely close together and there were 12 rocks total, throw the Flopper after using it.
If the last 2 right-side torpedoes did not spawn simultaneously and there were 10 rocks total, throw the Flopper after using it as well as throwing 2 more enemies at some point in the level.
If Kirby took damage:
If the 8th and 9th rocks hit the ground close together and there were 12 rocks total, throw the Flopper after using it as well as throwing 1 more enemy at some point in the level.
If the 8th and 9th rocks hit the ground close together and there were 11 rocks total, throw the Flopper after using it as well as throwing 1 more enemy at some point in the level, and wait for 1 extra rock to break on the wall at the end of the last room before leaving the stage.
If multiple pairs of rocks hit the ground close together and there were 11 rocks total, throw the Flopper after using it and wait for 2 extra rocks to break on the wall at the end of the last room before leaving the level.
See the video below for an example of a successful 3-4 manip:
Picnics that give the correct RNG value
The RNG value 2 before the target value will also work.
Acro
Practice Setup
To practice the manip starting at this boss, reset the game and don't press anything until the opening cutscene plays. Skip the cutscene and mash A to skip the title screen, then play single-player 100-Yard Hop. Immediately pause and choose 'Play Again' 16 times, then 'Play Another Game.' Select 100-Yard Hop again and keep choosing a character, then pressing B to exit and choosing another character until the COMs are Adeleine, Adeleine, Waddle Dee, in that order. If the combination doesn't appear within a few iterations, reset and start from the beginning. Once that combination appears, choose a file with Acro unlocked, get bomb from 2-4 and advance RNG once after entering the stage, then exit the level. At this point the RNG value will be correct and Acro can be practiced.
Route
Finish Acro's first phase as quickly as possible, then the second phase should be the torpedo attack. Make sure to destroy every torpedo as soon as it spawns, before it can advance RNG. Discard bomb without advancing RNG.
See the video below for an example of a successful Acro manip:
World 4
4-1
Practice Setup
To practice the manip starting at this stage, reset the game and don't press anything until the opening cutscene plays. Skip the cutscene and mash A to skip the title screen, then play single-player 100-Yard Hop. Immediately pause and choose 'Play Again' 19 times, then 'Play Another Game.' Select 100-Yard Hop again and keep choosing a character, then pressing B to exit and choosing another character until the COMs are Waddle Dee, King Dedede, King Dedede, in that order. If the combination doesn't appear within a few iterations, reset and start from the beginning. Once that combination appears, choose a file with 4-1 unlocked, then enter the level and advance RNG once after entering the level. At this point the RNG value will be correct and 4-1 can be practiced.
Route
Obtain single fire and advance RNG once by standing still on the first swinging log after the miniboss. In the last room, any mistakes will likely allow the Floras to advance RNG too far and ruin the manip. Use single fire 3 times on the ground, then jump and use single fire 3 more times, destroying the first 4 Floras as quickly as possible. Land on the ground and jump again before using single fire so that Kirby goes over top of the next Flora, leaving it alive, then land on the far right of the platform with the Bobo on it so that the Flora despawns. Throw single fire to obtain double fire, then use double fire high enough to destroy the next 2 Floras.
See the video below for an example of a successful 4-1 manip:
Picnic that gives the correct RNG value
4-2
Practice Setup
To practice the manip starting at this stage, reset the game and go to the title screen, then wait until the first demo starts playing. Immediately press A to skip it and mash A through the title screen to get to file select. Play single-player 100-Yard Hop, but if the COMs are Waddle Dee, Adeleine, and Waddle Dee, in that order, press B and choose a character again, then enter the game. Immediately pause and choose 'Play Again' 11 times, then 'Play Another Game.' Select 100-Yard Hop again and keep choosing a character, then pressing B to exit and choosing another character until the COMs are Waddle Dee, King Dedede, Kirby, in that order. If the combination doesn't appear within a couple iterations, reset and start from the beginning. Once that combination appears, choose a file with 4-2 unlocked, obtain double fire from 1-1 or 2-1 and advance RNG once after entering the stage, then exit the level. At this point the RNG value will be correct and 4-2 can be practiced.
Route
In the Waddle Dee section, constantly jump to avoid advancing RNG. Leave the first 2 Sparkys alive and destroy the third one. After defeating the miniboss, advance RNG 4 times before exiting the level. Be sure not to grab the enemy info card from the picnic.
See the video below for an example of a successful 4-2 manip:
Picnic that gives the correct RNG value
4-3
Practice Setup
To practice the manip starting at this stage, reset the game and mash A to skip the opening screens and go straight to file select. Play single-player 100-Yard Hop and immediately pause and choose 'Play Again' 13 times, then 'Play Another Game.' Select 100-Yard Hop again and keep choosing a character, then pressing B to exit and choosing another character until the COMs are Waddle Dee, Kirby, Adeleine, in that order. If the combination doesn't appear within a few iterations, reset and start from the beginning. Once that combination appears, choose a file with 4-3 unlocked, obtain double fire from 1-1 or 2-1 and advance RNG twice after entering the stage, then exit the level. At this point the RNG value will be correct and 4-3 can be practiced.
Route
Destroy the Bonehead and don't advance RNG at any point during the level. Adeleine should select top hat as the sculpture.
See the video below for an example of a successful 4-3 manip:
Picnic that gives the correct RNG value
Alternate picnic that gives a workable RNG value
The RNG value 1 before the target value will result in this picnic. If this picnic is created, the RNG value will be 1 too far; however, playing 4-4 normally might result in the correct outcome.
4-4
Practice Setup
To practice the manip starting at this stage, reset the game and mash A to skip the opening screens and go straight to file select. Play single-player 100-Yard Hop and immediately pause and choose 'Play Again' 17 times, then 'Play Another Game.' Select 100-Yard Hop again and keep choosing a character, then pressing B to exit and choosing another character until the COMs are Adeleine, Adeleine, Adeleine. If the combination doesn't appear within a few iterations, reset and start from the beginning. Once that combination appears, choose a file with 4-4 unlocked, obtain double fire from 1-1 or 2-1 and advance RNG twice after entering the stage, then exit the level. At this point the RNG value will be correct and 4-4 can be practiced.
Route
Traverse the first room as quickly as possible. Near the end, run and jump in front of the last river of lava before using double fire, then slide into the loading zone.
In the second room, jump over the rock from the second Burnis while grabbing the sandwich. Jump over the set of 3 Magoos when using double fire so that only the first one jumps, then use double fire low to leave the last Burnis alive. Be sure to make both of the last 2 Magoos jump.
In the Dedede section, destroy the first 3 Bos with a single attack, then jump over the Magoo directly before the crystal shard, which should do a low jump and end up jumping a second time. Destroy the final Bo as soon as possible.
In the room after the Dedede section, don't let any Magoos before the first Sparky jump, and destroy the Sparky quickly. After the Bronto Burts, make the first Magoo jump, then jump high enough to destroy the next Burnis with double fire, avoiding causing the next Magoo to jump, but triggering the one after it. Jump between the first magma spout and the rock from the next Burnis, leaving both it and the next one alive, but destroying the Sparky. Do a full jump before starting the last double fire so that the Burnis can advance RNG an extra time before the Sparky spawns, causing it to jump towards Kirby before being destroyed.
In the lava wall room, avoid the first Burnis and make the first Magoo jump, using double fire high enough to destroy the second Burnis. Trigger every Magoo from this point on, destroying the next Burnis but leaving the final one alone.
In the final room, float quickly up to the platform with the Sparky on it, leaving the Sparky alive. It's possible to float too quickly, but very difficult. Continue to float, moving in such a way that the Bonehead falls down so that it doesn't advance RNG a second time. Headbutt the star blocks to break through them without advancing RNG, and keep double fire for the boss fight. If Kirby has one HP, pick up some health from the picnic.
See the video below for an example of a successful 4-4 manip:
Picnics that give the correct RNG value
The RNG values 2 after and 4 after the target value will also work.
Magman
Practice Setup
To practice the manip starting at this boss, reset the game and go to the title screen, then wait until the first demo starts playing. Immediately press A to skip it and mash A through the title screen to get to file select. Play single-player 100-Yard Hop, but if the COMs are Waddle Dee, Adeleine, and Waddle Dee, in that order, press B and choose a character again, then enter the game. Immediately pause and choose 'Play Again' 4 times, then 'Play Another Game.' Select 100-Yard Hop again and keep choosing a character, then pressing B to exit and choosing another character until the COMs are Kirby, King Dedede, Adeleine, in that order. If the combination doesn't appear within a couple iterations, reset and start from the beginning. Once that combination appears, choose a file with Magman unlocked, obtain double fire from 1-1 or 2-1 without advancing RNG after entering the stage, then exit the level. At this point the RNG value will be correct and Magman can be practiced.
Route
Don't advance RNG before Magman's first attack. Either keep moving or stay ducked so that Kirby doesn't do an idle animation. At the start of the first attack, use double fire to the left to hit one tentacle, then stand still to advance RNG once. After advancing RNG, jump to the left, then turn around and double fire to the right, damaging the left tentacle and bonking on the right one. Use double fire again to get a third hit in, then avoid advancing RNG before the next attack. Advance RNG once after Magman shoots out the first column of magma, which should be in the leftmost spot. Damage the first three pillars of magma so that the second phase begins before the attack finishes. If the fourth magma pillar is allowed to rise, RNG will advance an extra time. After phase one, advance RNG 4 times - 3 if the previous attack finished. Hit Magman quickly 6 times with double fire. If Magman is not defeated quickly enough, the next attack will start and RNG will be 3 values past what it's intended to be.
See the video below for an example of a successful Magman manip:
World 5
5-1
Practice Setup
To practice the manip starting at this stage, reset the game and go to the title screen, then wait until the first demo starts playing. Immediately press A to skip it and mash A through the title screen to get to file select. Play single-player 100-Yard Hop, but if the COMs are Waddle Dee, Adeleine, and Waddle Dee, in that order, press B and choose a character again, then enter the game. Immediately pause and choose 'Play Again' 9 times, then 'Play Another Game.' Select 100-Yard Hop again and choose a character. The COMs should all be Kirby. If not, reset and start from the beginning. If that combination appears, choose a file with 5-1 unlocked, obtain double fire from 1-1 or 2-1 and advance RNG once after entering the stage, then exit the level. At this point the RNG value will be correct and 5-1 can be practiced.
Route
In the first room, don't destroy any Frigises, and also be careful not to take damage, or one of them might have time to drop an extra rock. Constantly jump in the Waddle Dee section to avoid advancing RNG, and destroy the Sparky as well. Be sure to take out the miniboss as quickly as possible or too many Frigises will spawn and advance RNG more than they're supposed to. Be sure that every Propeller is activated and chases after Kirby in the next room. In the final room, avoid the first Frigis and destroy the second one after it drops 5 attacks, then be sure to space the final double fire usage so that it ends as Kirby is tumbling into the loading zone. If he hits the loading zone while still in double fire, the Frigis will have time to drop an extra rock and ruin the manip.
See the video below for an example of a successful 5-1 manip:
Picnic that gives the correct RNG value
5-2
Practice Setup
To practice the manip starting at this stage, reset the game and don't press anything until the opening cutscene plays. Skip the cutscene and mash A to skip the title screen, then play single-player 100-Yard Hop. Immediately pause and choose 'Play Again' 11 times, then 'Play Another Game.' The puddles should be on the third and fifth spaces when exiting. After exiting 100-Yard Hop, choose a file with 5-2 unlocked, obtain double fire from 1-1 or 2-1 and advance RNG once after entering the stage, then exit the level. At this point the RNG value will be correct and 5-2 can be practiced.
Route
In the fourth room, using the second-to-last double fire at the perfect height to go under the raised star block without hitting the ground may cause RNG to advance one too few times, since a Mopoo may not have time to spawn. In the second-to-last room, slide off of the star block before using double fire to destroy the Sparky. Against the miniboss, hold right when entering the room and use double fire after Kirby takes one or two steps. The miniboss should be destroyed in one attack, and the Propeller will hit Kirby straight into the picnic. Make sure to grab the enemy info card from the picnic.
See the video below for an example of a successful 5-2 manip:
Picnics that give the correct RNG value
The RNG values 4 before, 2 before, and 2 after the target value will also work.
5-3
Practice Setup
To practice the manip starting at this stage, reset the game and go to the title screen, then wait until the first demo starts playing. Immediately press A to skip it and mash A through the title screen to get to file select. Play single-player 100-Yard Hop, but if the COMs are Waddle Dee, Adeleine, and Waddle Dee, in that order, press B and choose a character again, then enter the game. Immediately pause and choose 'Play Again' 18 times, then 'Play Another Game.' Select 100-Yard Hop again and keep choosing a character, then pressing B to exit and choosing another character until the COMs are Kirby, Waddle Dee, King Dedede, in that order. If the combination doesn't appear within a couple iterations, reset and start from the beginning. Once that combination appears, choose a file with 5-3 unlocked, obtain double fire from 1-1 or 2-1 without advancing RNG after entering the stage, then exit the level. At this point the RNG value will be correct and 5-3 can be practiced.
Route
In the second room, jump to the right after using the first double fire, then turn around and use double fire to the left. This should prevent Kirby from taking damage from the Sir Kibble. Quickly jump to the left before using double fire to the right. In the next room, use the first double fire at max jump height. Make sure to trigger all 3 Gloms with the next double fire, then jump to use the subsequent double fire above the blocks, not destroying the Ticks. Don't destroy either Bo in the miniboss fight, and don't miss any hits or the Bos will advance RNG too far. Be sure to leave the room promptly after the miniboss is defeated. Adeleine should paint a chestnut. Move quickly when the next 3 Gloms are spawned so that they don't advance RNG too much, and also trigger the top two to attack.
See the video below for an example of a successful 5-3 manip:
Picnic that gives the correct RNG value
5-4
Practice Setup
To practice the manip starting at this stage, reset the game and mash A to skip the opening screens and go straight to file select. Play single-player 100-Yard Hop and immediately pause and choose 'Play Again' 5 times, then 'Play Another Game.' Select 100-Yard Hop again and keep choosing a character, then pressing B to exit and choosing another character until the COMs are Adeleine, Adeleine, Adeleine. If the combination doesn't appear within a couple iterations, reset and start from the beginning. Once that combination appears, choose a file with 5-4 unlocked, obtain double fire from 1-1 or 2-1 without advancing RNG after entering the stage, then exit the level. At this point the RNG value will be correct and 5-4 can be practiced.
Route
Land on the edge of the well so that Kirby has time to pull out double fire before entering the loading zone. Spit it out, don't throw it. When going down through the semisolid platforms, be about halfway between their midpoint and the left wall. Pay attention to whether the final Rockn is destroyed by Kirby. Obtain single fire from the Burnis as soon as possible. After the Dedede section, look at where the first Flora moves when it spawns.
If Kirby destroys the Rockn and the first Flora moves to the left:
Stand still to advance RNG between the I³s and throw single fire to advance RNG when combining with the Sir Kibble. In the miniboss room, immediately spawn the Magoo to the left. If it jumps low, advance RNG 7 times in the next room, or 8 times if the miniboss was destroyed before it could drop another rock. If the Magoo jumps high, advance RNG 5 times in the next room, or 6 times if the miniboss was destroyed before it could drop another rock.
If Kirby doesn't destroy the Rockn and the first Flora moves to the left:
Don't advance RNG when waiting in between the I³s, and put single fire into Kirby's mouth, then spit it at the Sir Kibble instead of throwing it. In the miniboss room, immediately spawn the Magoo to the left. If it jumps low, advance RNG 7 times in the next room, or 8 times if the miniboss was destroyed before it could drop another rock. If the Magoo jumps high, advance RNG 5 times in the next room, or 6 times if the miniboss was destroyed before it could drop another rock.
If the first Flora moves to the right (regardless of where the Rockn was):
Don't advance RNG when waiting in between the I³s, and put single fire into Kirby's mouth, then spit it at the Sir Kibble instead of throwing it. In the miniboss room, immediately spawn the Magoo to the left. If it jumps low, advance RNG 6 times in the next room, or 7 times if the miniboss was destroyed before it could drop another rock. If the Magoo jumps high, advance RNG 4 times in the next room, or 5 times if the miniboss was destroyed before it could drop another rock.
In any case, spawn a second Magoo and inhale it to get single fire. After advancing RNG the required number of times, move in such a way that the Zooses in the final room throw 4 projectiles and move close together. Throw away single fire to advance RNG an extra time, then inhale both Zooses simultaneously to get double spark. RNG should advance 5 times total in this room.
See the video below for an example of a successful 5-4 manip:
Picnic that gives the correct RNG value
HR-H
Practice Setup
To practice the manip starting at this boss, reset the game and don't press anything until the opening cutscene plays. Skip the cutscene and mash A to skip the title screen, then play single-player 100-Yard Hop. Immediately pause and choose 'Play Again' 7 times, then 'Play Another Game.' Select 100-Yard Hop again and keep choosing a character, then pressing B to exit and choosing another character until the COMs are King Dedede, Waddle Dee, King Dedede, in that order. If the combination doesn't appear within a couple iterations, reset and start from the beginning. Once that combination appears, choose a file with 6-1 unlocked, obtain double spark from 6-1 and advance RNG once after entering the stage, then exit the level. At this point the RNG value will be correct and HR can be practiced.
Route
Advance RNG once before the first attack, then 3 times during the first attack. It's recommended to duck twice before the clap, starting when HR's health bar reaches Kirby's third HP marker as it fills up. Then RNG can be advanced the third time after doing the fourth hit of damage on HR. Advance RNG 13 times after HR starts to slap and before the first attack of phase 2. It's recommended to advance RNG once as the slap winds up, throw double spark to finish the phase, then stand still and inhale 10 times to quickly advance RNG. Inhale the 2 rightward missiles that HR shoots, spit them to do damage, then inhale and spit the other 2 missiles as well. Finally, inhale 2 more missiles from the next attack and hold onto them as HR goes invincible. After HR becomes vulnerable, finish it off immediately, then advance RNG once before grabbing the crystal shard.
See the video below for an example of a successful HR manip:
World 6
6-1
Practice Setup
To practice the manip starting at this stage, reset the game and don't press anything until the opening cutscene plays. Skip the cutscene and mash A to skip the title screen, then play single-player 100-Yard Hop. Immediately pause and choose 'Play Again' 10 times, then 'Play Another Game.' Select 100-Yard Hop again and choose a character. The COMs should be Waddle Dee, Waddle Dee, Kirby, in that order. If not, reset and start from the beginning. If that combination appears, choose a file with 6-1 unlocked, enter the stage, and advance RNG once after entering the level. At this point the RNG value will be correct and 6-1 can be practiced.
Route
Obtain single fire, then throw it away to advance RNG before inhaling the Plugg to get spark. After using spark to beat the miniboss, take it out and break it on the ceiling to avoid advancing RNG when discarding it. After exiting the miniboss room, run right, jump over the Sparky, and inhale the first Bobo, swallowing it immediately and standing still afterward to advance RNG once, then quickly running and jumping to the right before using single fire once. Float all the way to the top of the screen and be sure not to lose enough height to activate any of the Flutters, or the manip will be ruined.
See the video below for an example of a successful 6-1 manip:
Picnics that give the correct RNG value
The RNG value 2 after the target value will also work.
6-2
Practice Setup
To practice the manip starting at this stage, reset the game and go to the title screen, then wait until the first demo starts playing. Immediately press A to skip it and mash A through the title screen to get to file select. Play single-player 100-Yard Hop, but if the COMs are Waddle Dee, Adeleine, and Waddle Dee, in that order, press B and choose a character again, then enter the game. Immediately pause and choose 'Play Again' 4 times, then 'Play Another Game.' Select 100-Yard Hop again and keep choosing a character, then pressing B to exit and choosing another character until the COMs are Adeleine, Waddle Dee, Adeleine, in that order. If the combination doesn't appear within a few iterations, reset and start from the beginning. Once that combination appears, choose a file with 6-2 unlocked, obtain single fire from 1-1 or 2-1 without advancing RNG after entering the stage, then exit the level. At this point the RNG value will be correct and 6-2 can be practiced.
Route
In the room with the Bos, after falling through the first hole, turn left and use single fire high enough that Kirby lands on the bottom row of star blocks and doesn't break them. Don't destroy the first Bo, and make sure to do a full jump out of the water at the end of the room so that the other Bo will be able to advance RNG. Advance RNG twice while waiting for Adeleine to paint. Be sure not to grab the enemy info card from the picnic.
See the video below for an example of a successful 6-2 manip:
Picnic that gives the correct RNG value
6-3
Practice Setup
To practice the manip starting at this stage, reset the game and go to the title screen, then wait until the first demo starts playing. Immediately press A to skip it and mash A through the title screen to get to file select. Play single-player 100-Yard Hop, but if the COMs are Waddle Dee, Adeleine, and Waddle Dee, in that order, press B and choose a character again, then enter the game. Immediately pause and choose 'Play Again' 23 times, then 'Play Another Game.' Select 100-Yard Hop again and keep choosing a character, then pressing B to exit and choosing another character until the COMs are Waddle Dee, Waddle Dee, King Dedede, in that order. If the combination doesn't appear within a couple iterations, reset and start from the beginning. Once that combination appears, choose a file with 6-3 unlocked, obtain single fire from 1-1 or 2-1 and advance RNG twice after entering the stage, then exit the level. At this point the RNG value will be correct and 6-3 can be practiced.
Route
Combine fire and bomb without advancing RNG and defeat every enemy as quickly as possible with the following exceptions: When the 2 Floras spawn, the one on the right needs to advance RNG twice, for a total of 4 values advanced (6 if including the Flora on the left). Be sure to let it live for a few extra frames so that it has time to advance RNG. Also let the Propellers live for a couple of frames so that all 3 of them advance RNG before dying.
See the video below for an example of a successful 6-3 manip:
Picnics that give the correct RNG value
The RNG value 6 after the target value will also work.
Alternate picnic that gives a workable RNG value
The RNG value 1 before the target value will result in this picnic. If this picnic is created, grab the enemy info card. At the start of the Miracle Matter fight, advance RNG twice immediately, and then do not advance RNG again until ice appears. Cutter will be third. Advance RNG twice during/after ice and twice right after spark appears. Cutter and spark should behave approximately the same as in the intended fight.
Miracle Matter
Practice Setup
To practice the manip starting at this boss, reset the game and mash A to skip the opening screens and go straight to file select. Play single-player 100-Yard Hop and immediately pause and choose 'Play Again' 9 times, then 'Play Another Game.' Select 100-Yard Hop again and keep choosing a character, then pressing B to exit and choosing another character until the COMs are Kirby, Kirby, Adeleine, in that order. If the combination doesn't appear within several iterations, reset and start from the beginning. Once that combination appears, choose a file with Miracle Matter unlocked, obtain bomb + fire from 1-3 without advancing RNG after entering the stage, then exit the level. At this point the RNG value will be correct and Miracle Matter can be practiced.
Route
Advance RNG twice after Miracle Matter chooses fire. It is recommended to advance RNG once after each set of 3 firework attacks that Kirby does. Don't advance RNG during the bomb phase or when discarding Kirby's ability. Don't advance RNG during the cutter phase. Advance RNG once immediately upon Miracle Matter choosing spark, and bait the last attack towards the corner of the screen so that it doesn't go offscreen before it can be inhaled. Advance RNG once during the needle phase. Throw away needle to advance RNG before Miracle Matter chooses ice. Stone will be last.
See the video below for an example of a successful Miracle Matter manip:

